
DIY Series: Valentine Cards and Decorations
Posted by Kelley Sandidge on 11th Feb 2022
 If you're looking for ideas for Valentine's cards and decorations with a personal touch, read on!
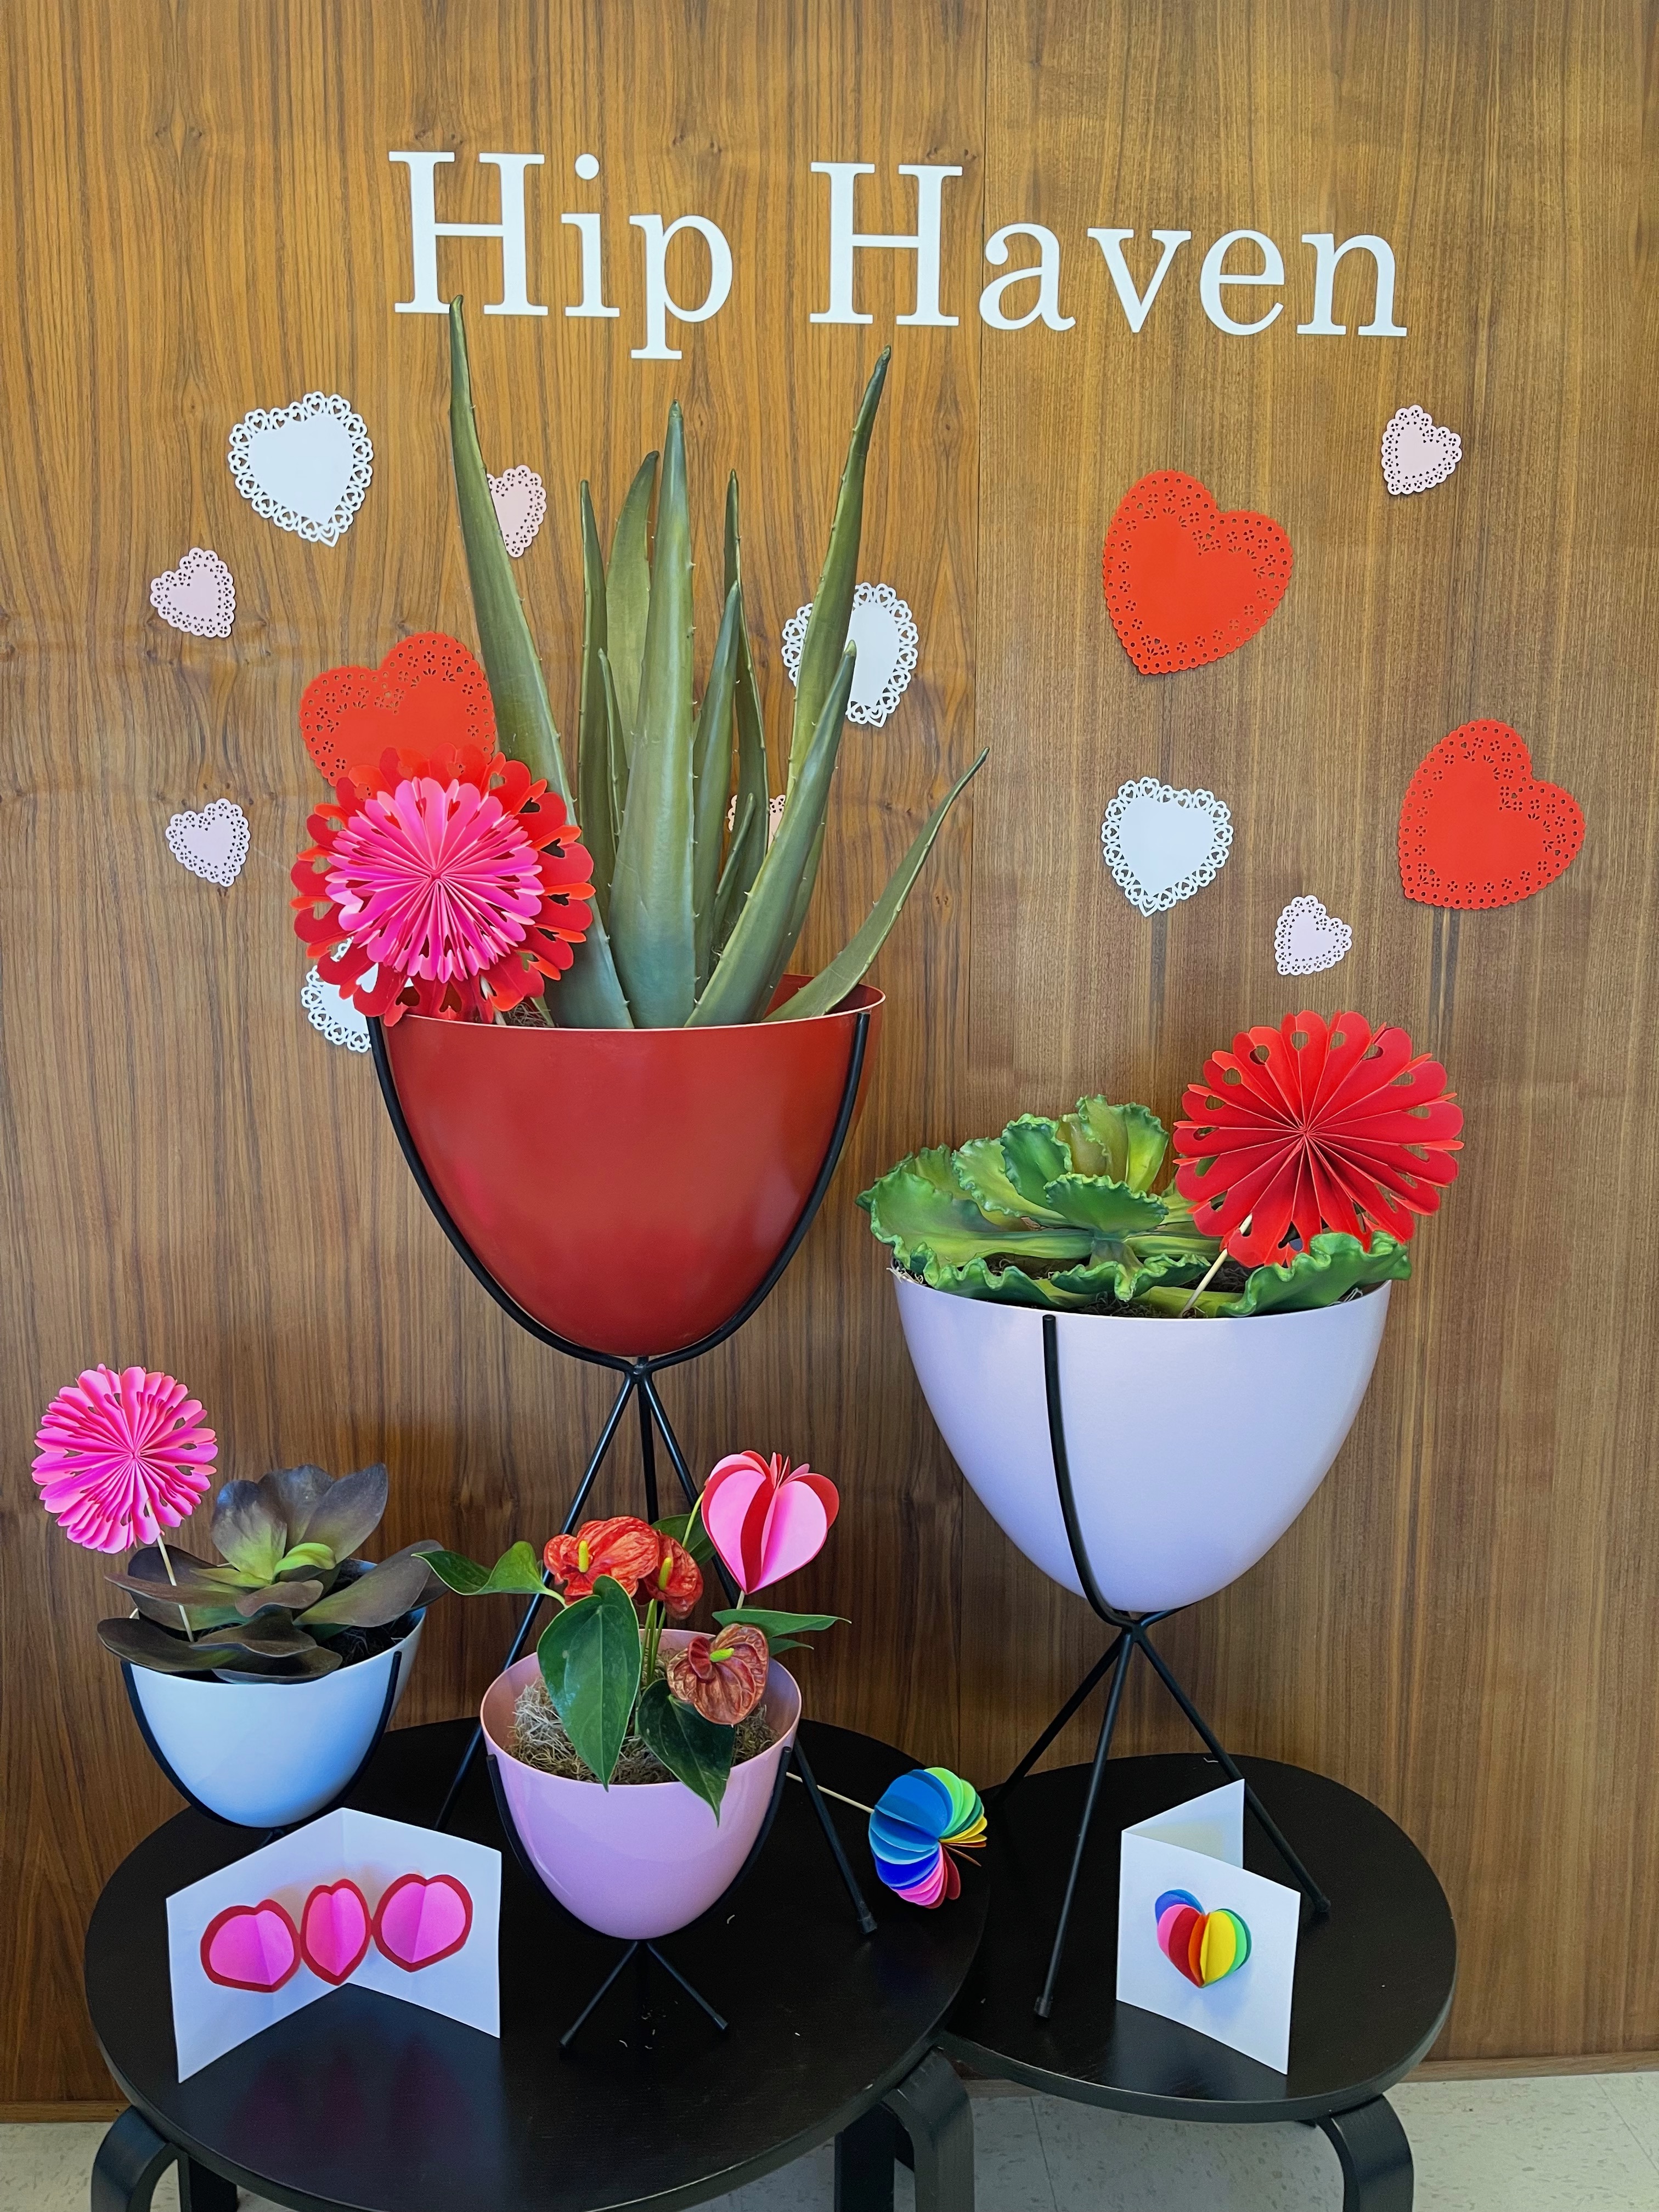
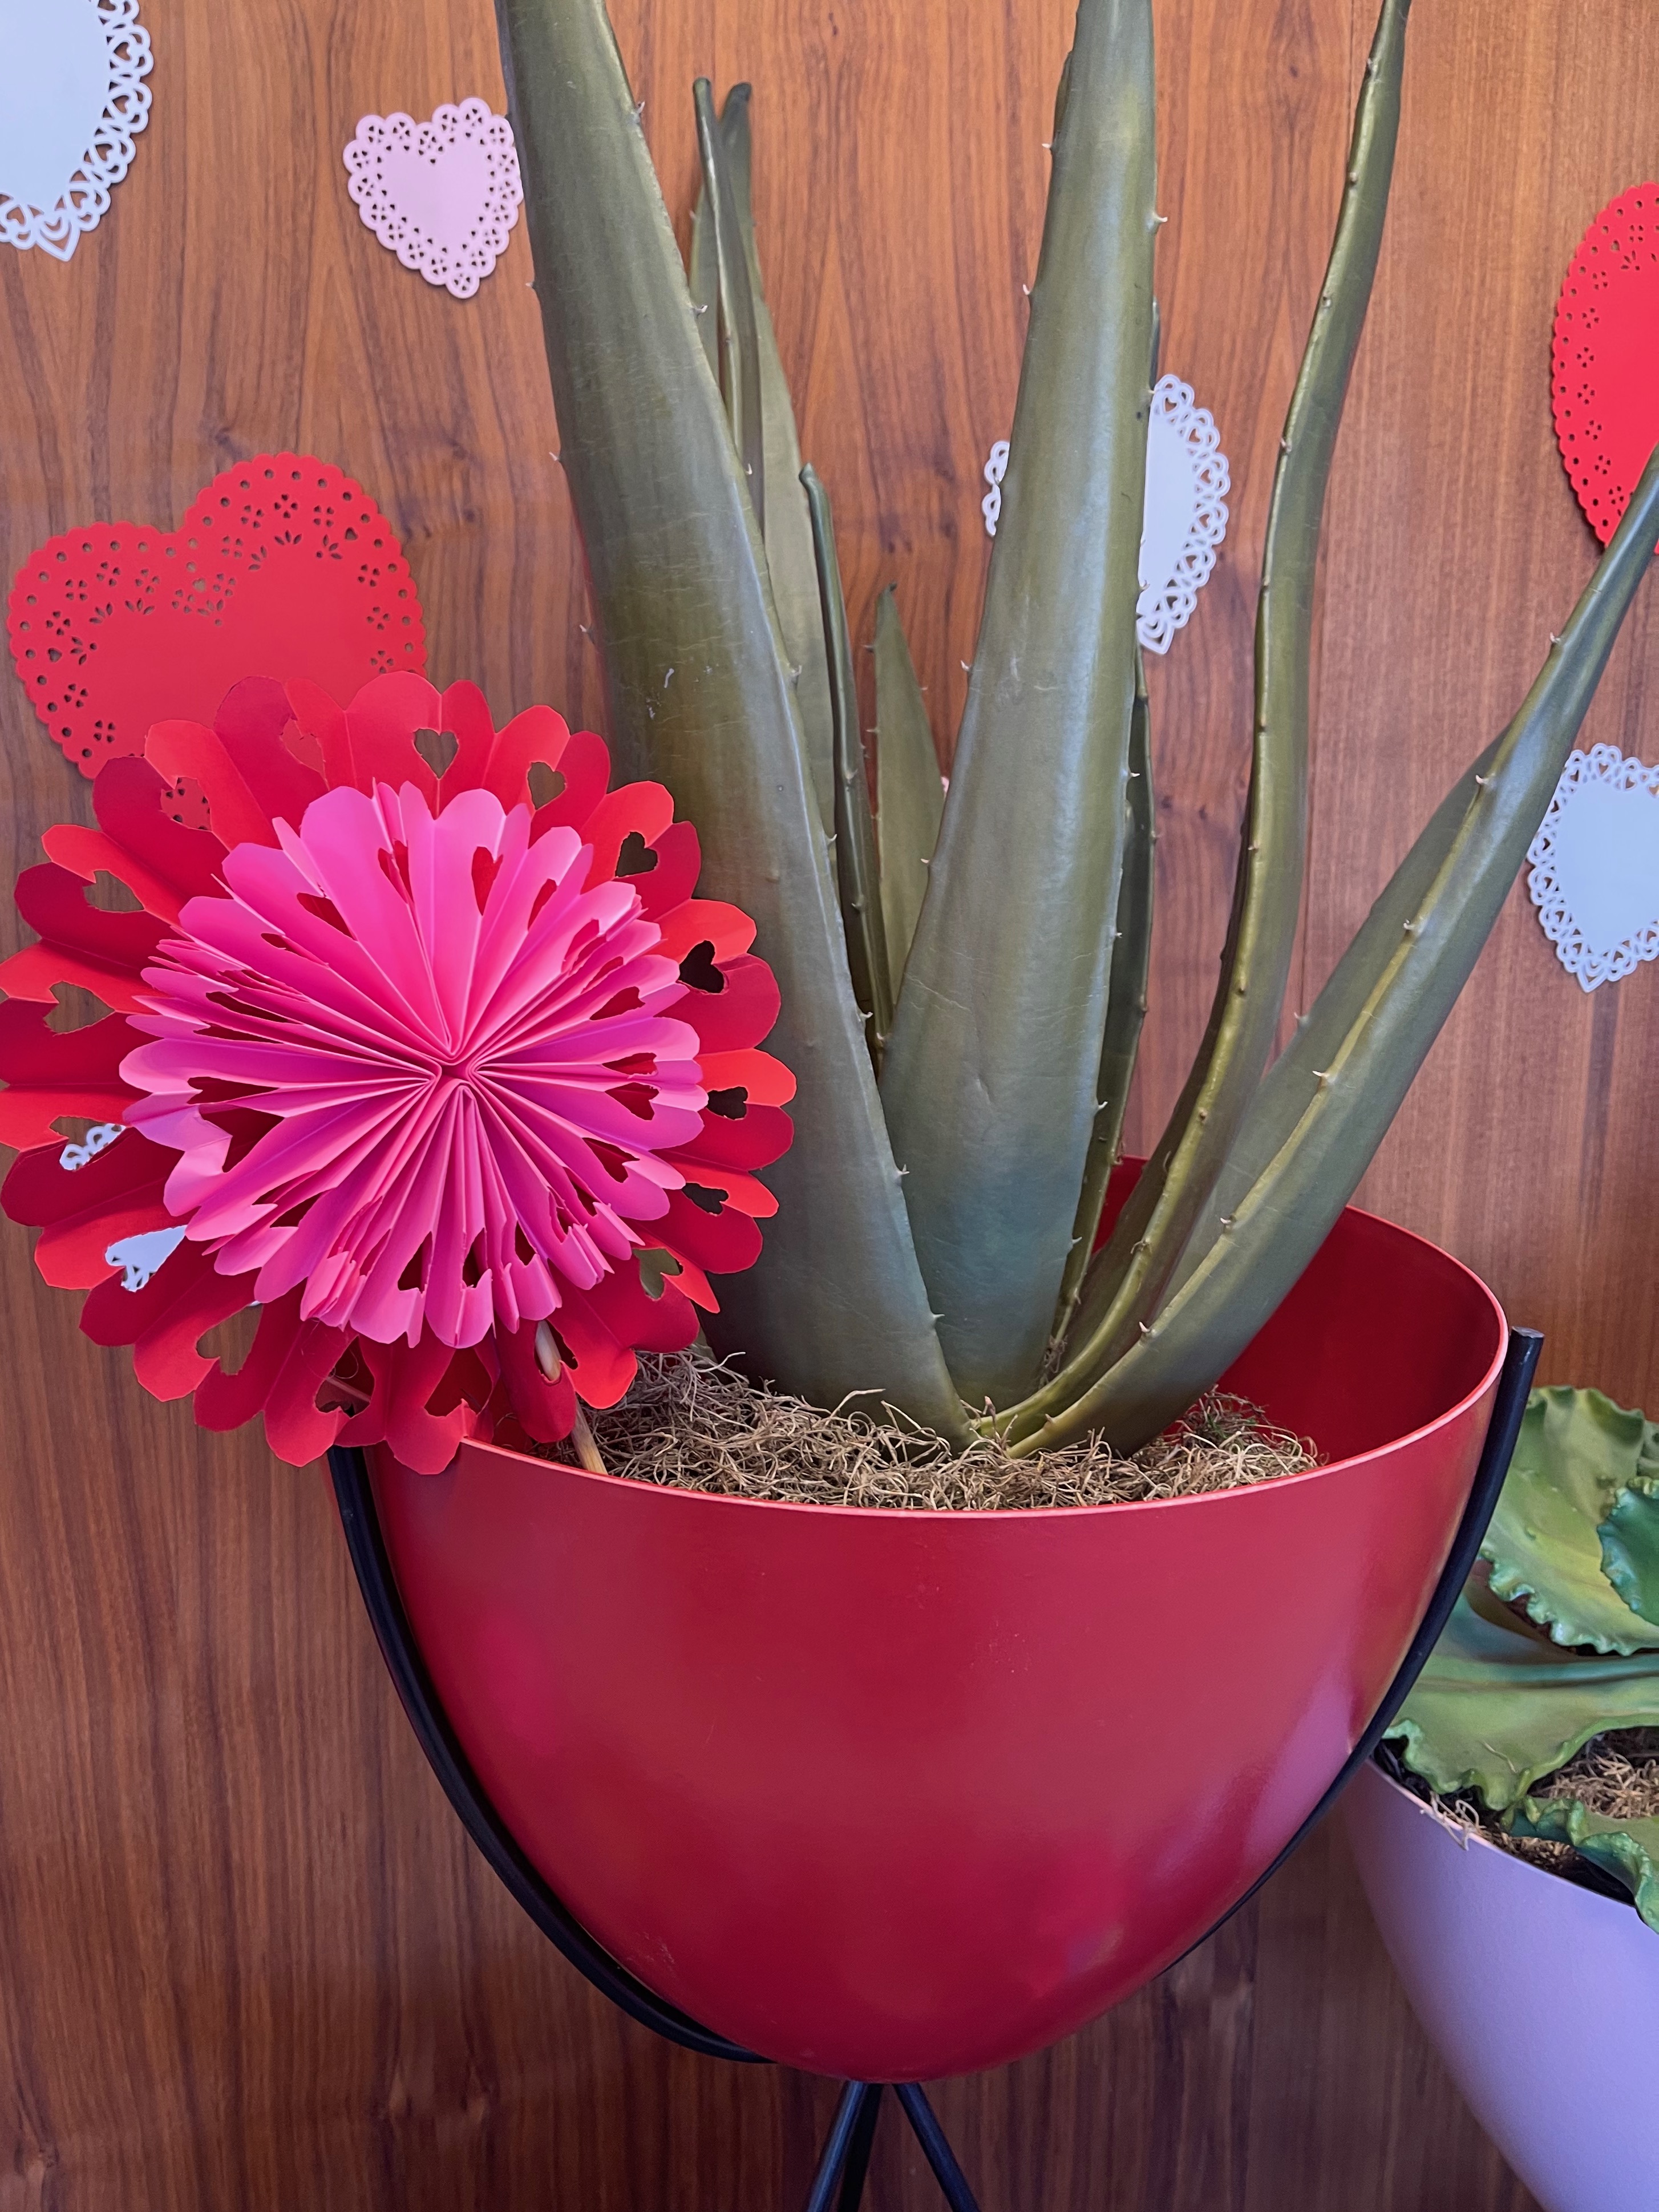
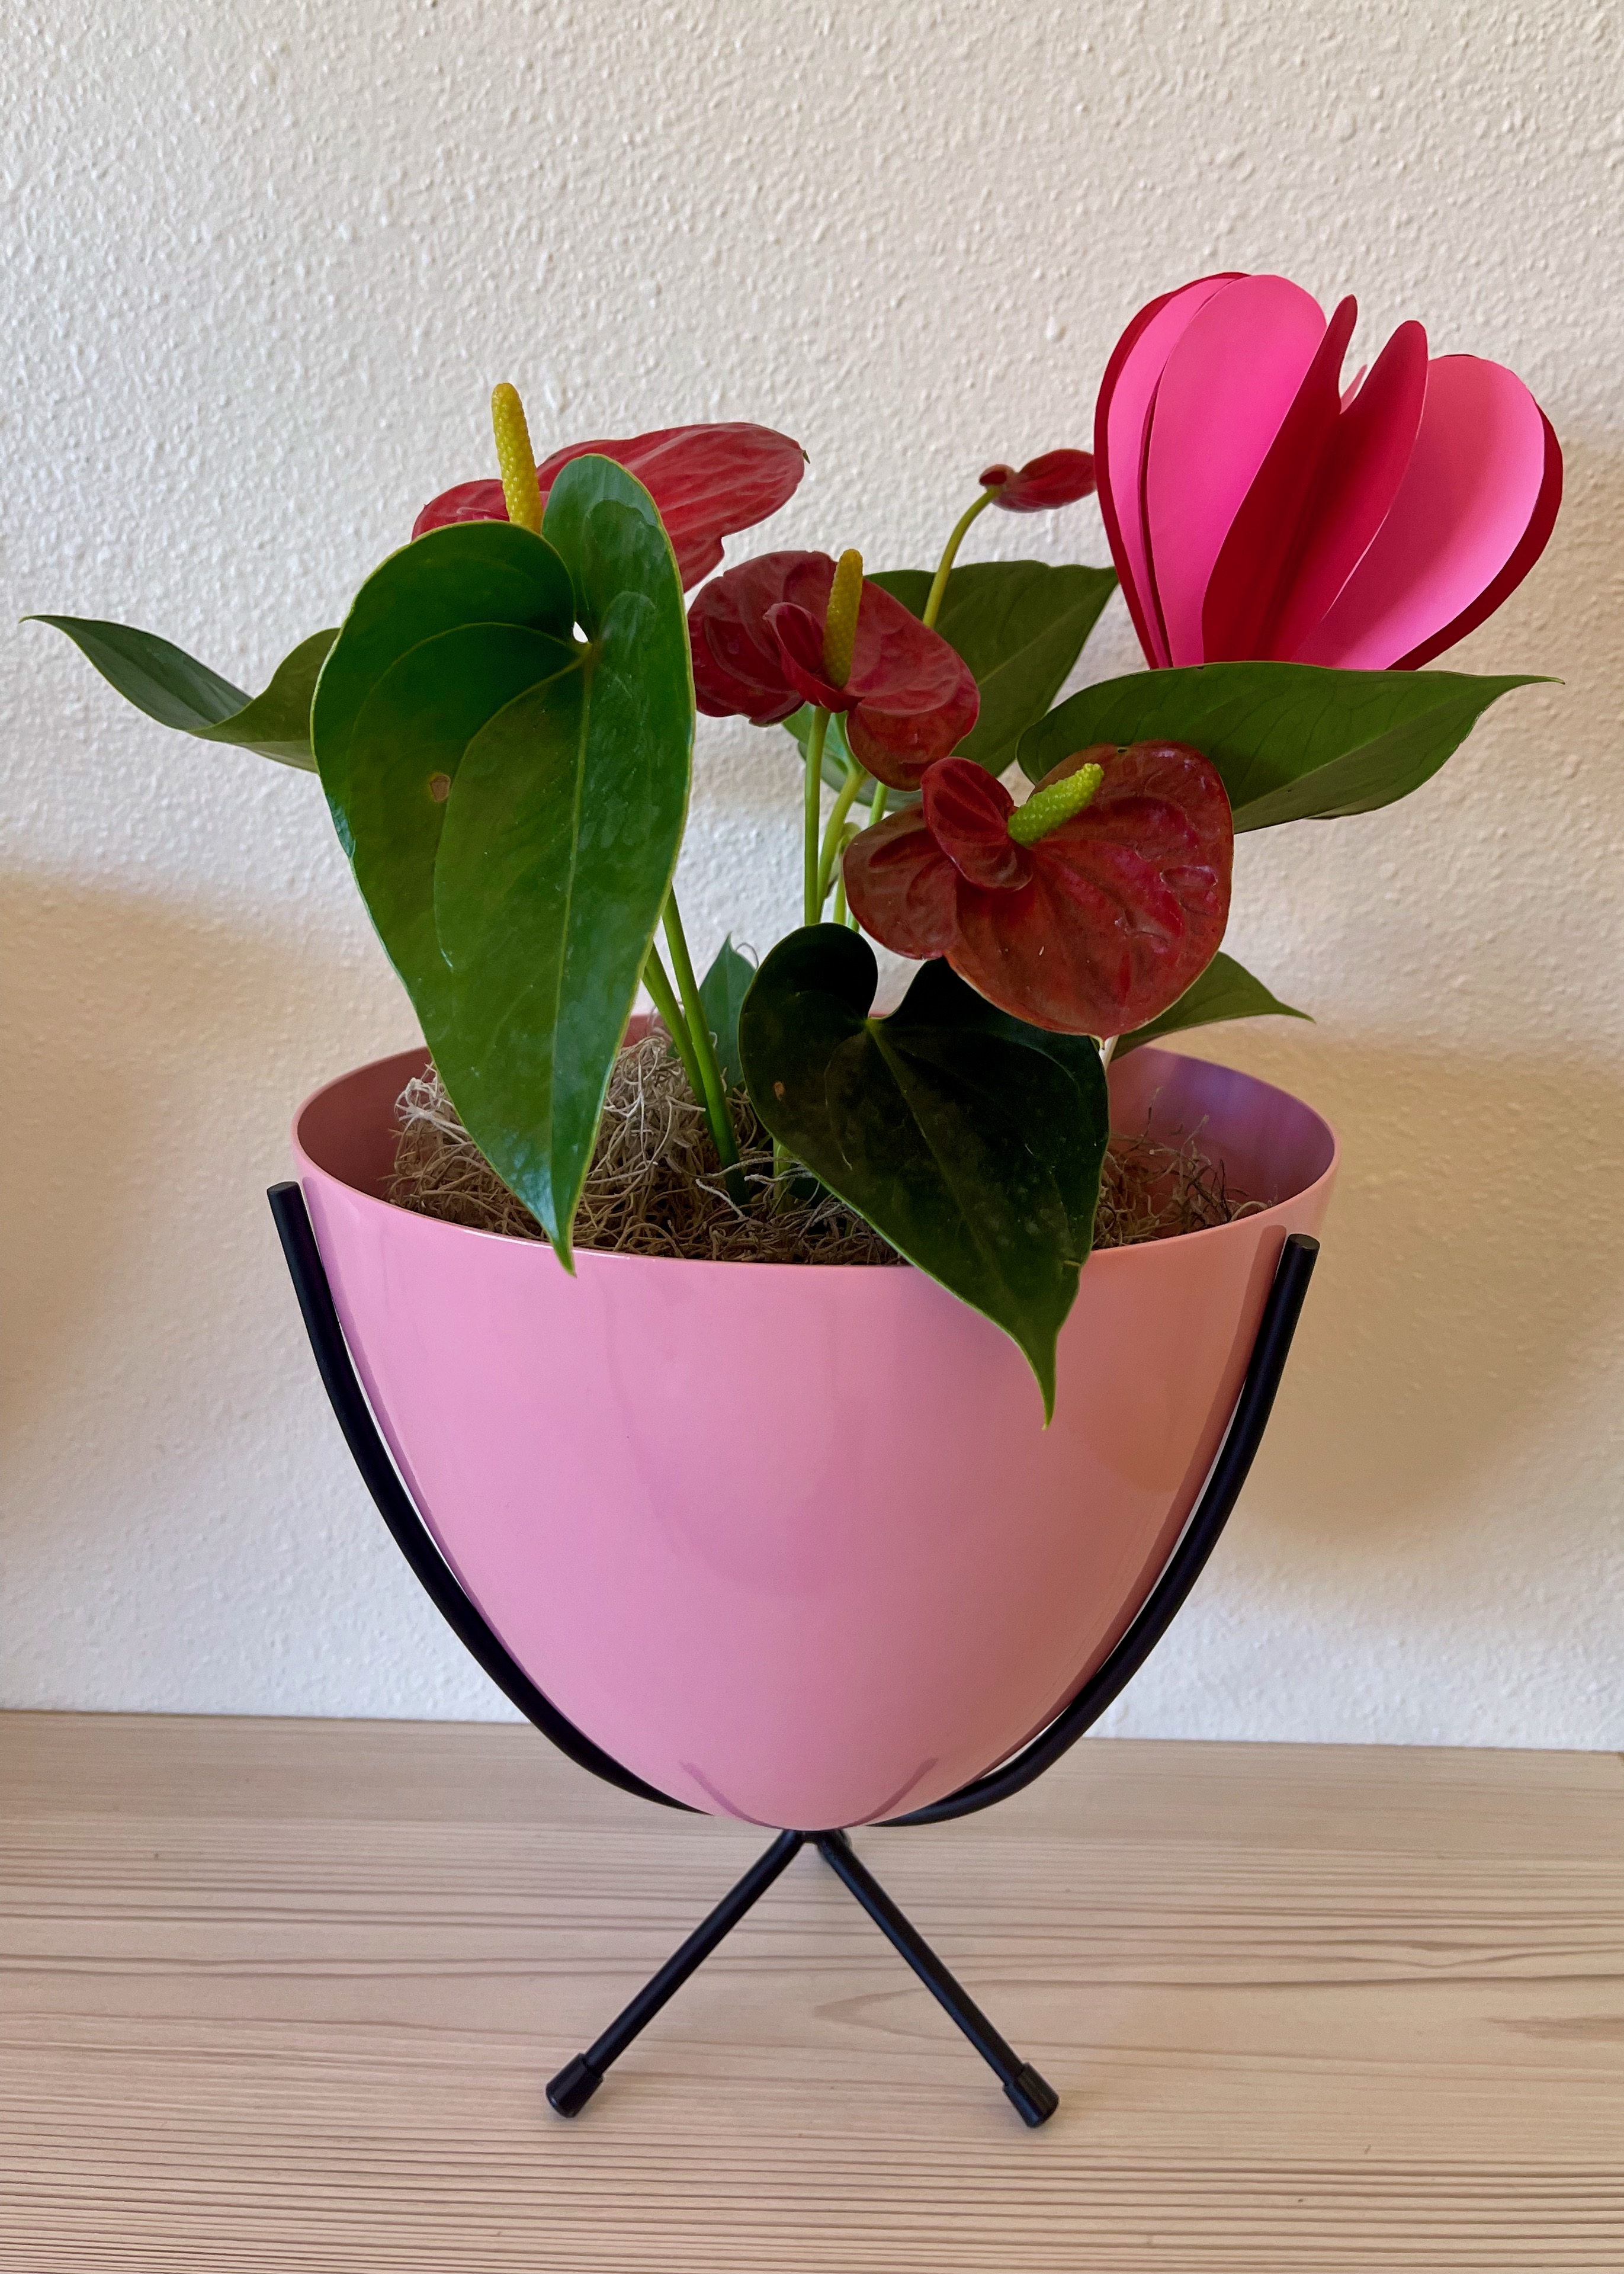
We set out to find ways to style our Retro Bullet Planters for Valentine's decor and gifts, but it was so much fun, we just kept going! These cheery paper crafts were just the thing for dressing up our space, and we hope you'll enjoy them as much as we have.
Here are the how-tos for making festive cut-paper Accordion Flowers, 3-D Valentines, garlands, and hanging Valentine ornaments...
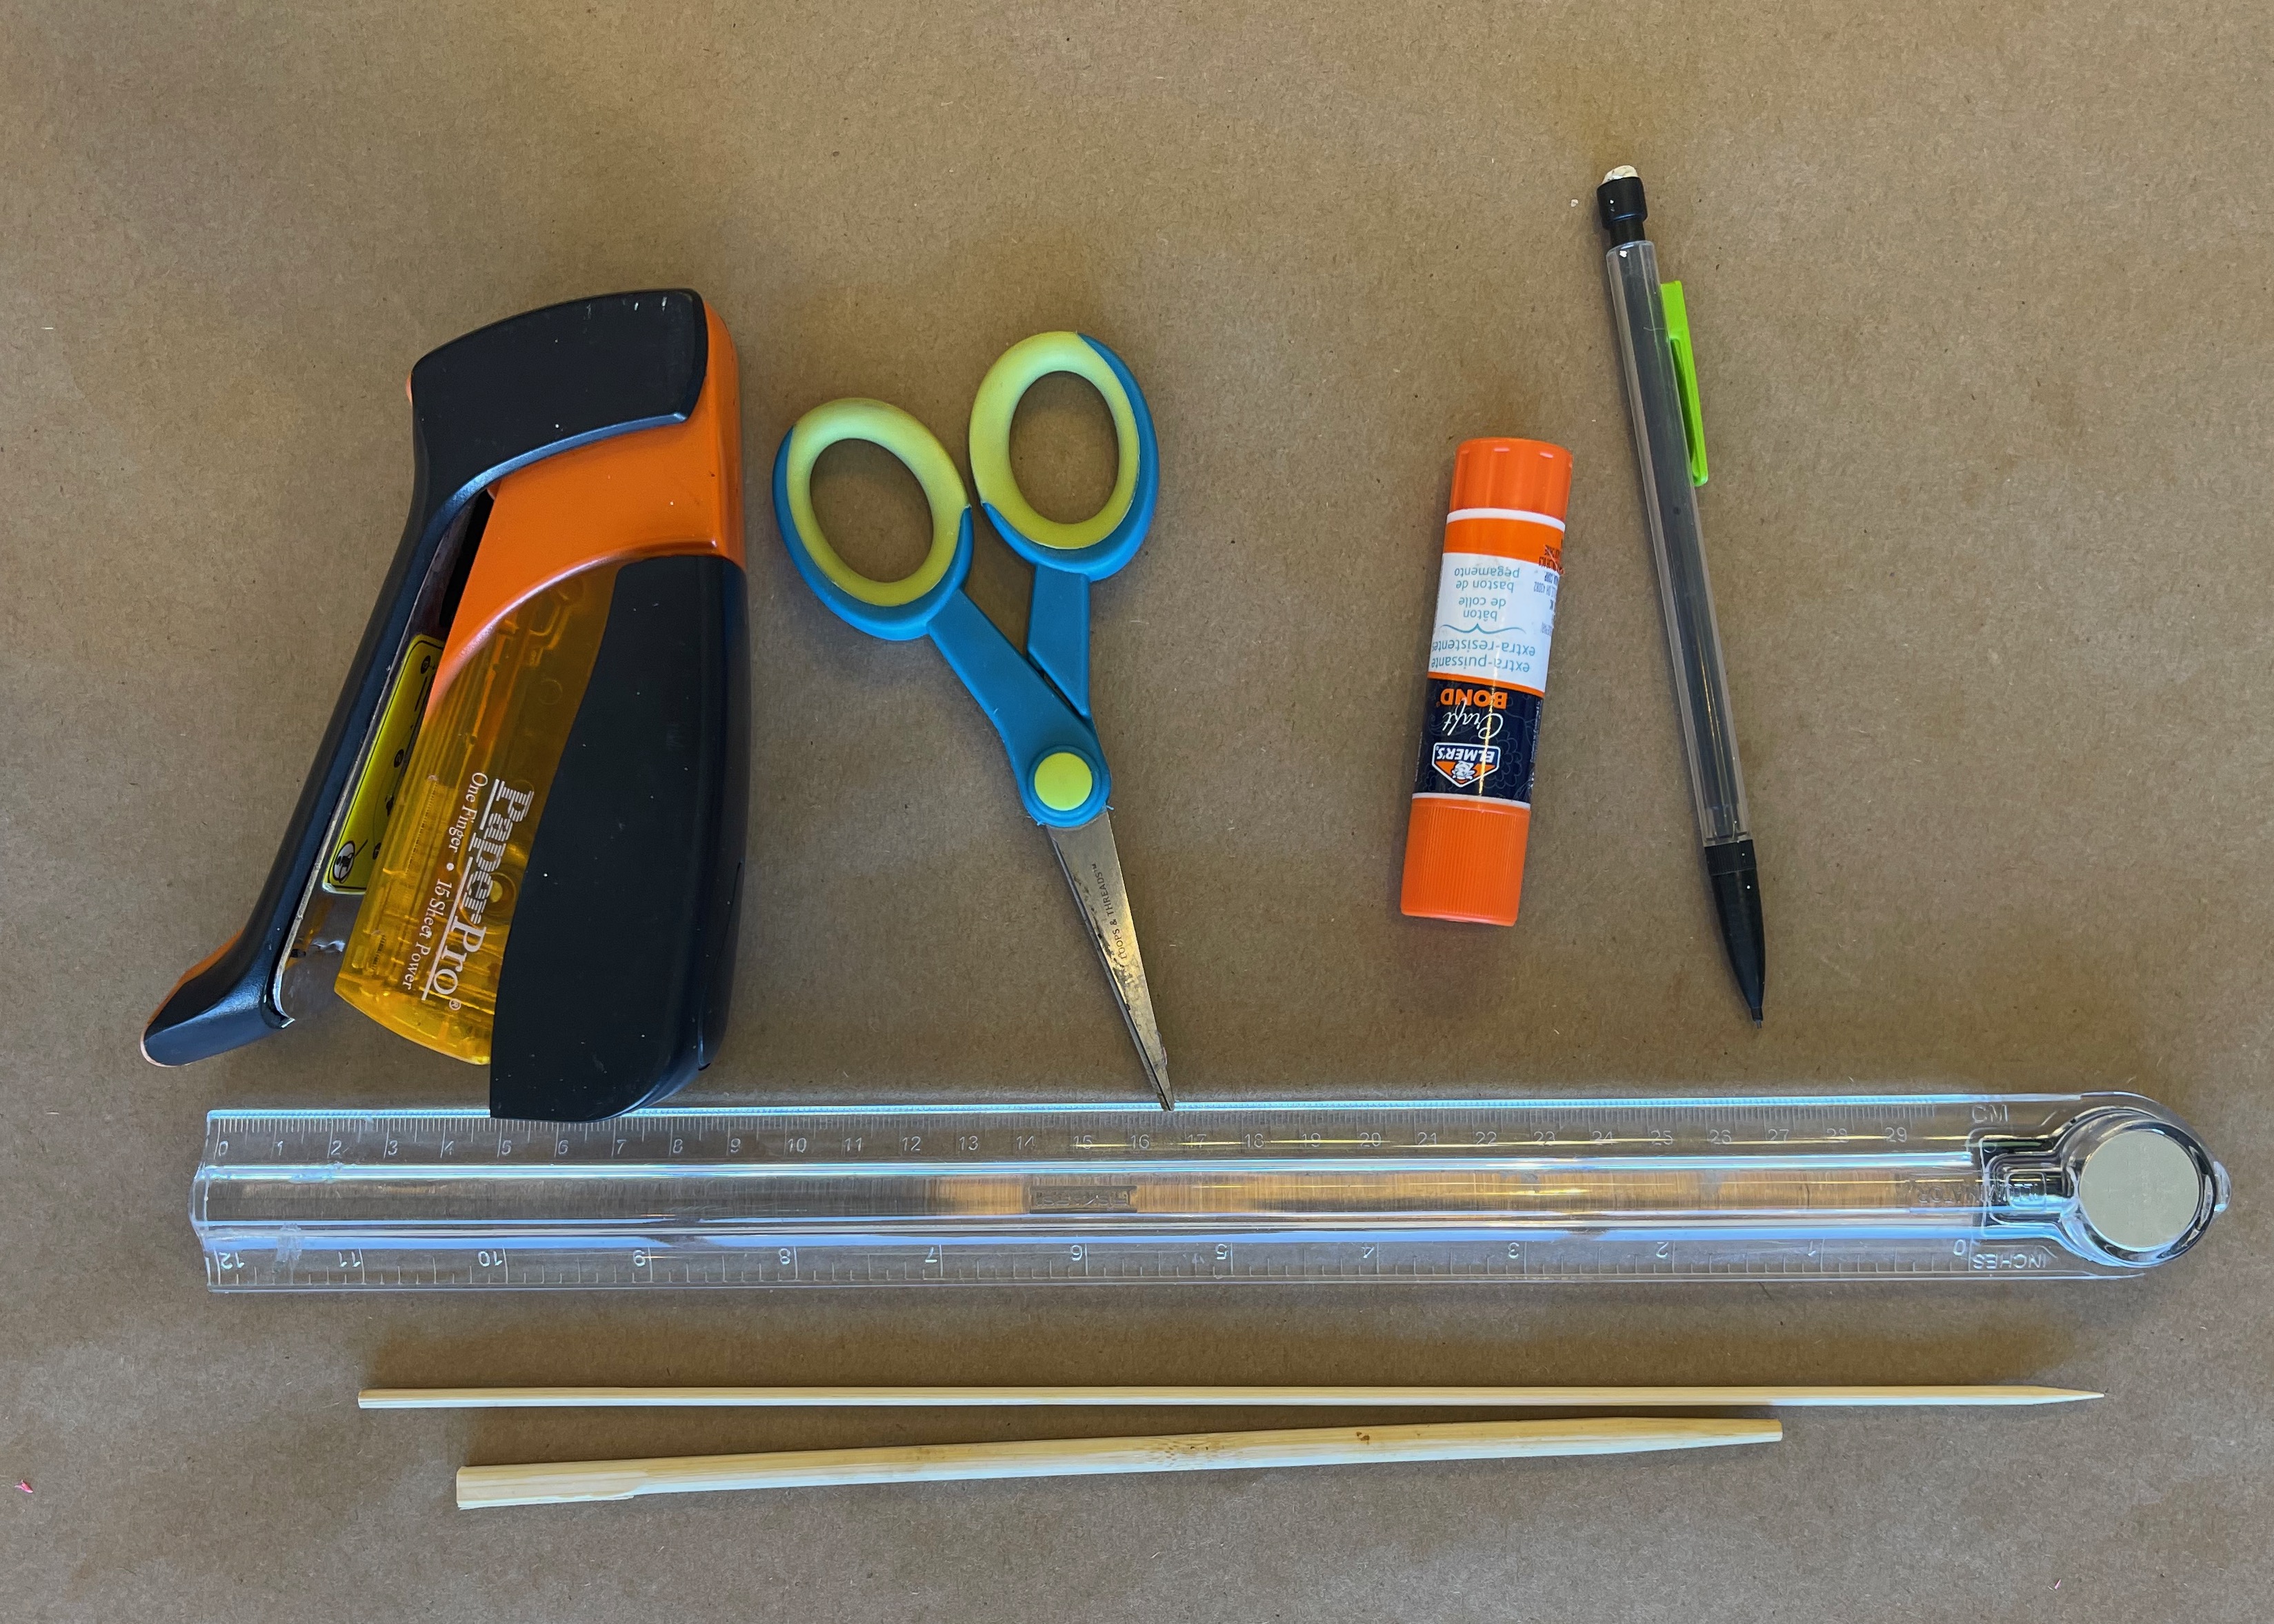
MATERIALS:
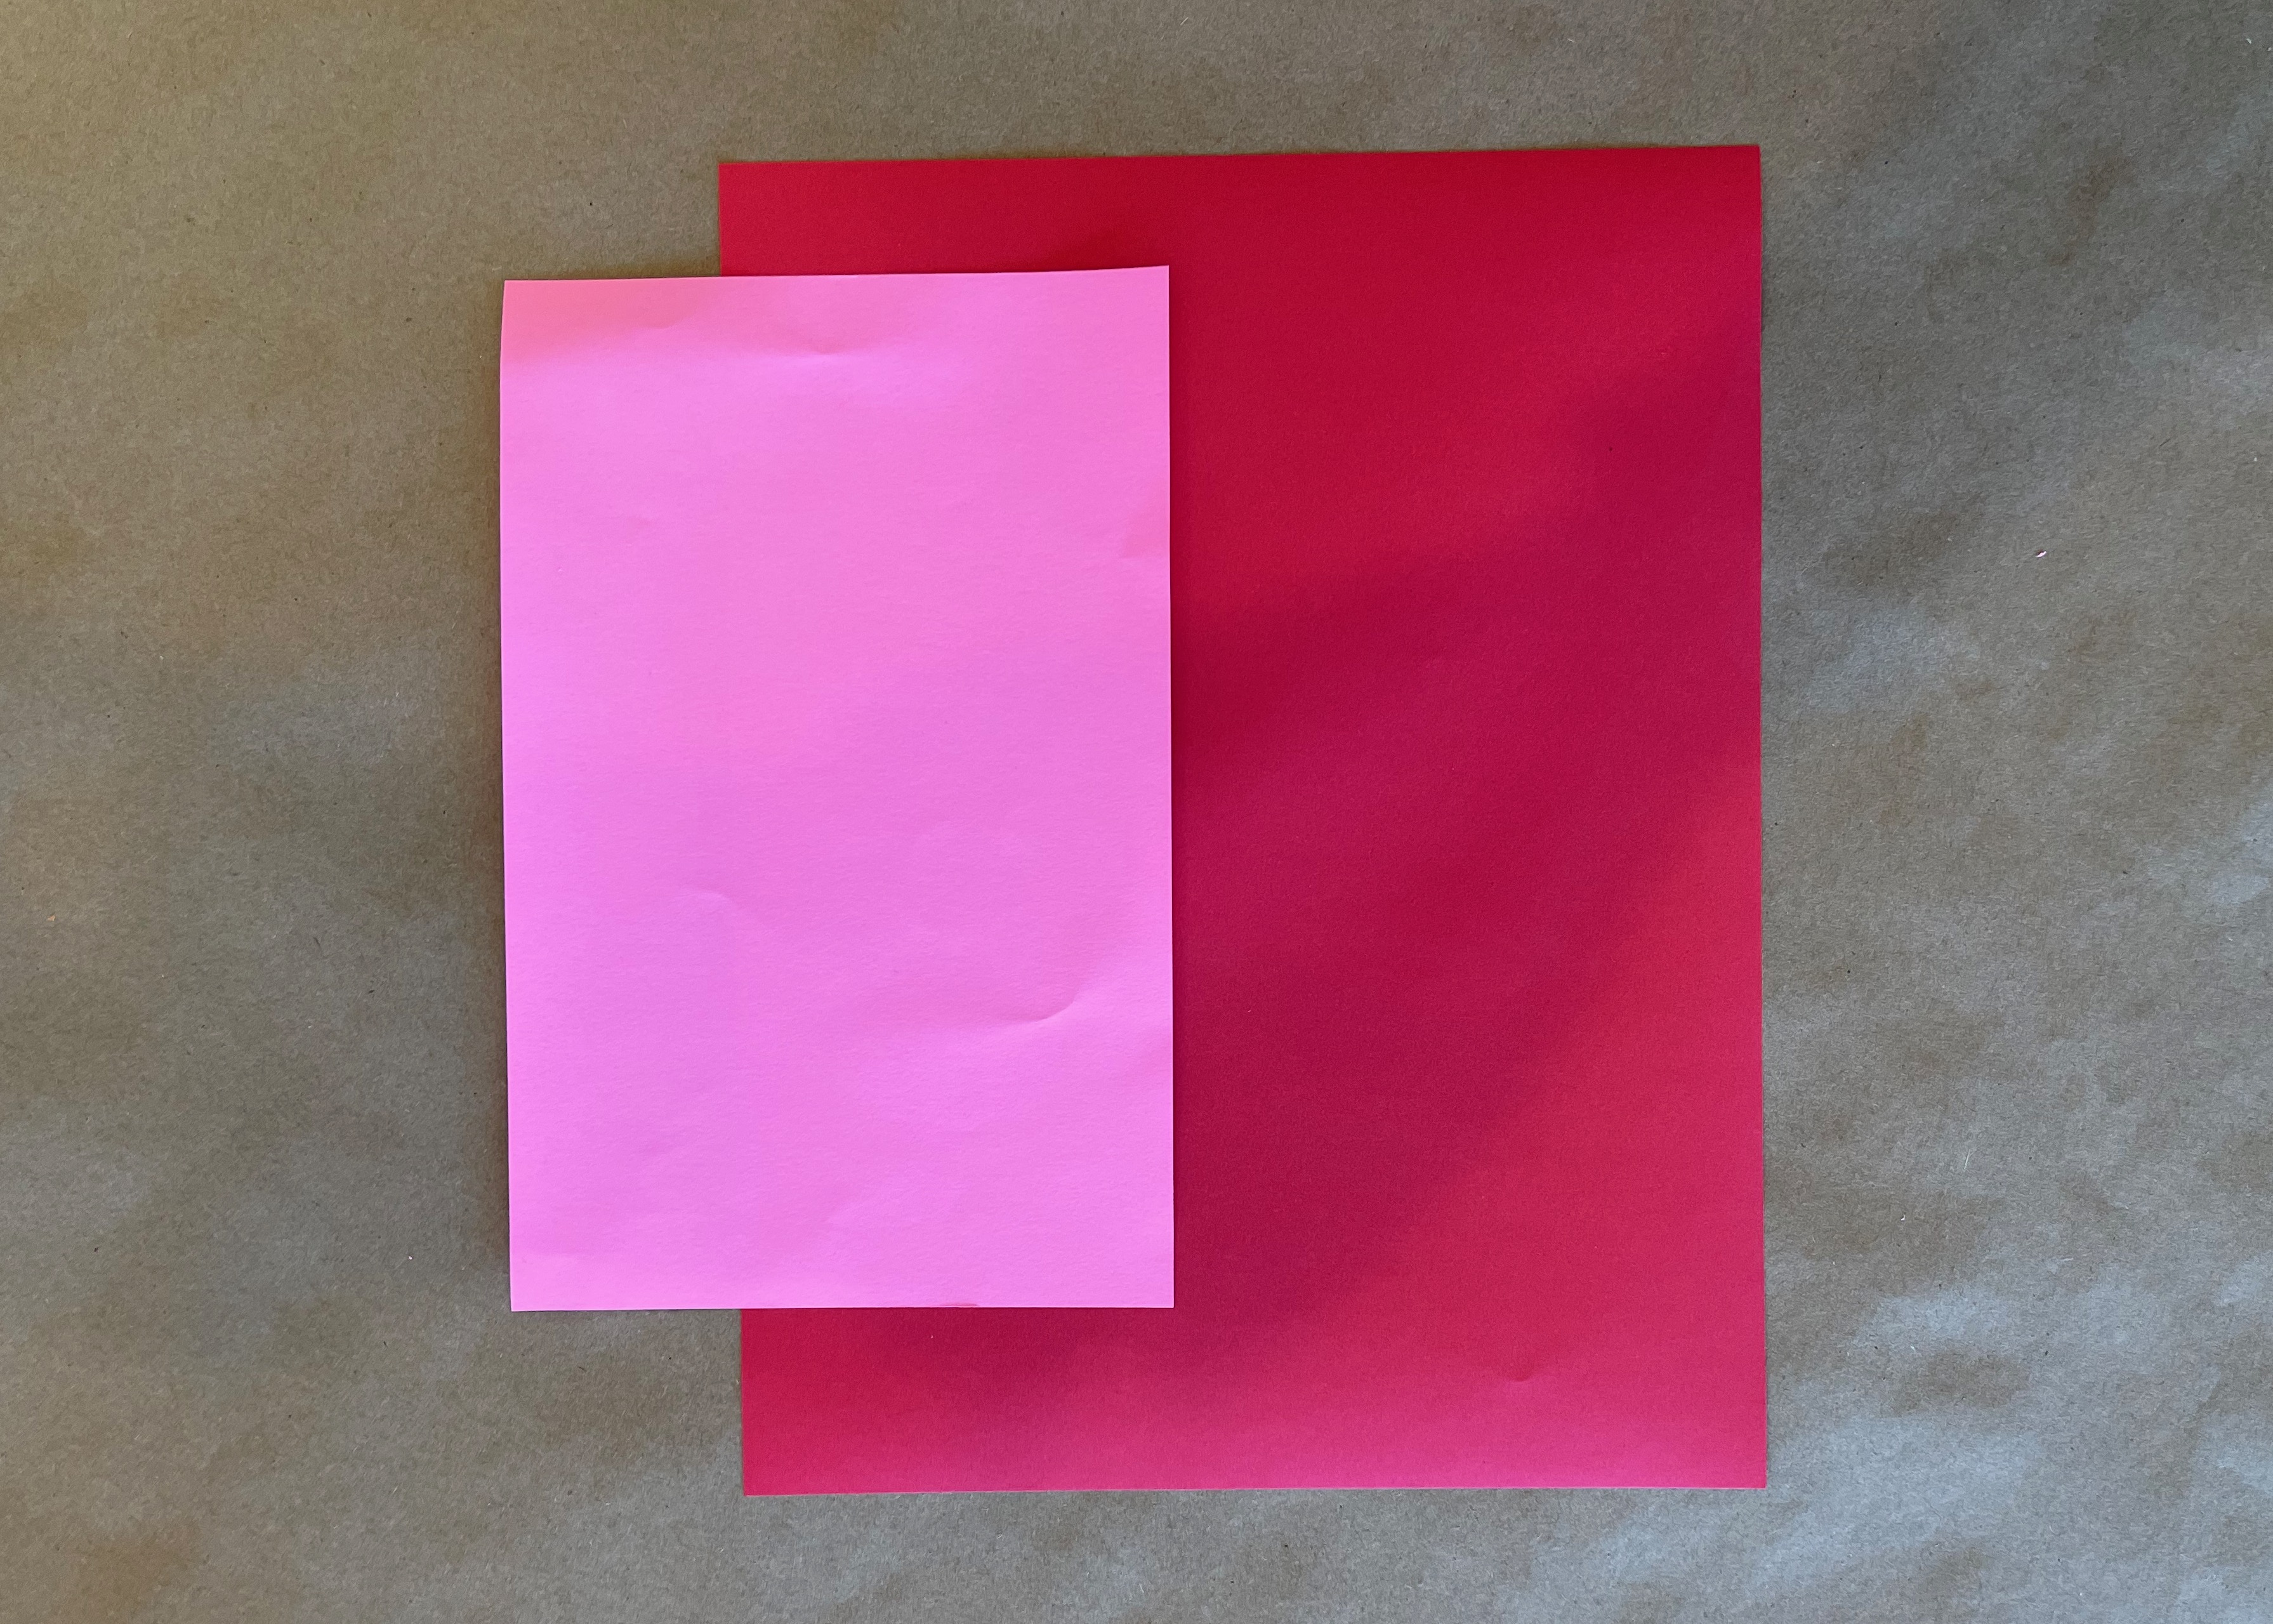
8 1/2 x 11 brightly colored office paper (heavy bond, not cardstock)
medium or small scissors for precision work
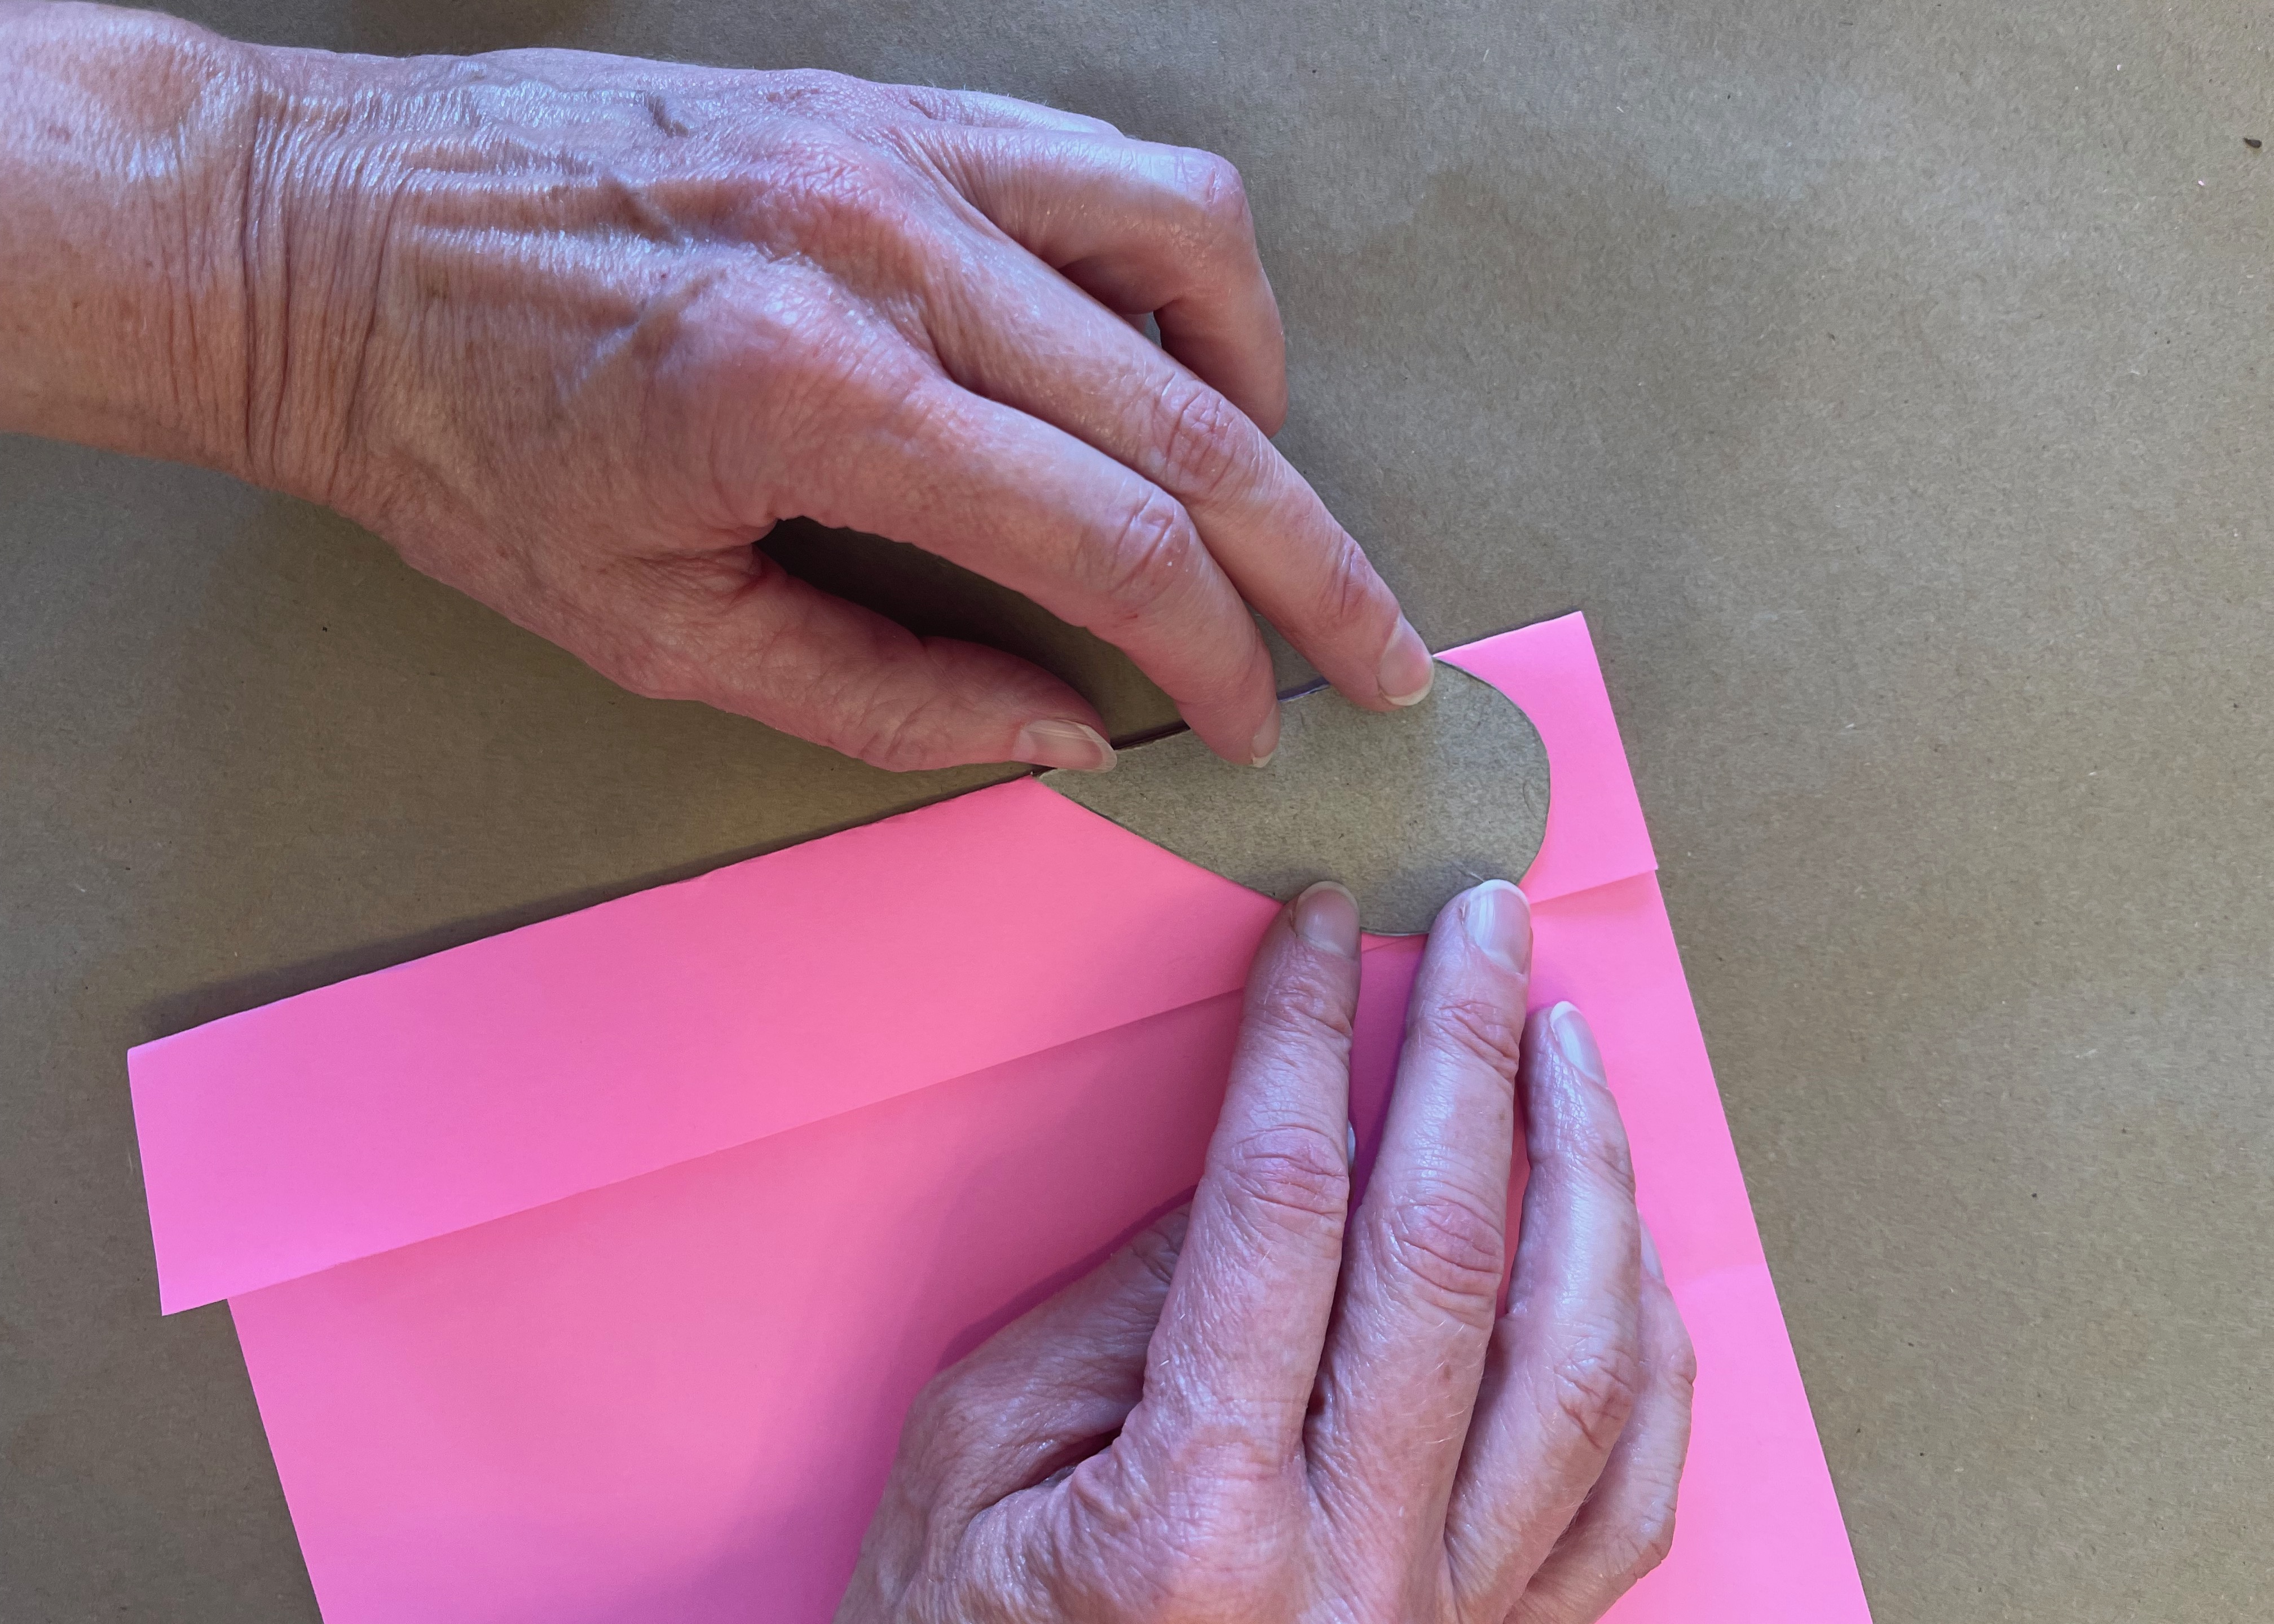
thin cardboard for stencils (a recycled cereal box works great for this)
glue-stick
pencil
ruler
stapler
chopsticks or skewers and a hot glue gun if making floral picks
hole punch and string if making the Valentine Ornament
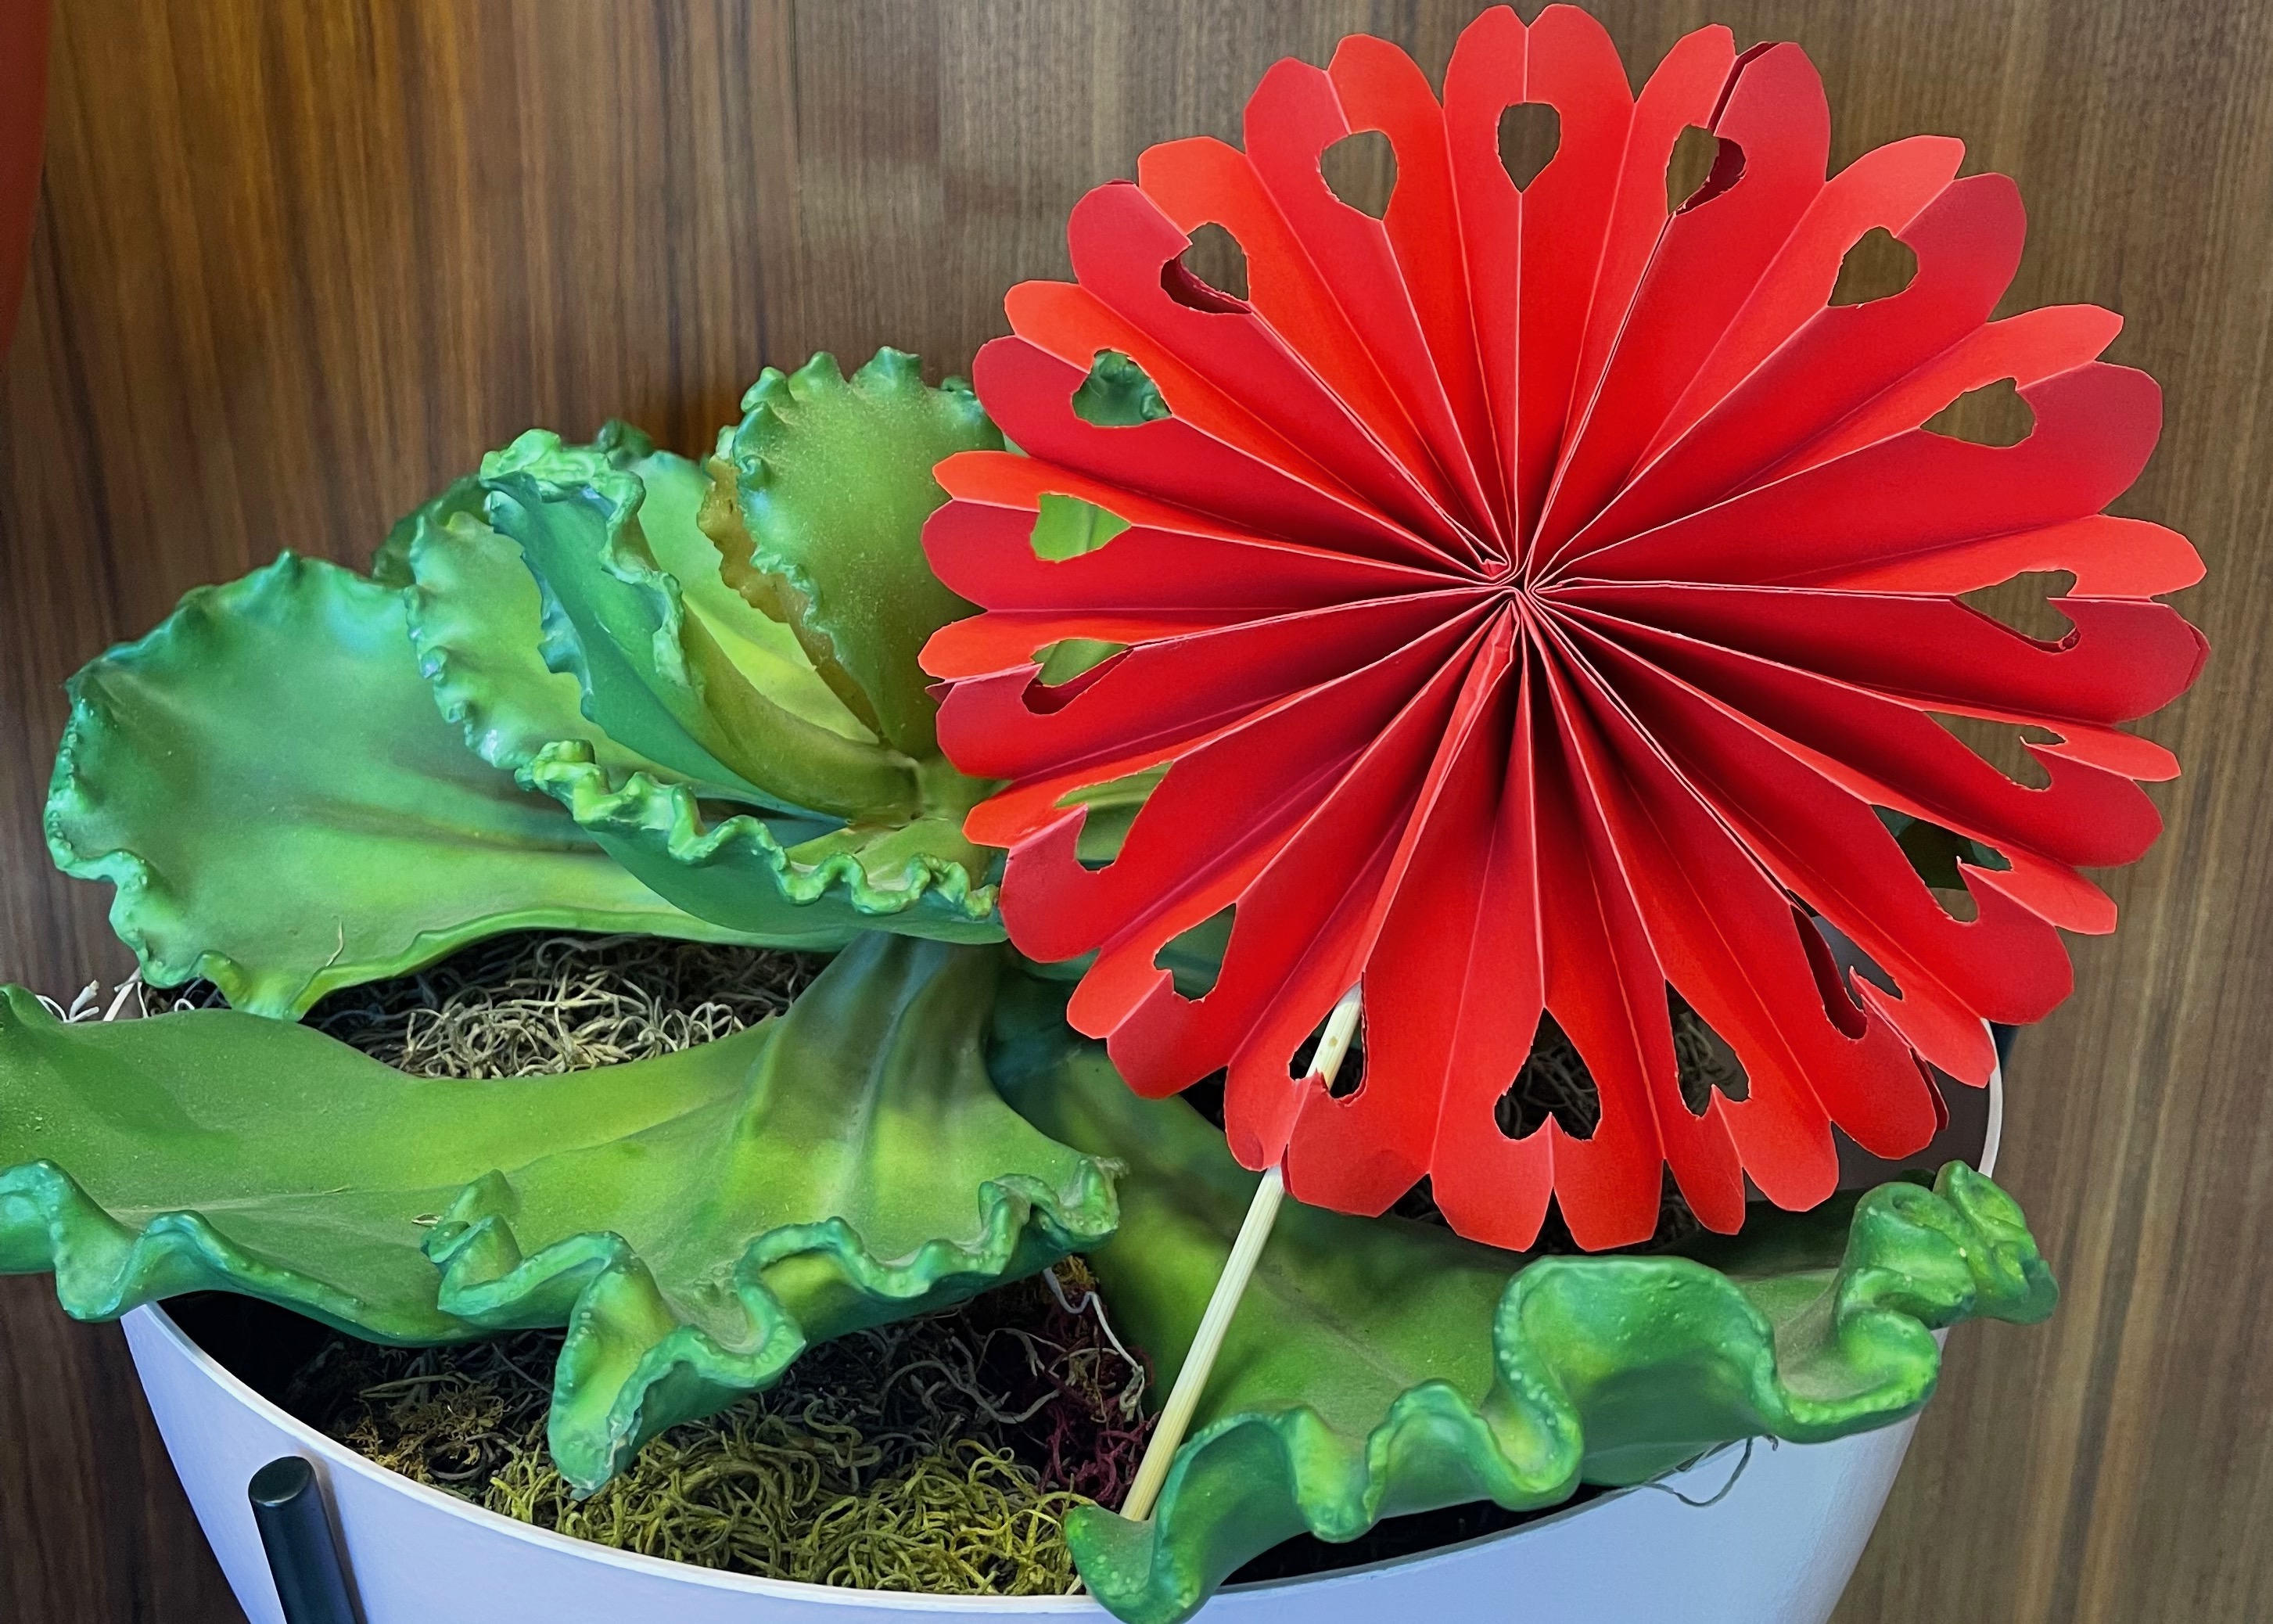
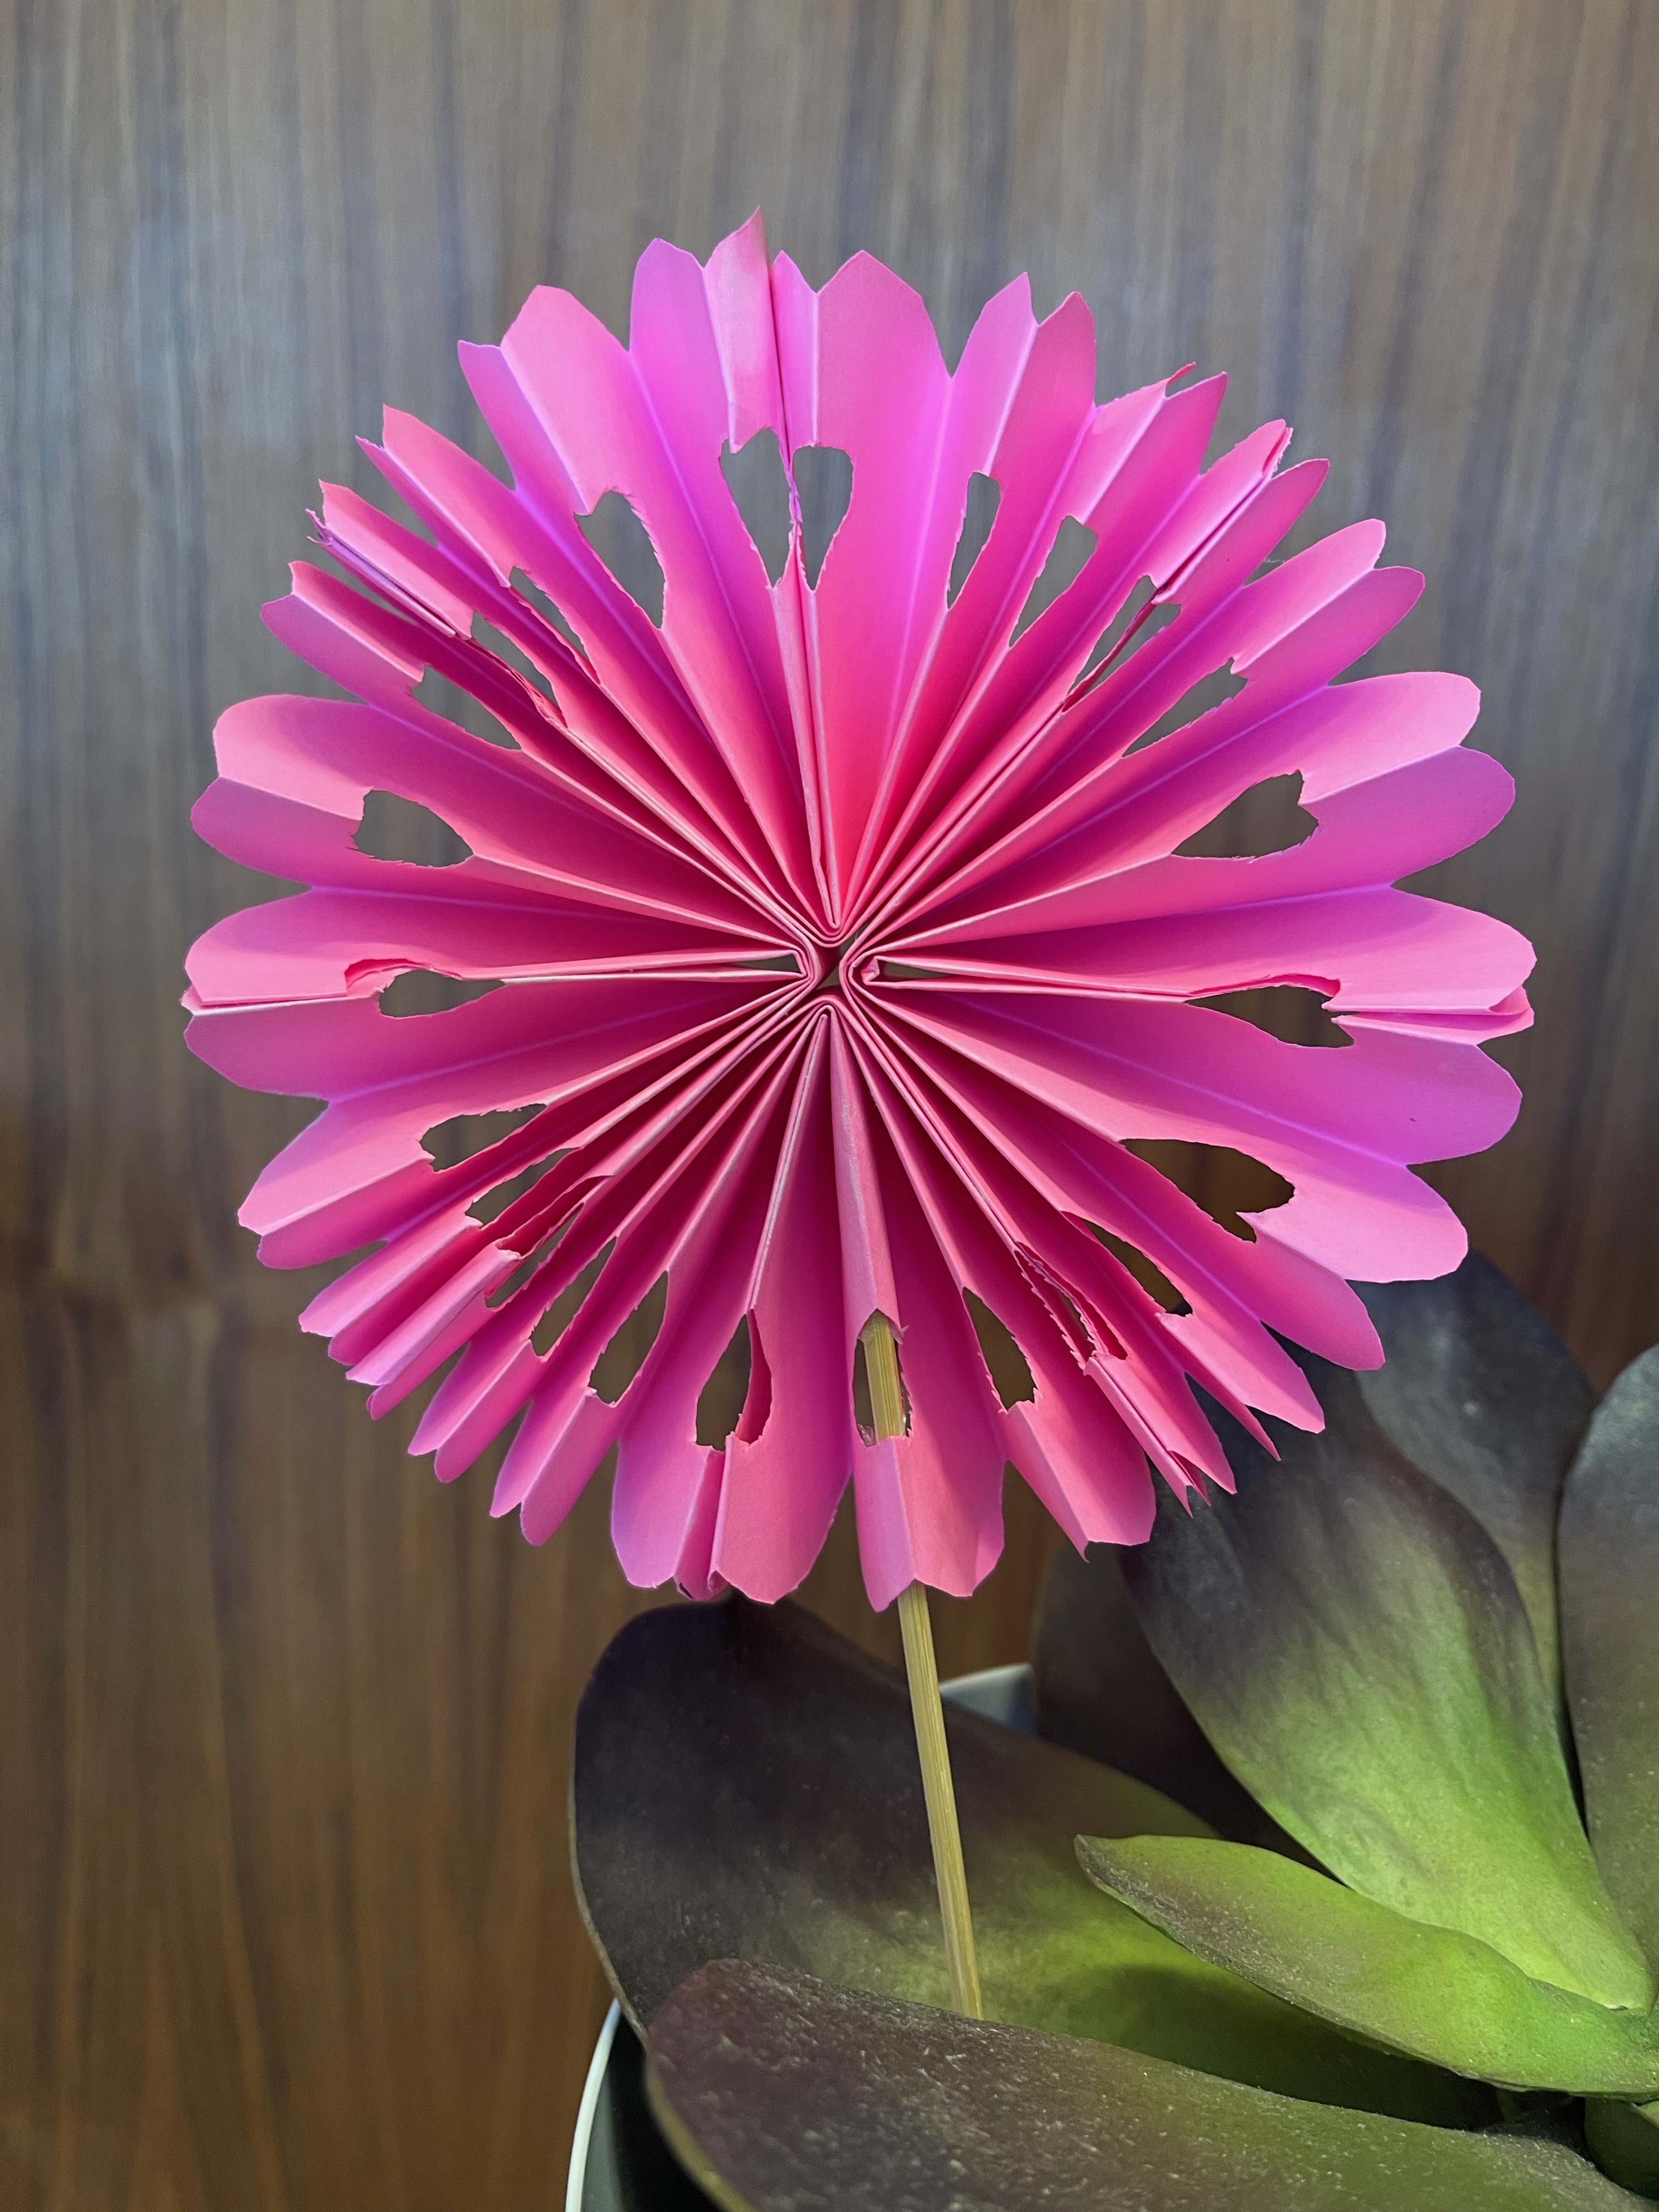
ACCORDION FOLD FLOWERS
There are several methods online for making these, with varying degrees of complexity, but this technique is the one we found the easiest to do using easily sourced supplies.
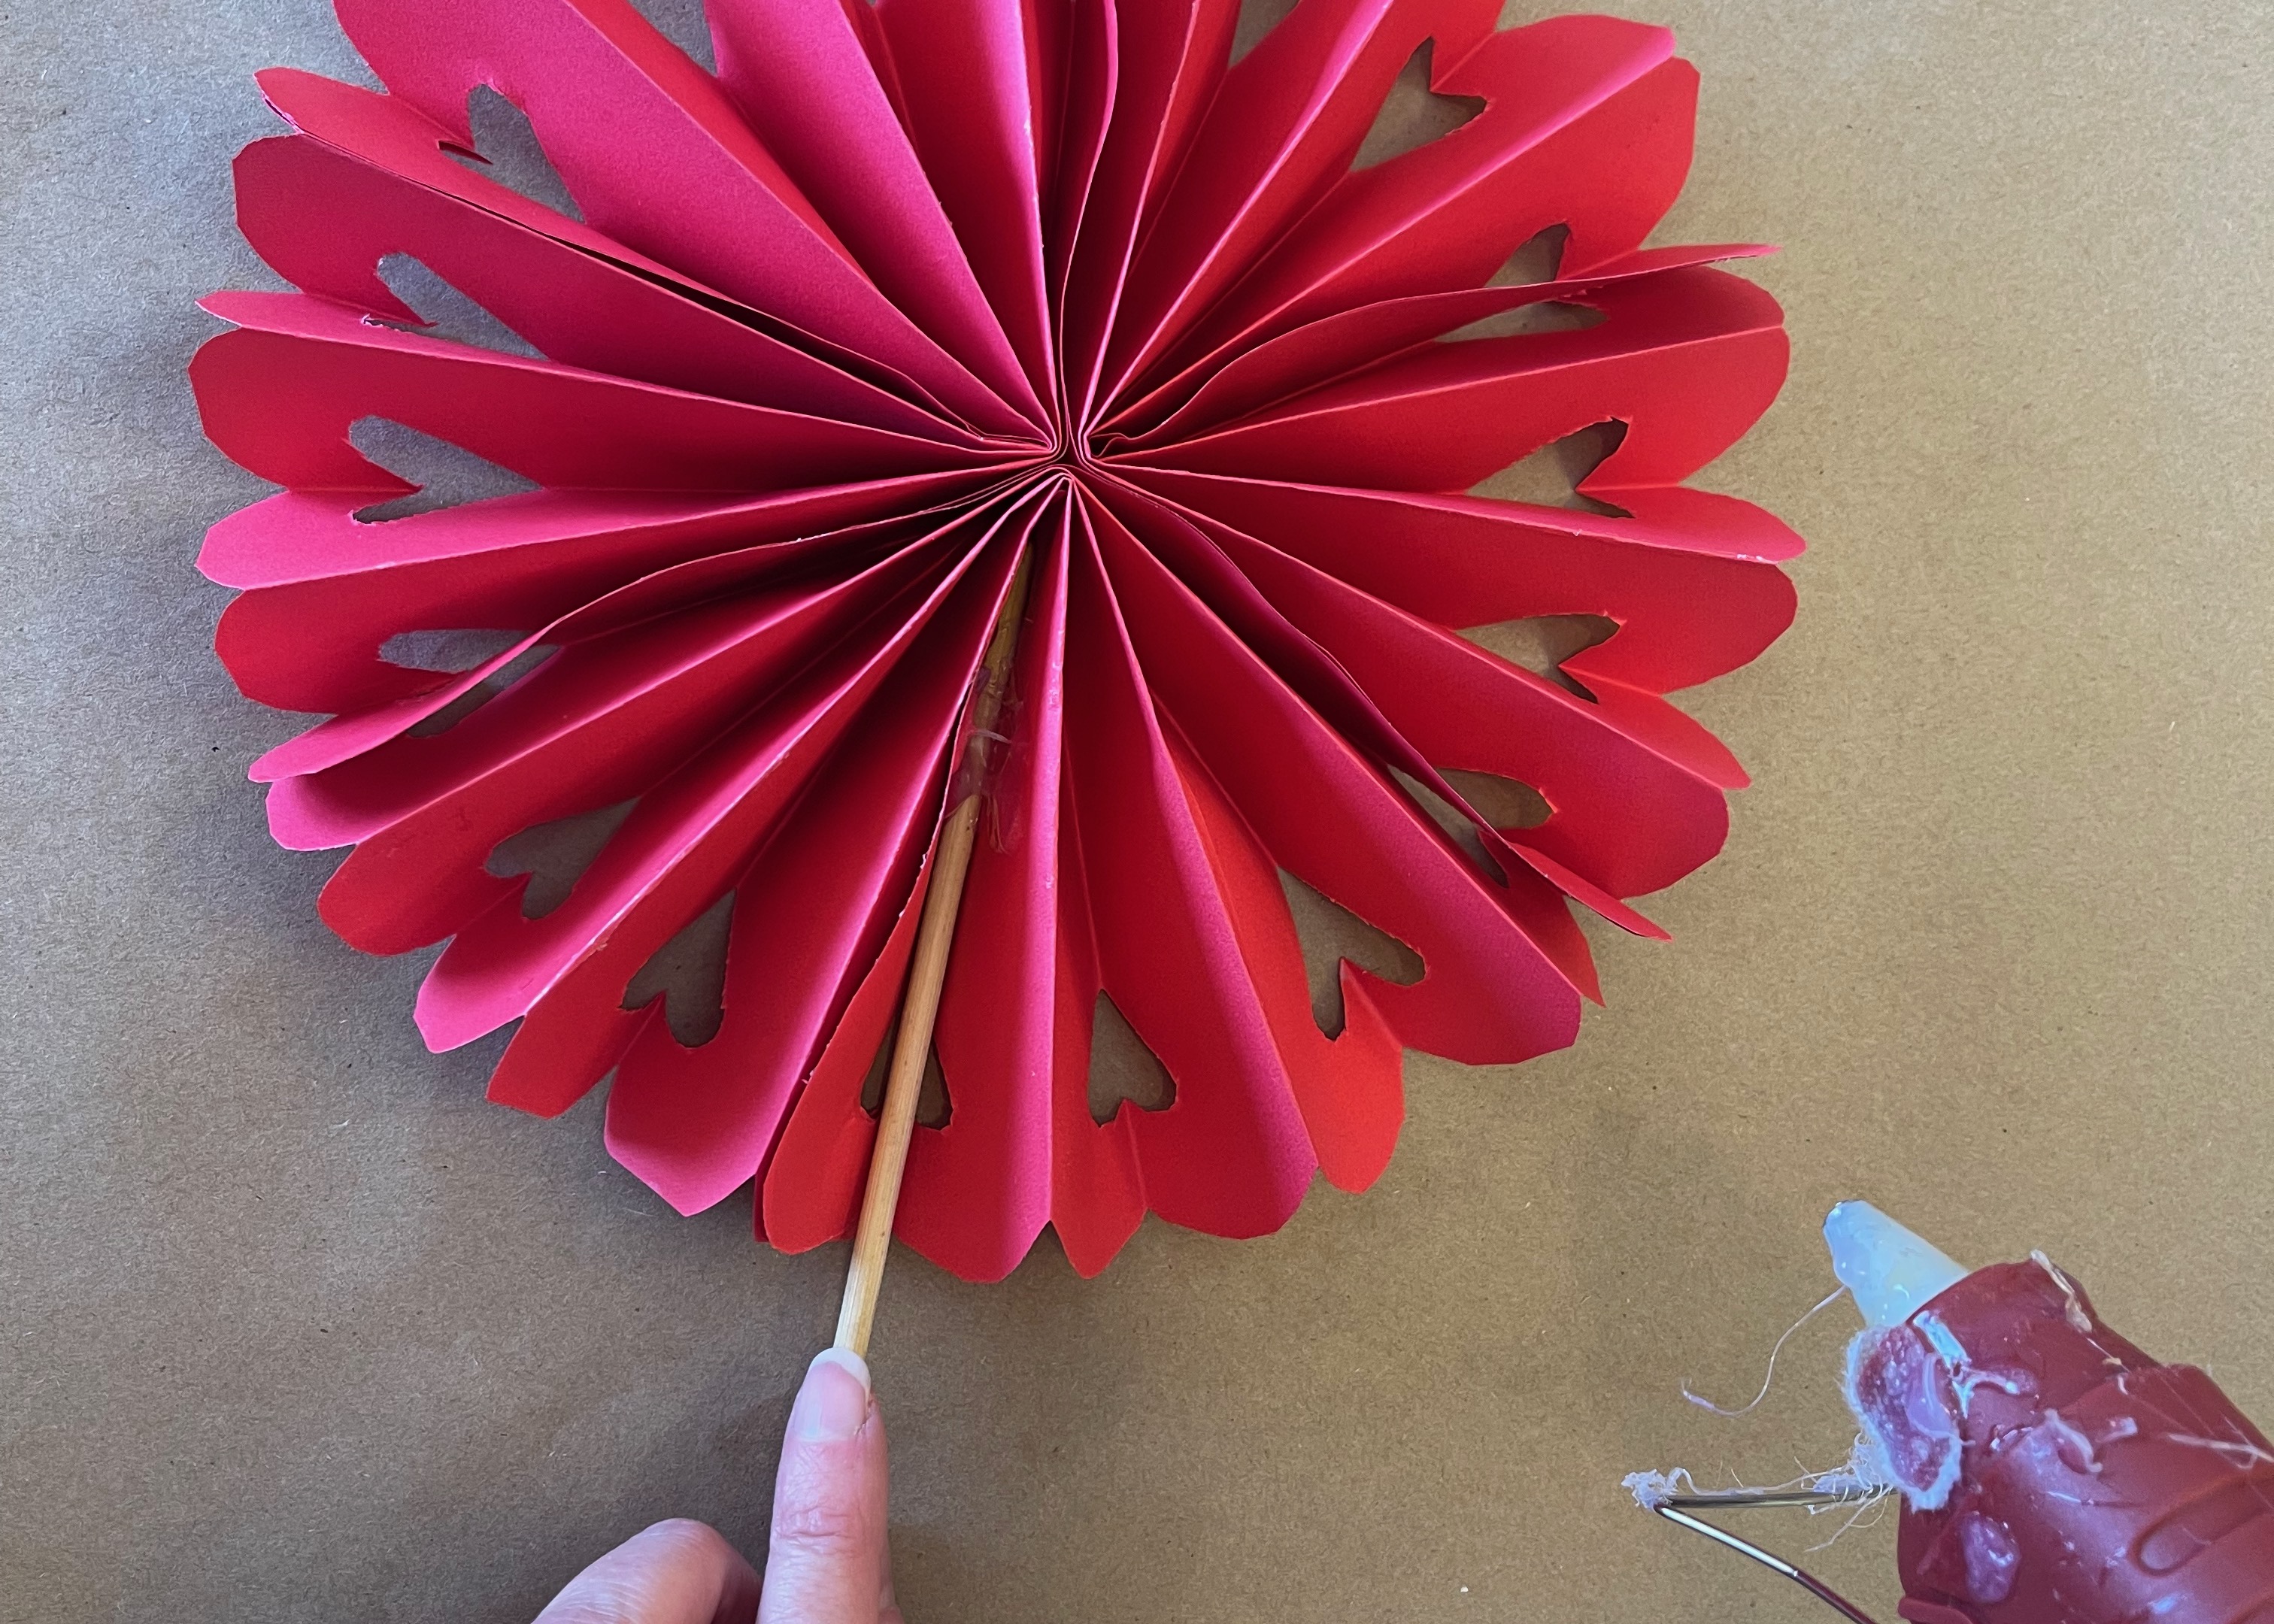
We made our flowers in two sizes--the large size, approximately 8.5 inches in diameter requires 3 sheets of 8.5 x 11 paper, and the smaller 5.5 inch diameter, requires 1.5 sheets of 8.5 x 11 paper.
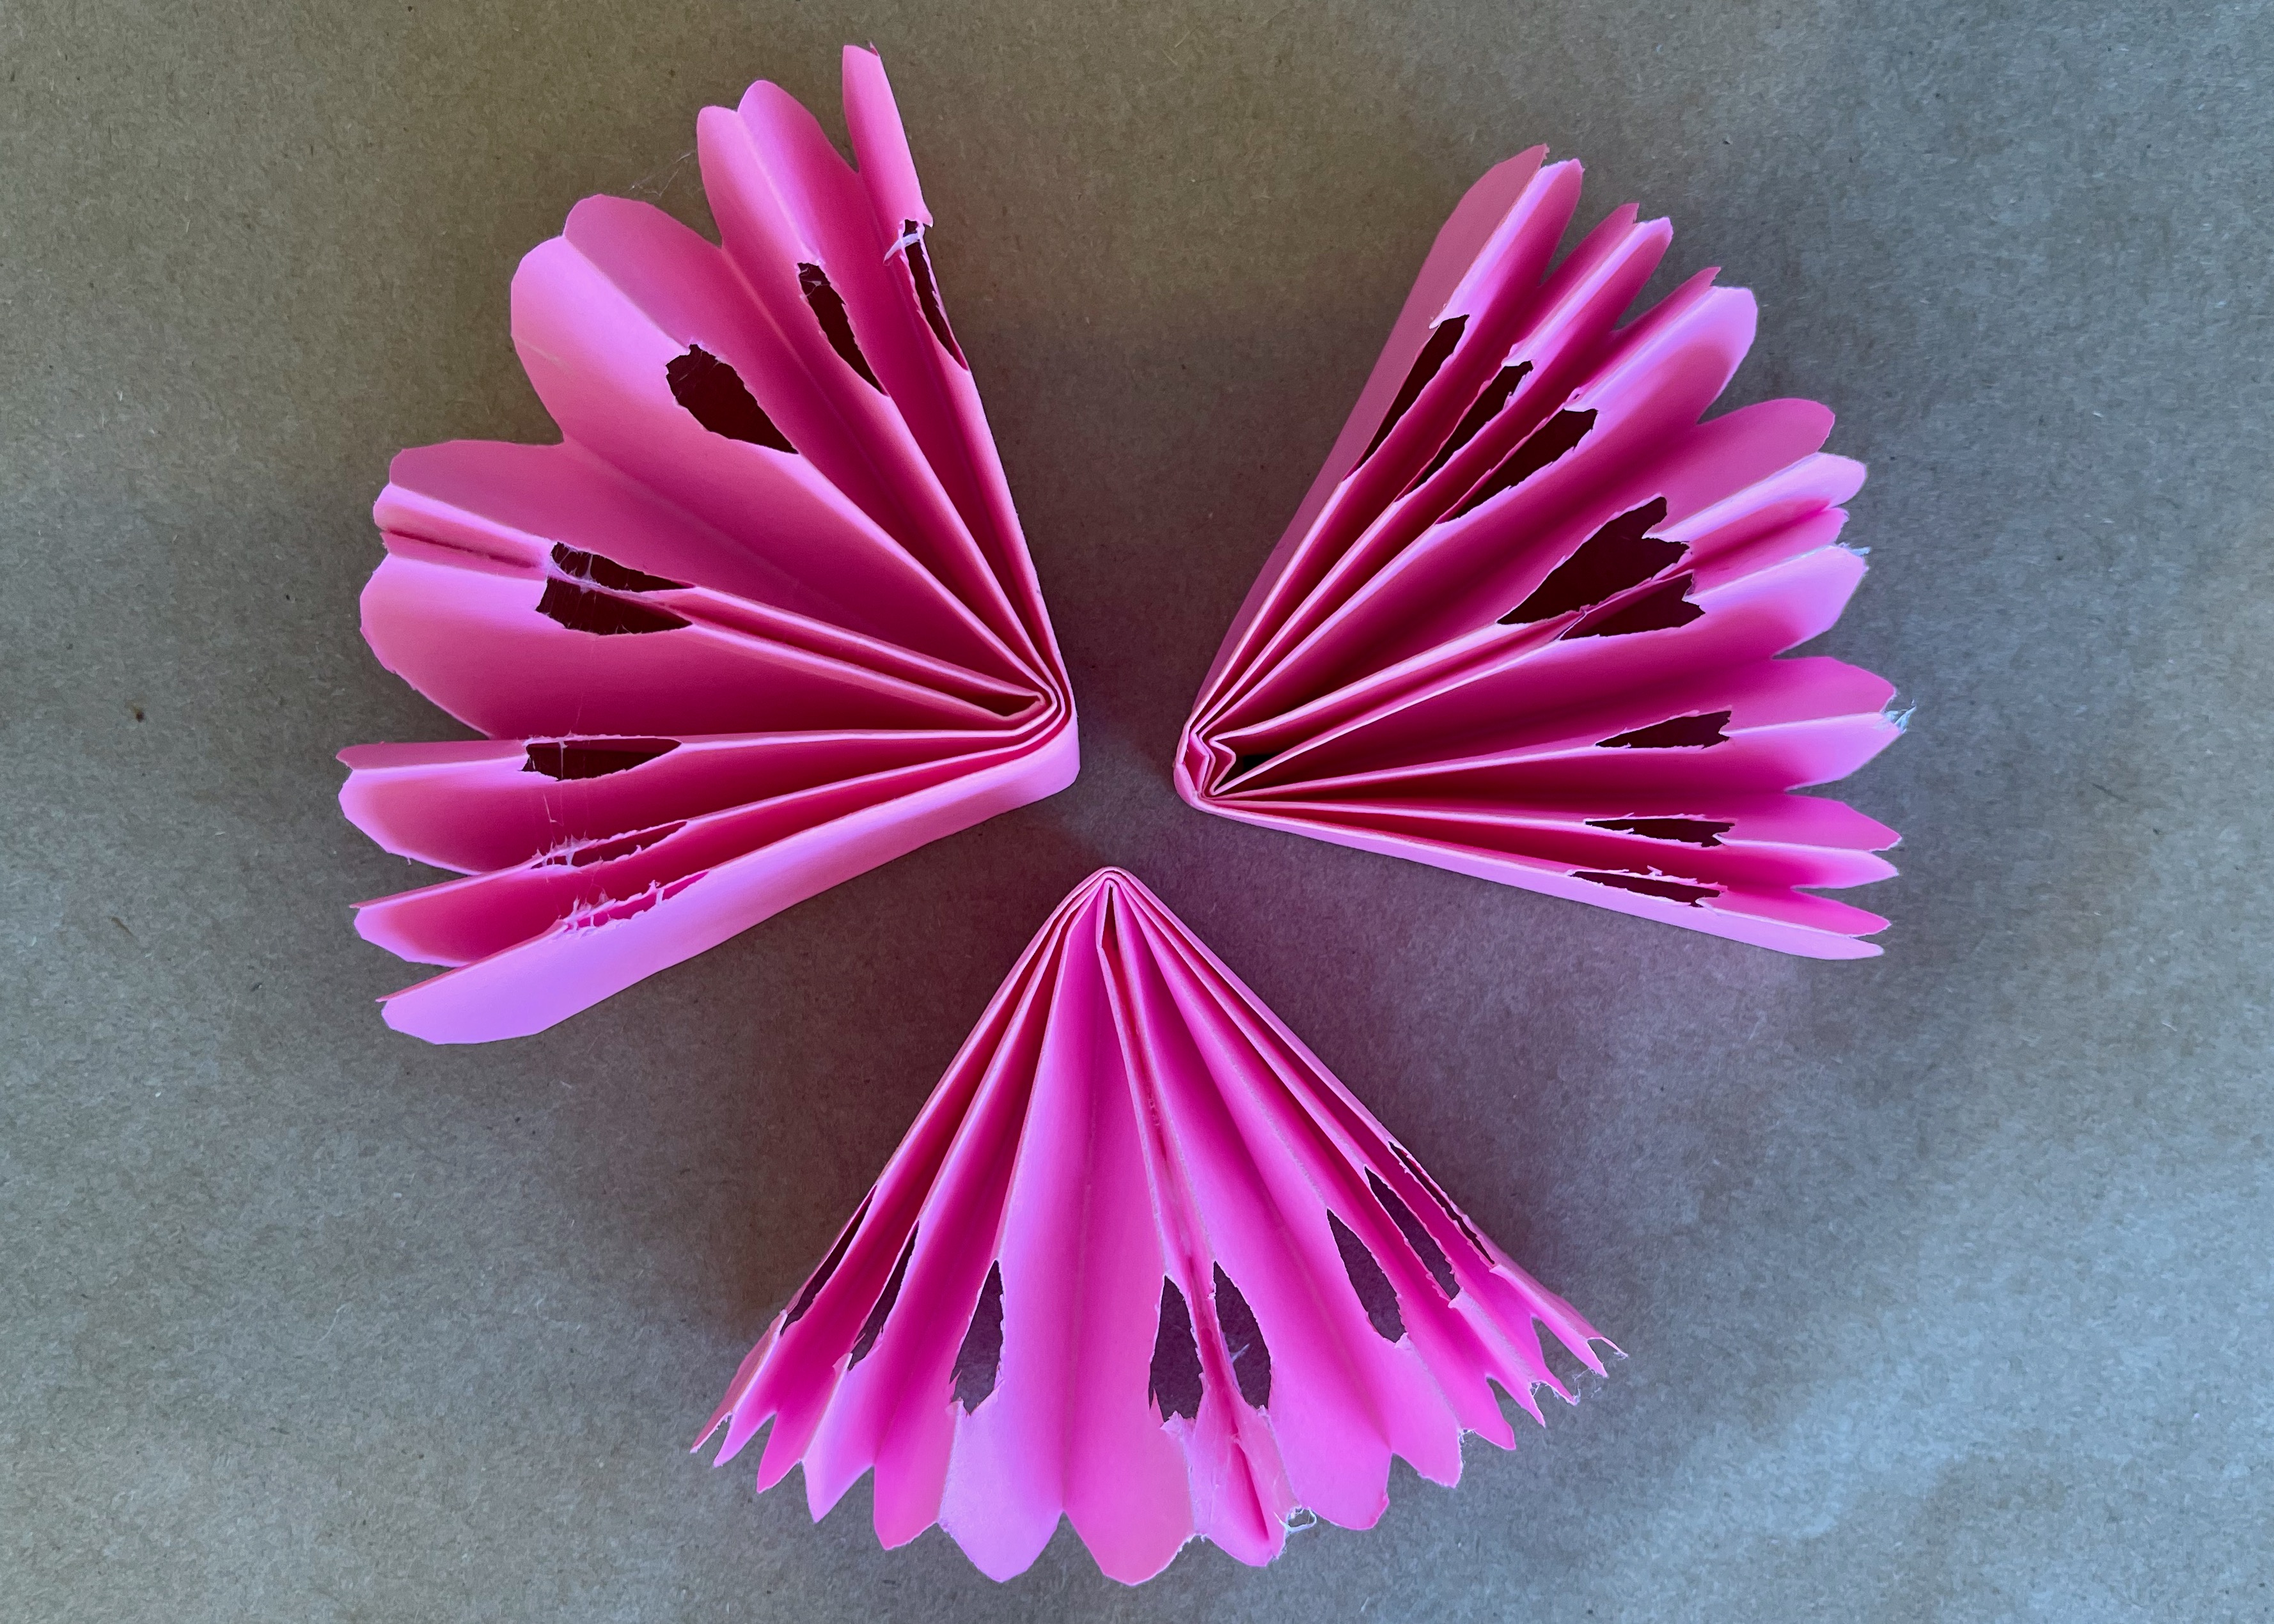
1) Accordion-fold a half sheet for small, or a full sheet for large, into eight sections. You can do more folds for finer pleats, but we found eight the easiest to fold without measuring.
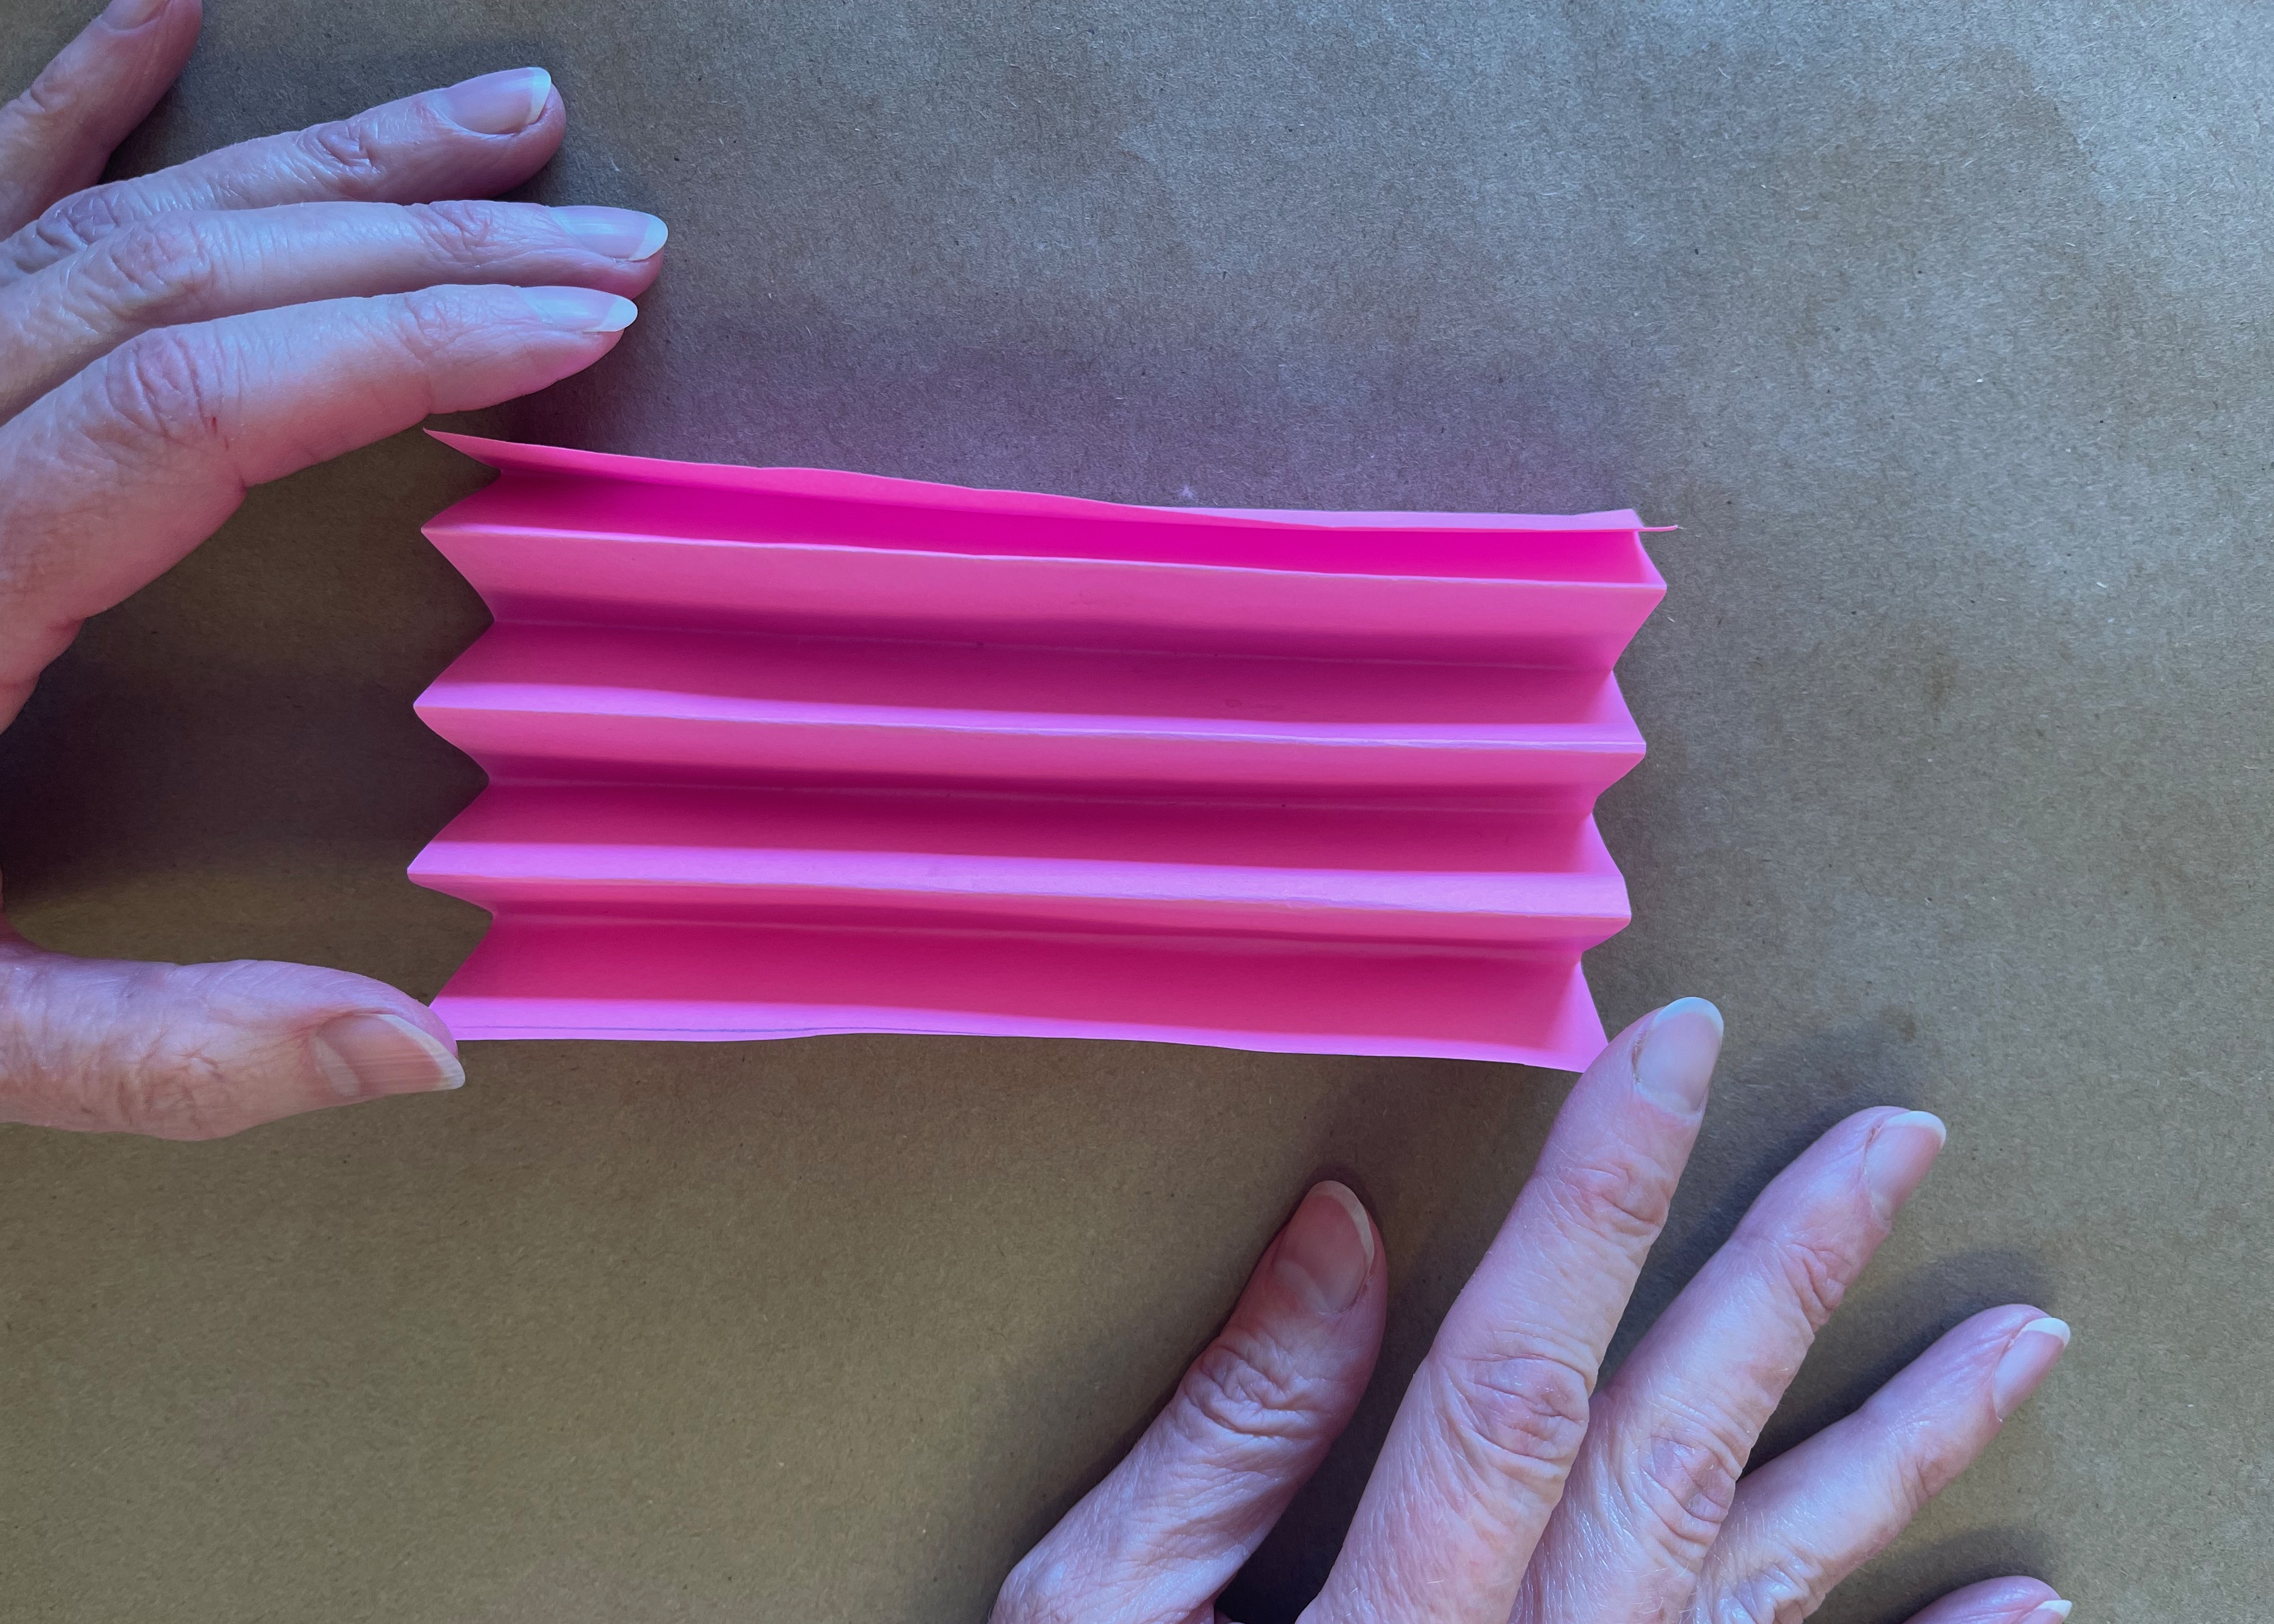
3) On the side with the closed tops of the folds only, cut a design. We cut half a heart shape, to open into a full heart shape, and also rounded off the ends of the rectangle to look like the top of a heart.
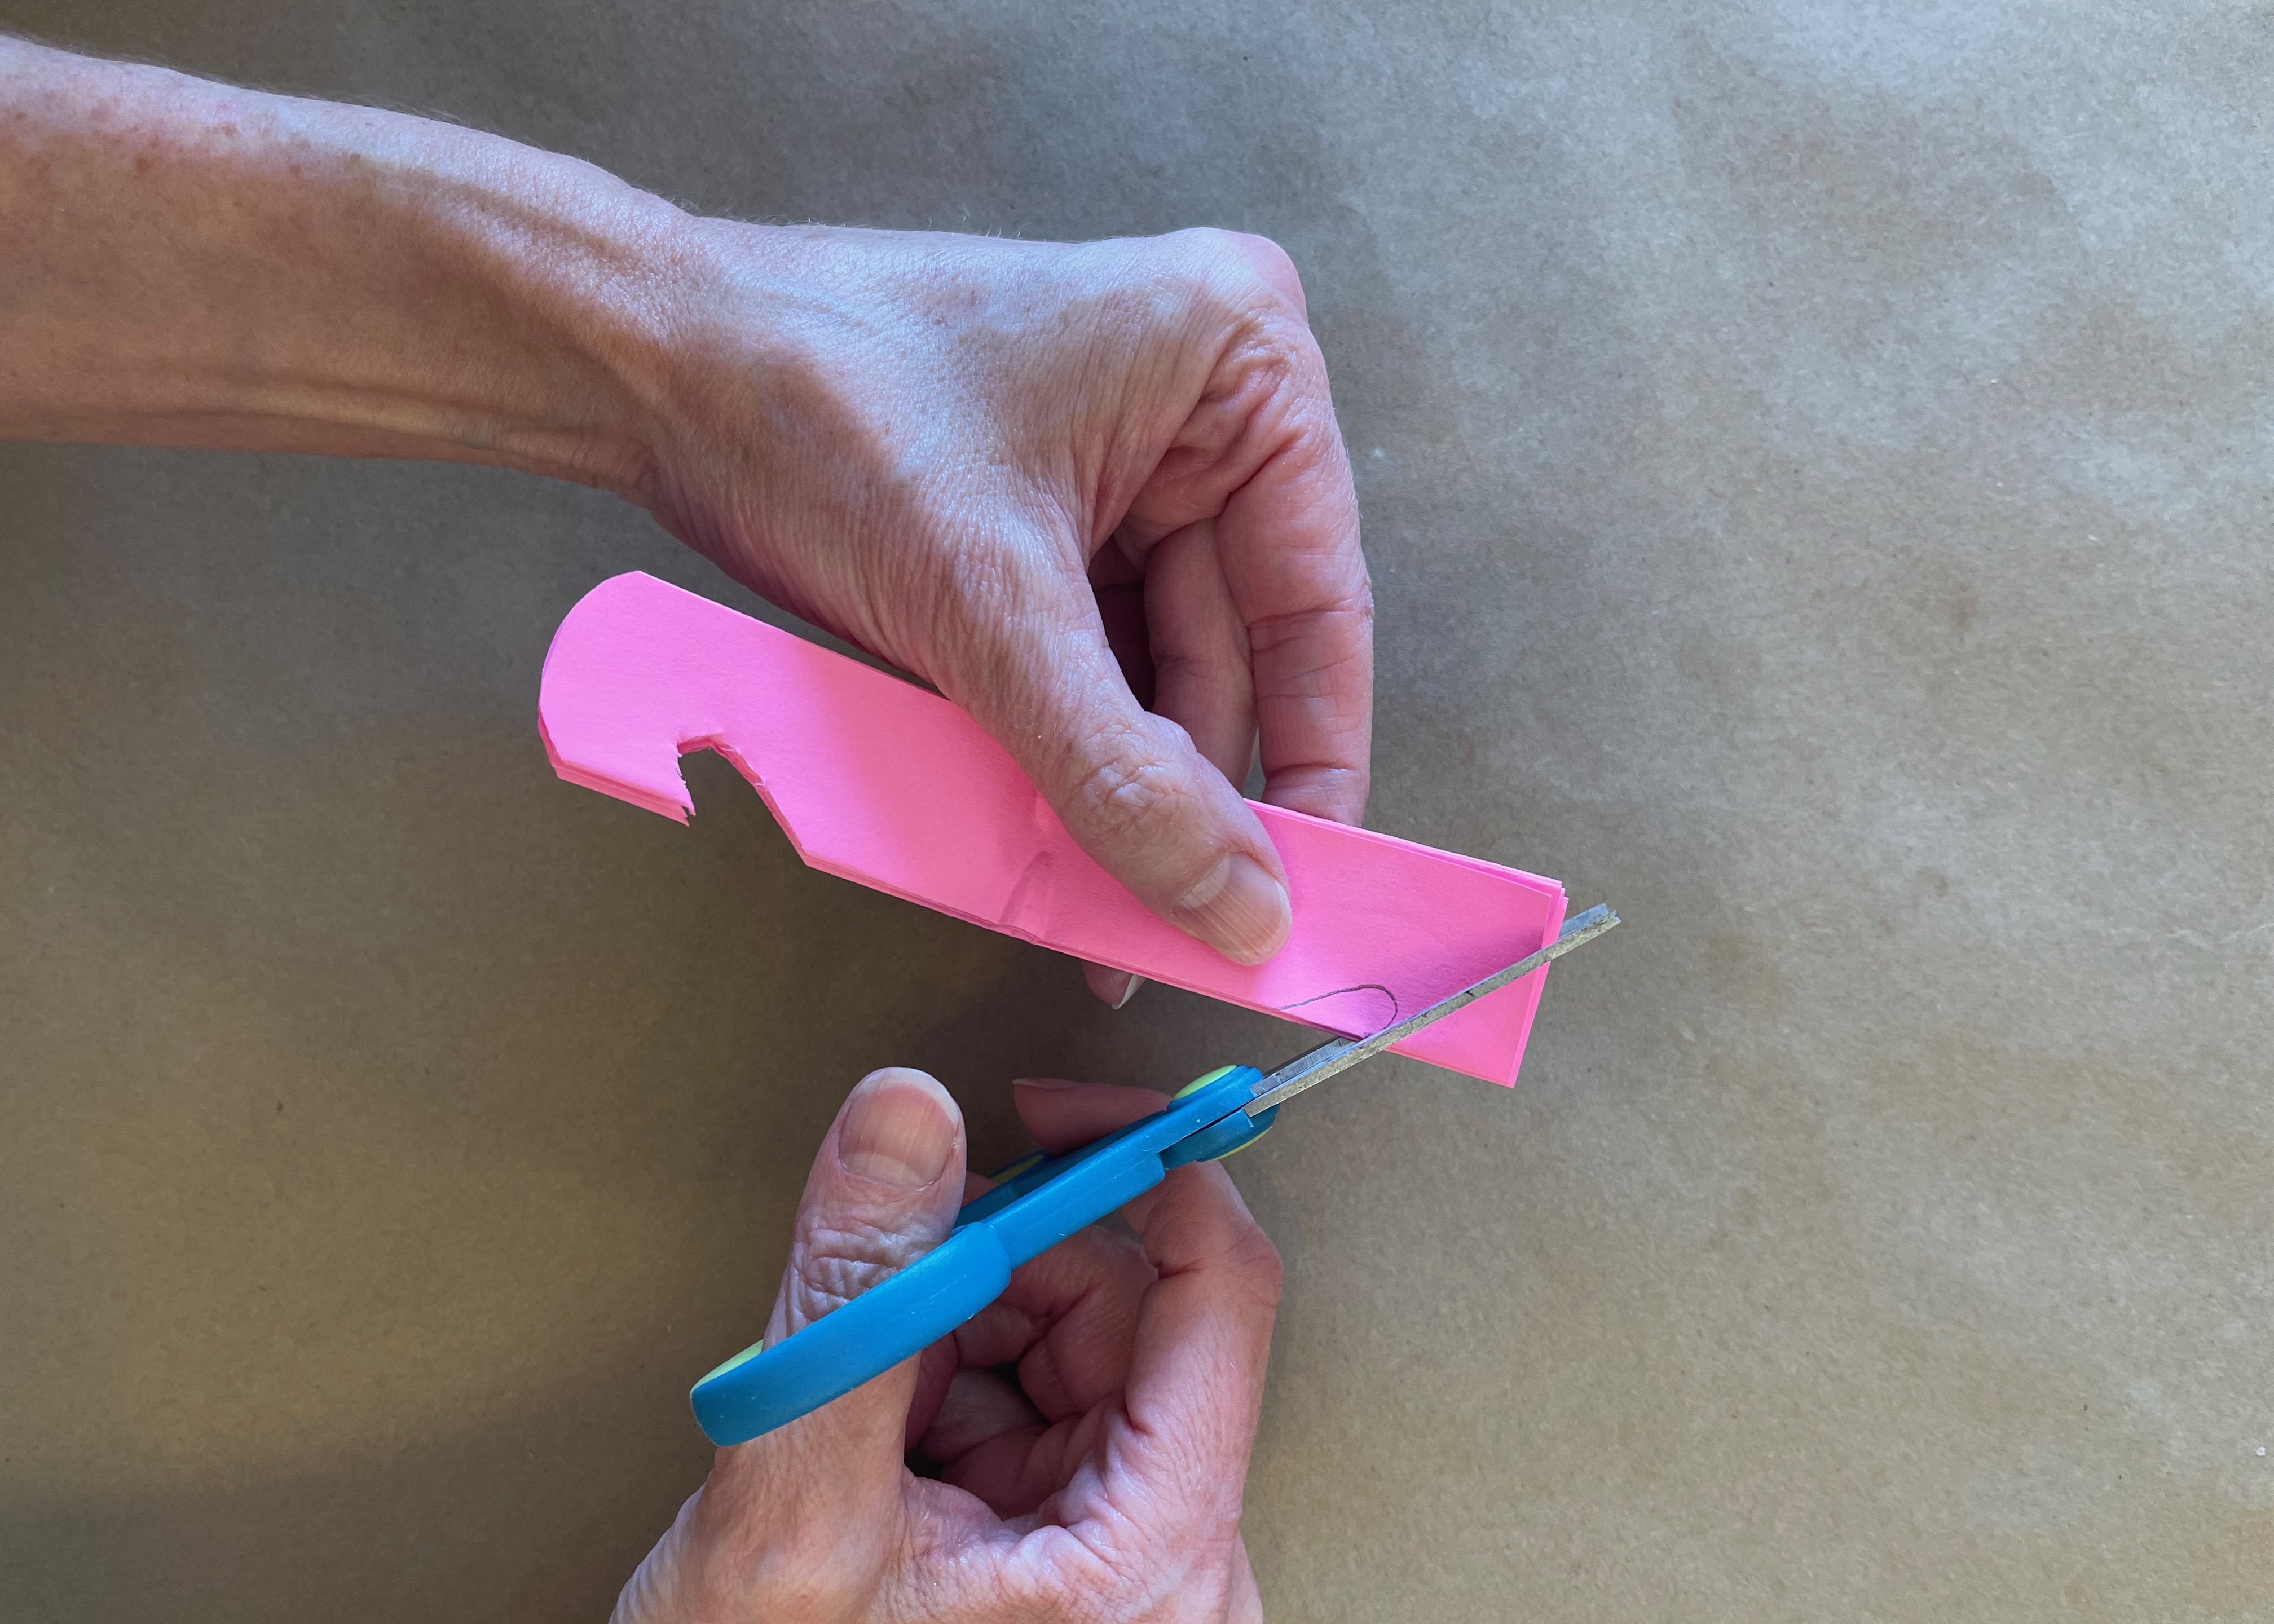
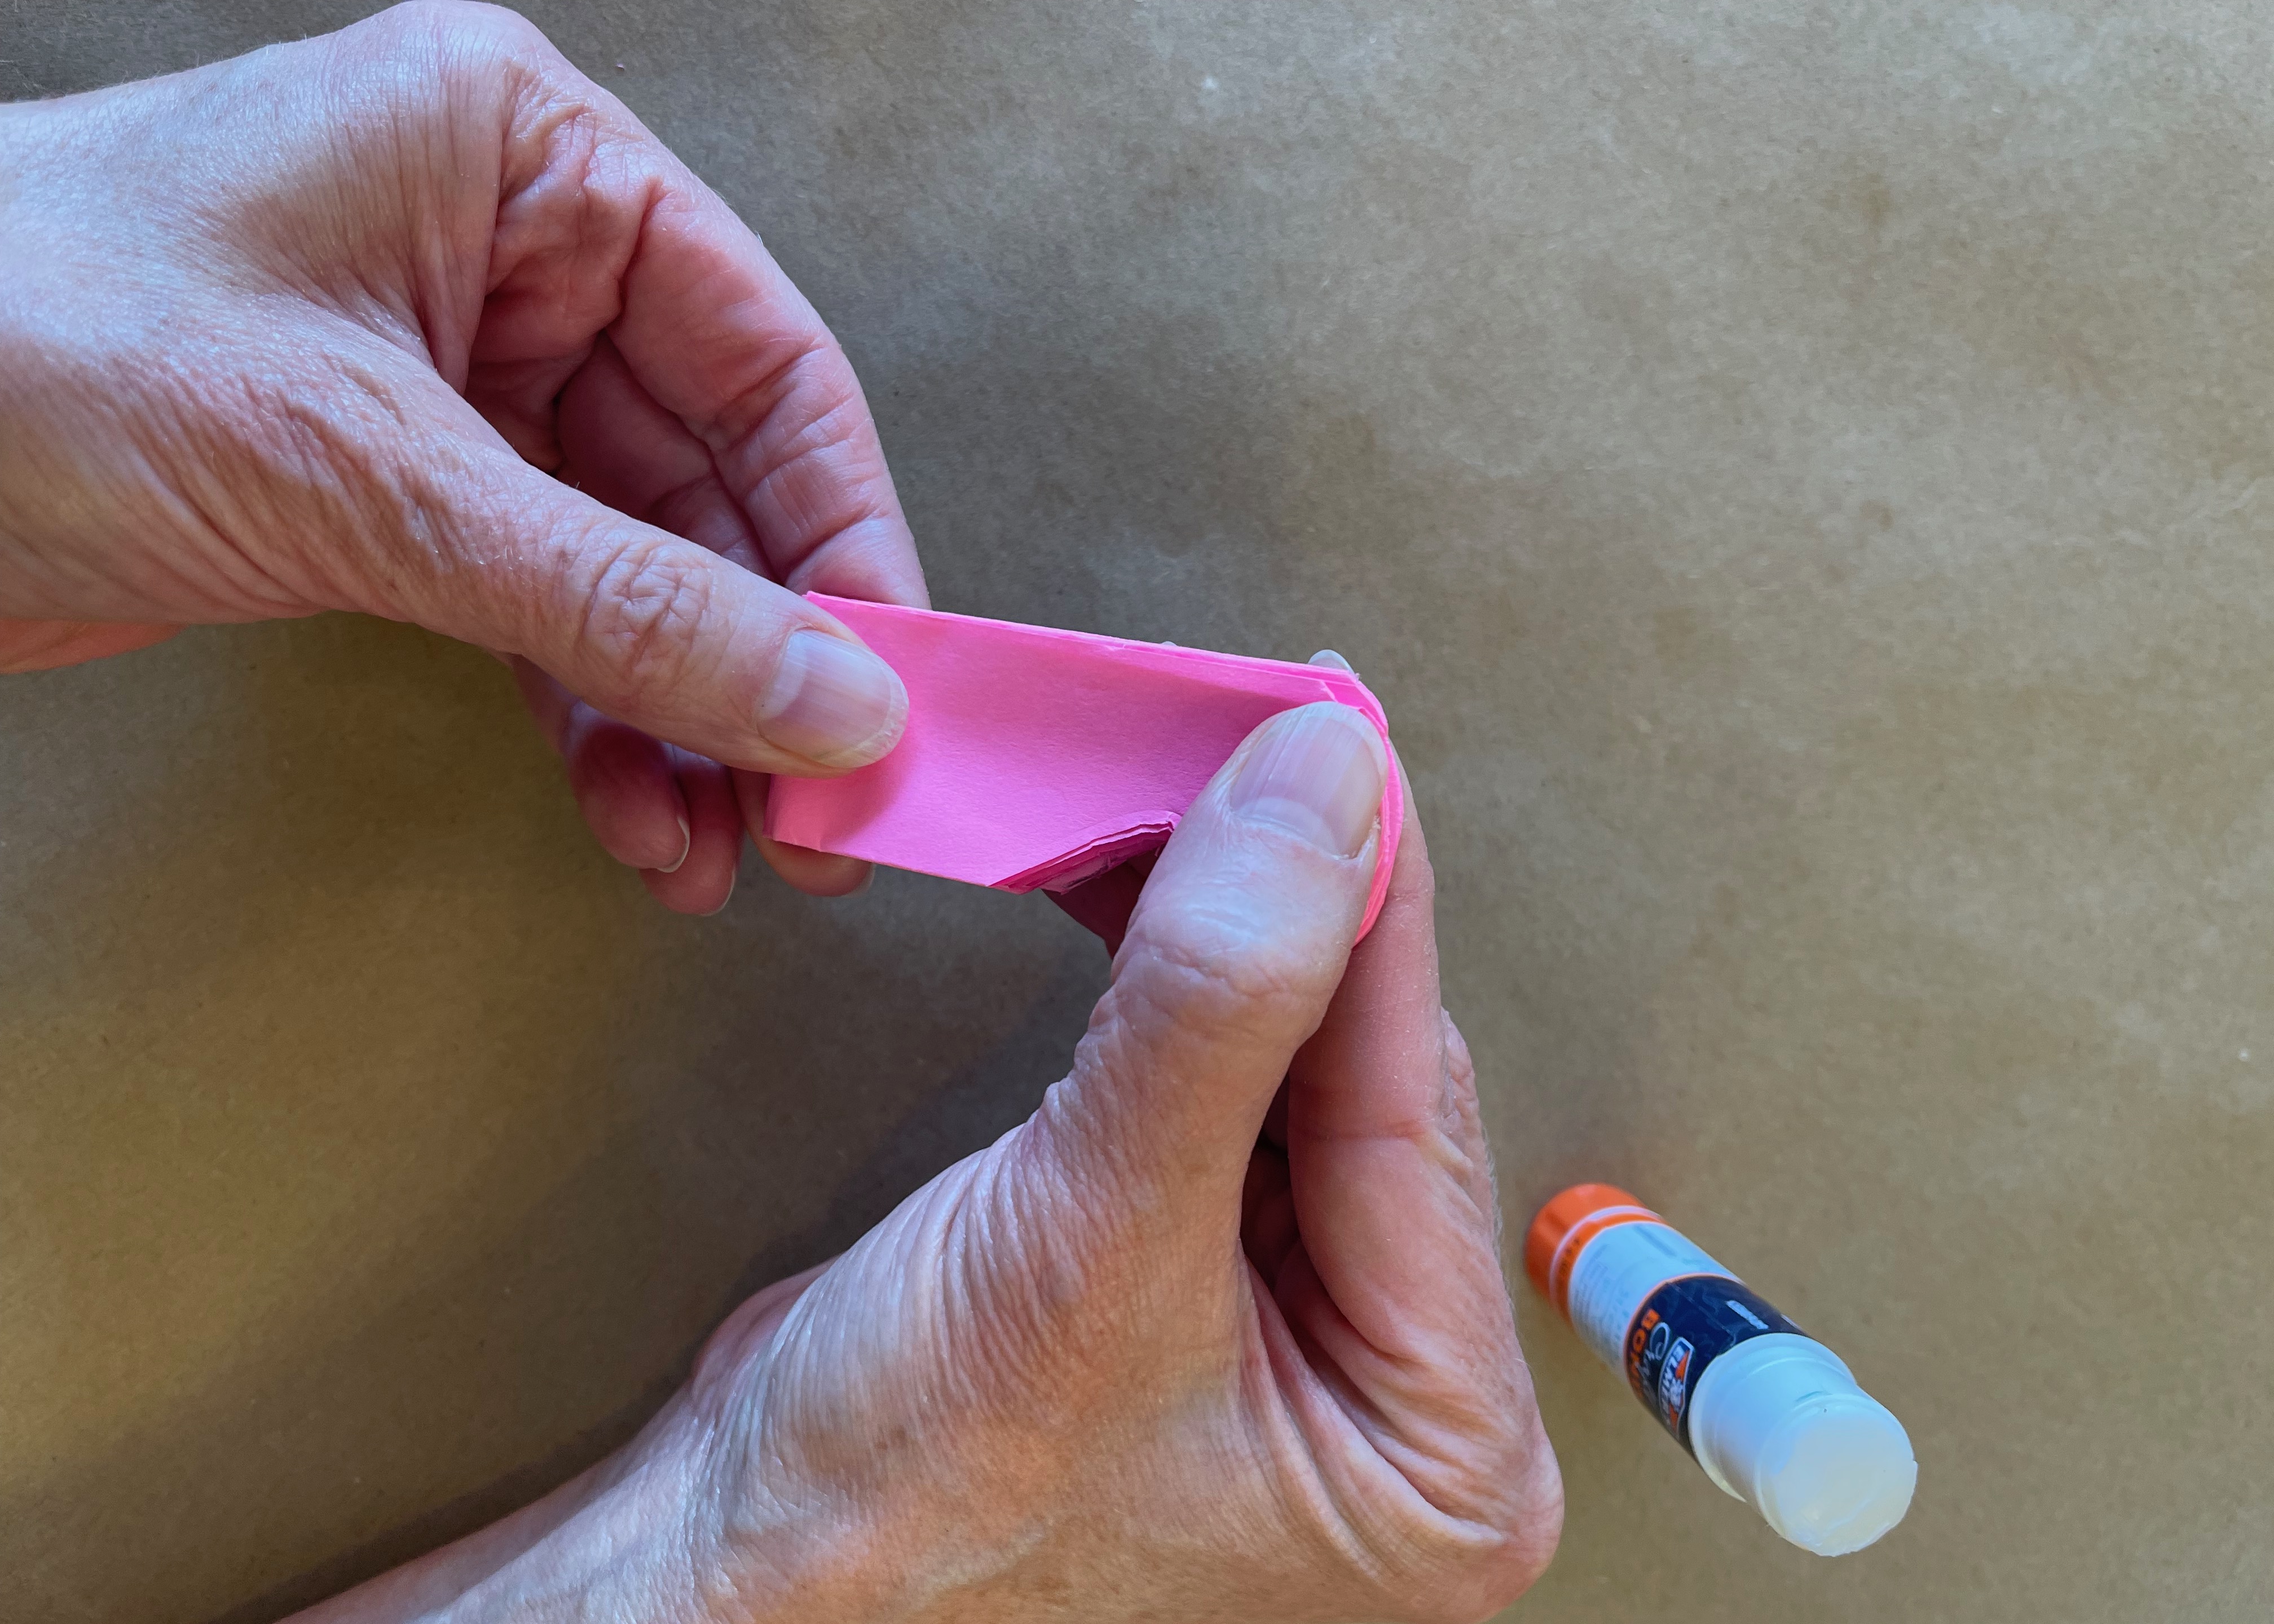
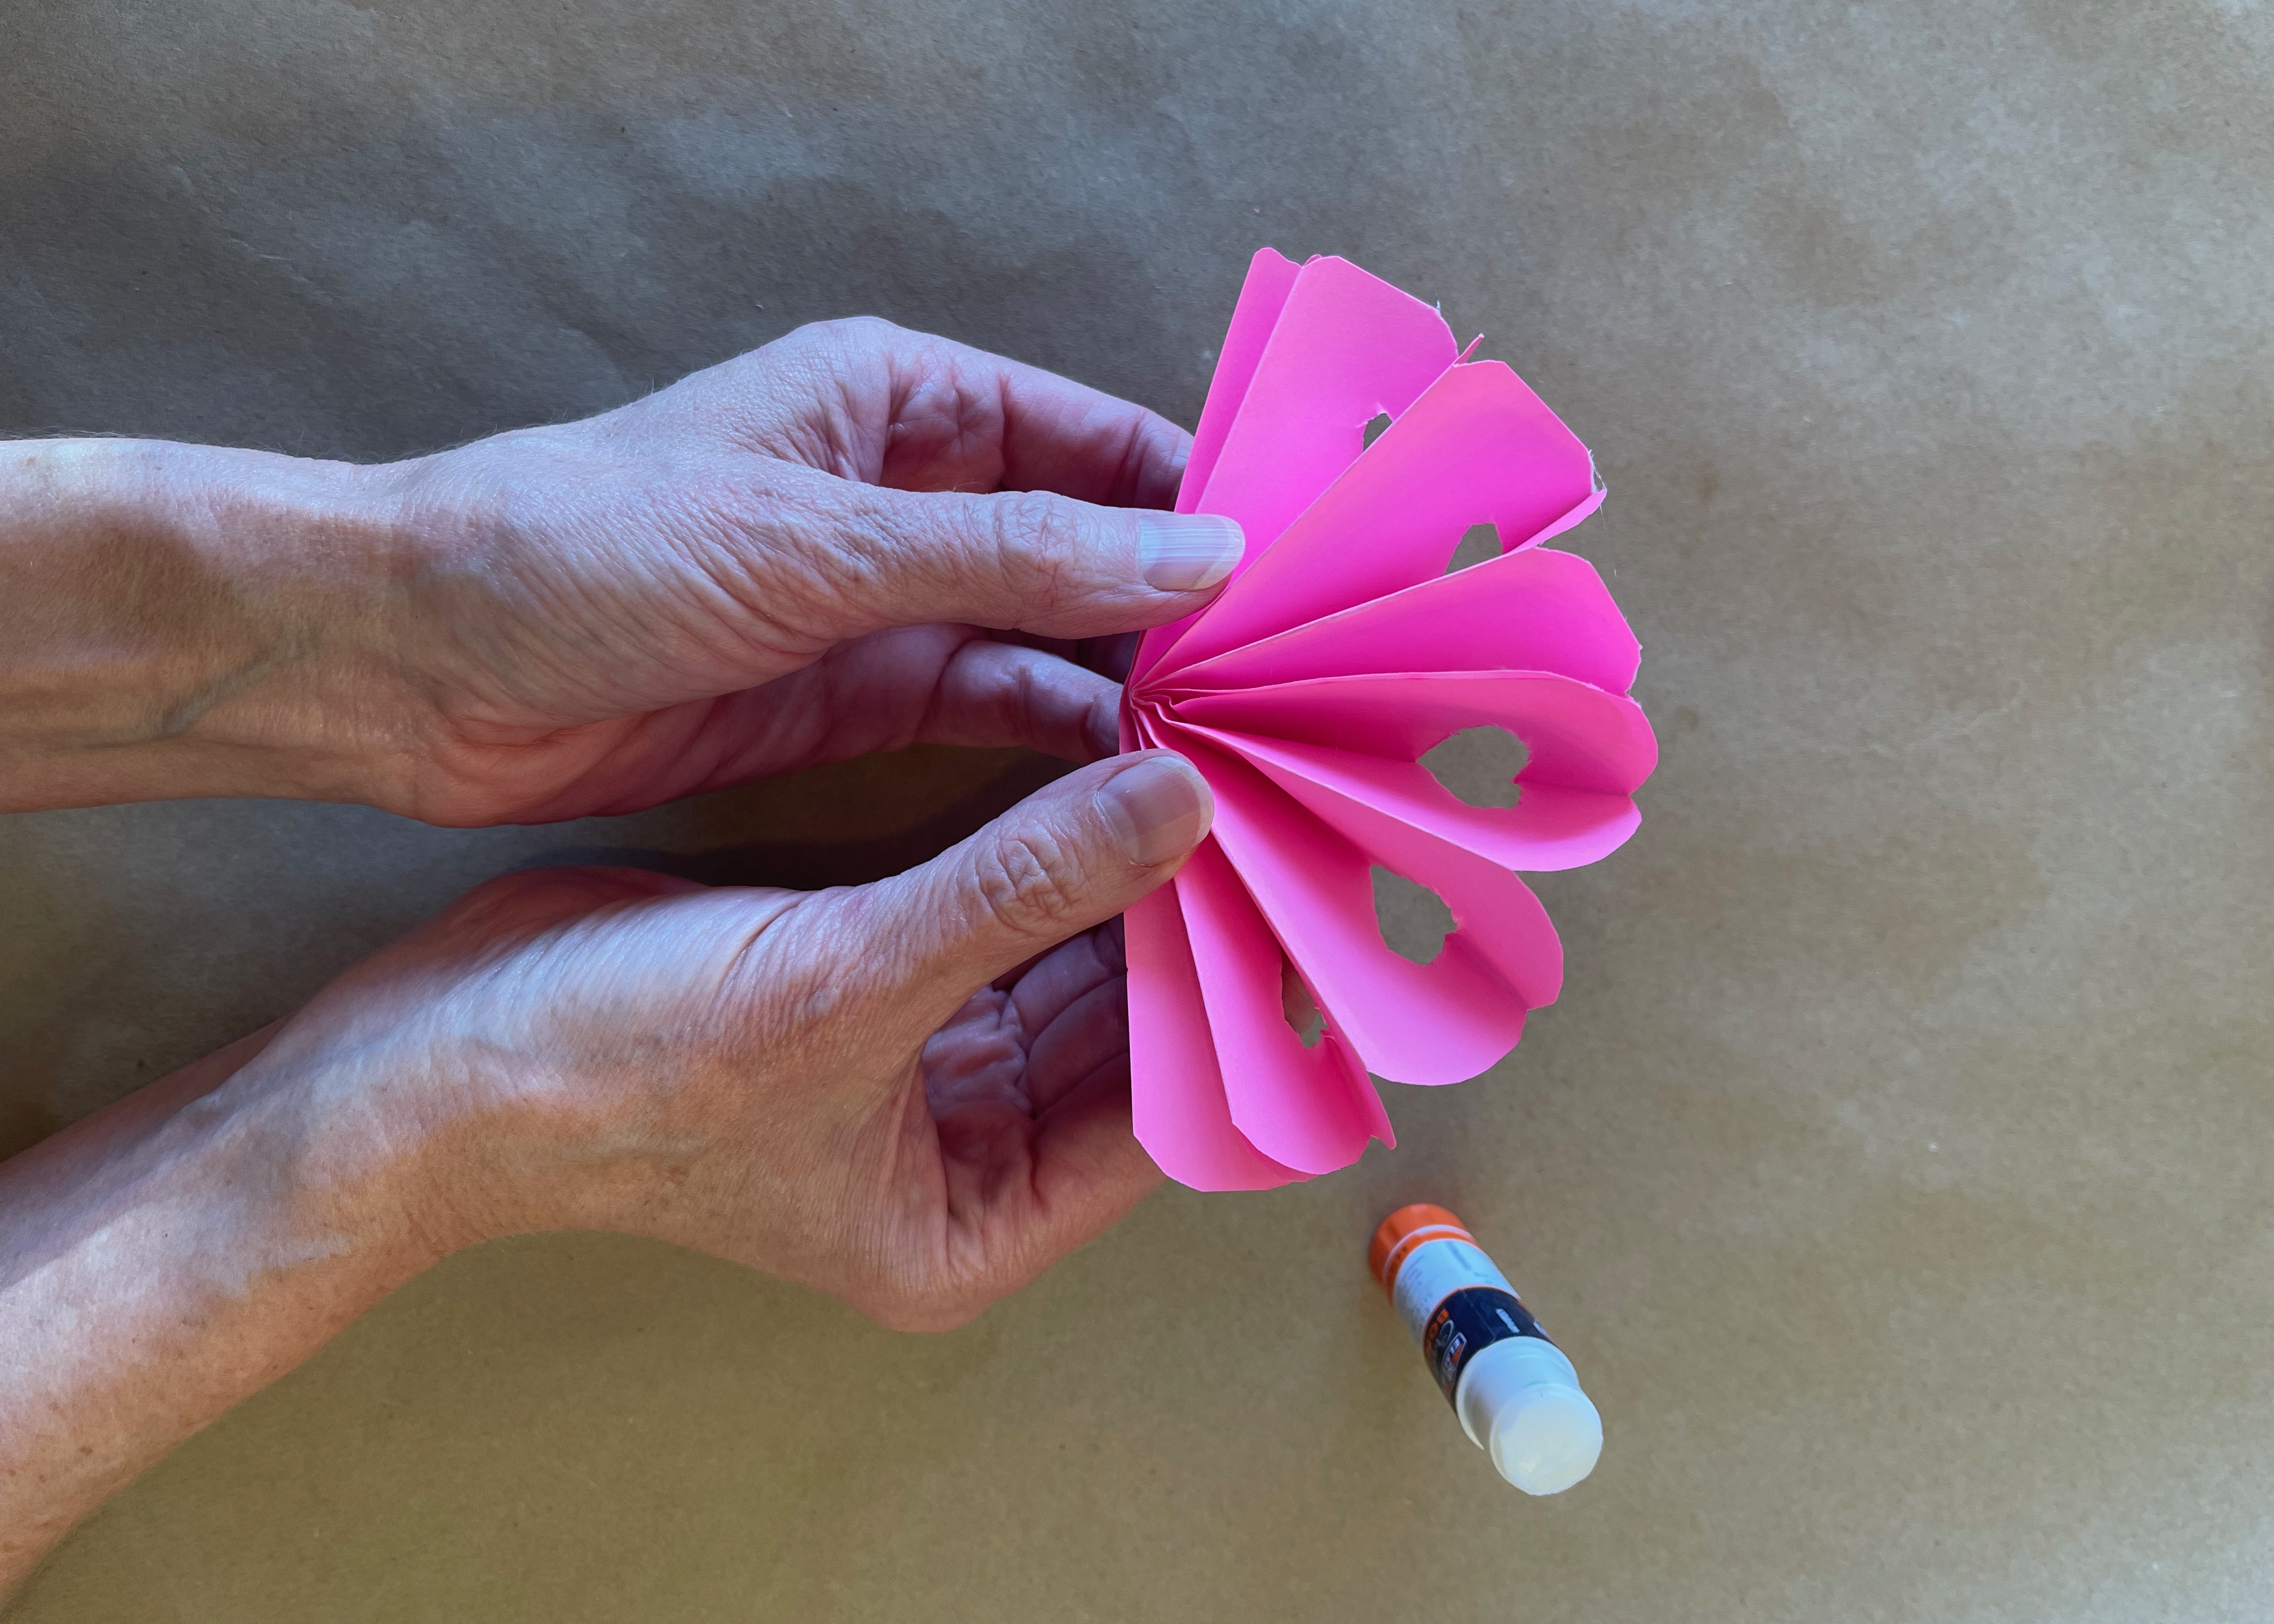
4) Fold the pleated and already-cut piece of paper in half, and glue the inner sides together to create a fan. Make an additional two fans. Glue all these fans together, side to side, until they create a full circle. We used three fans for our flowers, but four work well too if you want tighter folds.

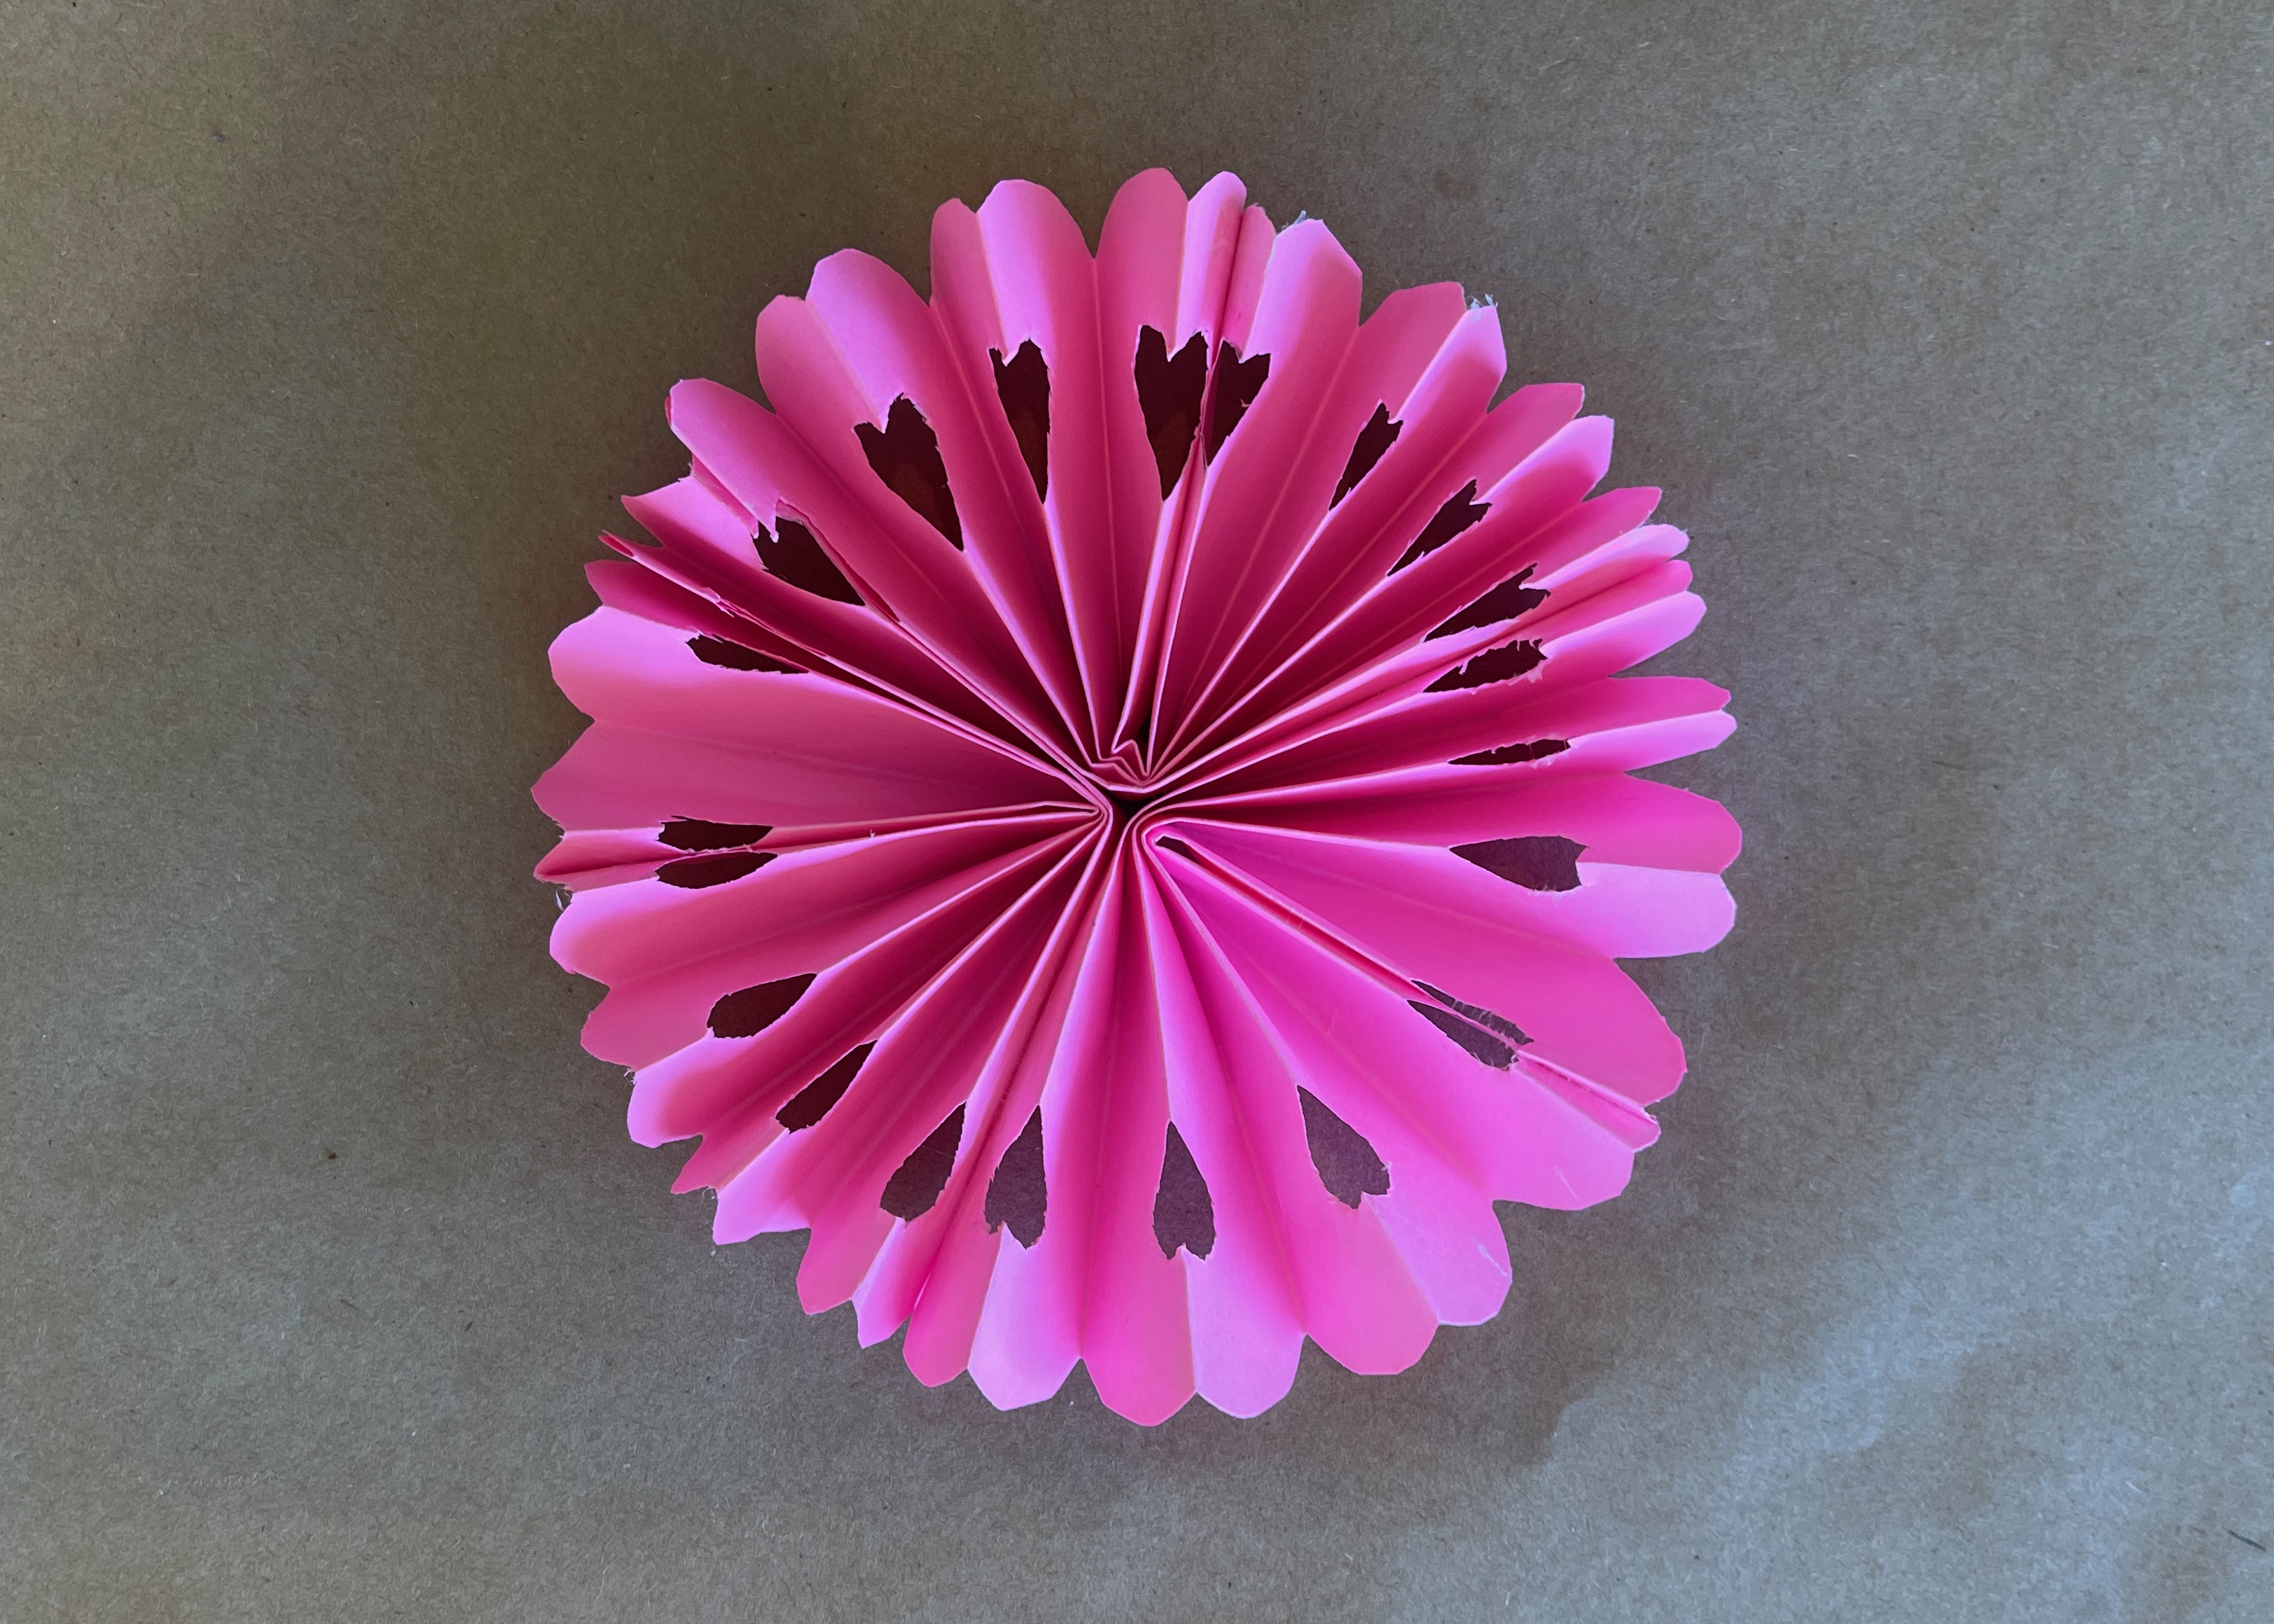
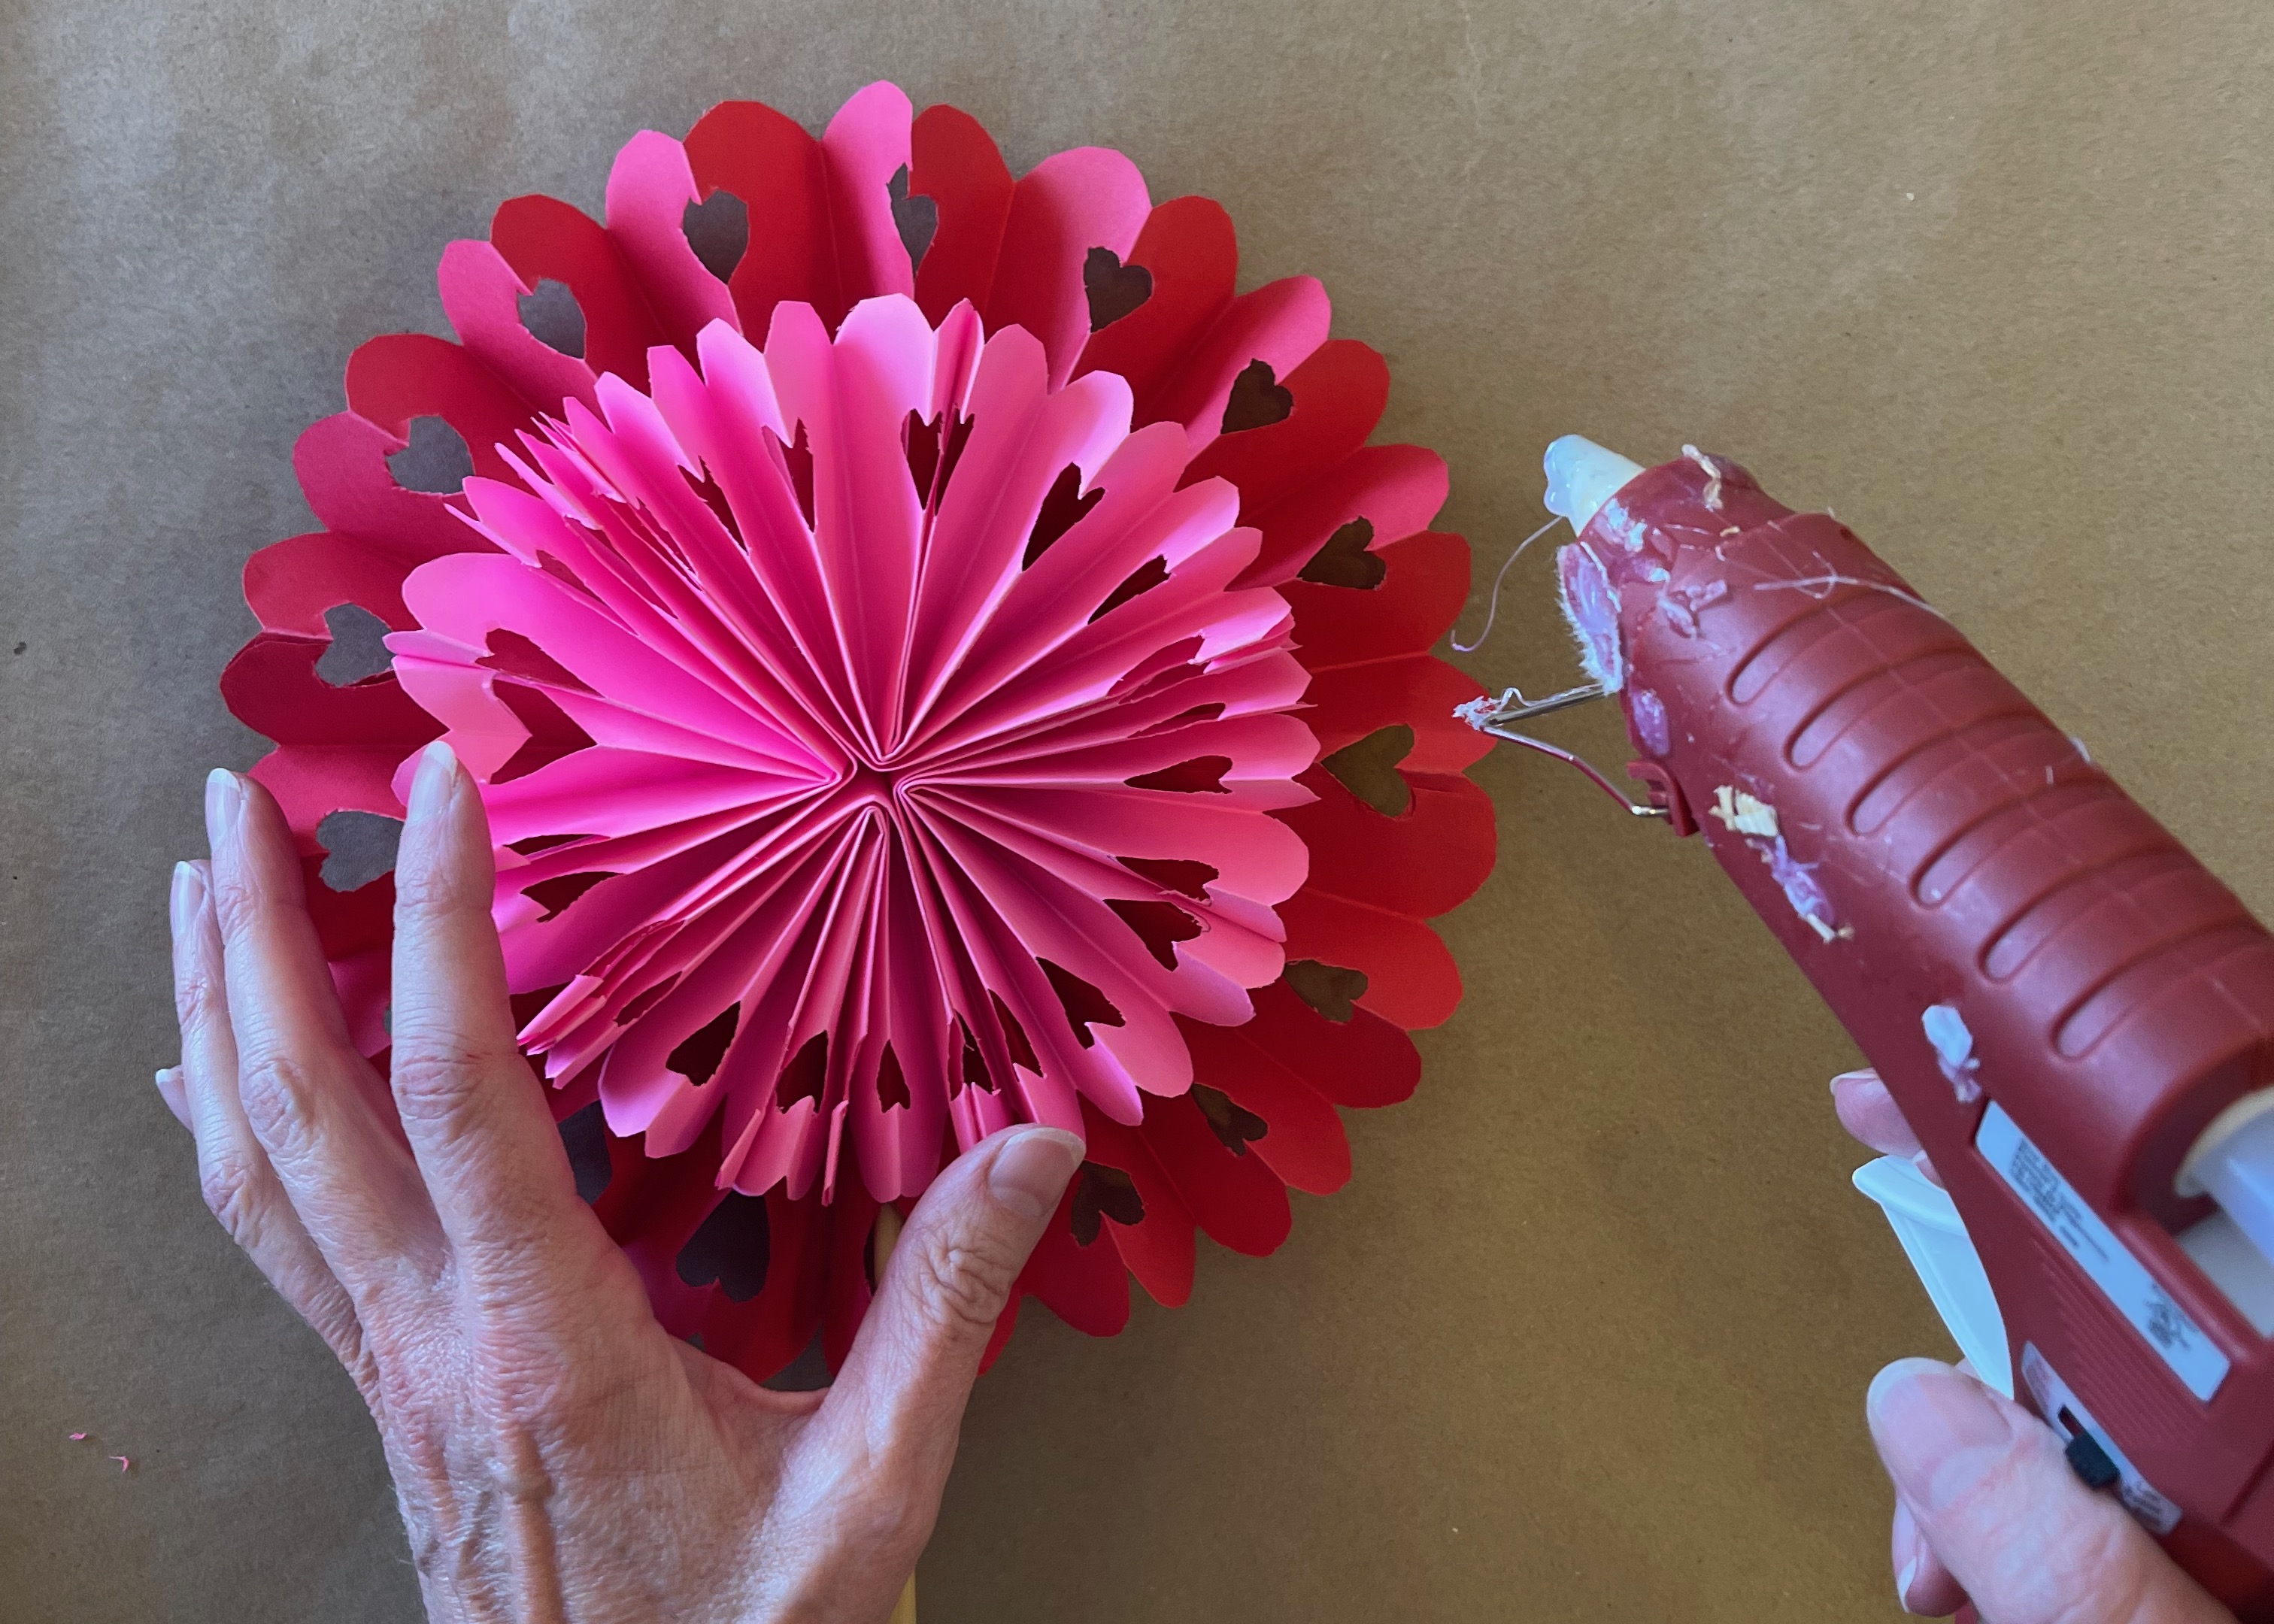
5) If using your Accordion Fold Flower for a for a floral pick, use hot glue or other fast drying glue to attach a chopstick or skewer to the back.
6 ) For an even more fabulous version, hot glue a small flower to the center of a large flower!
Et Voila!
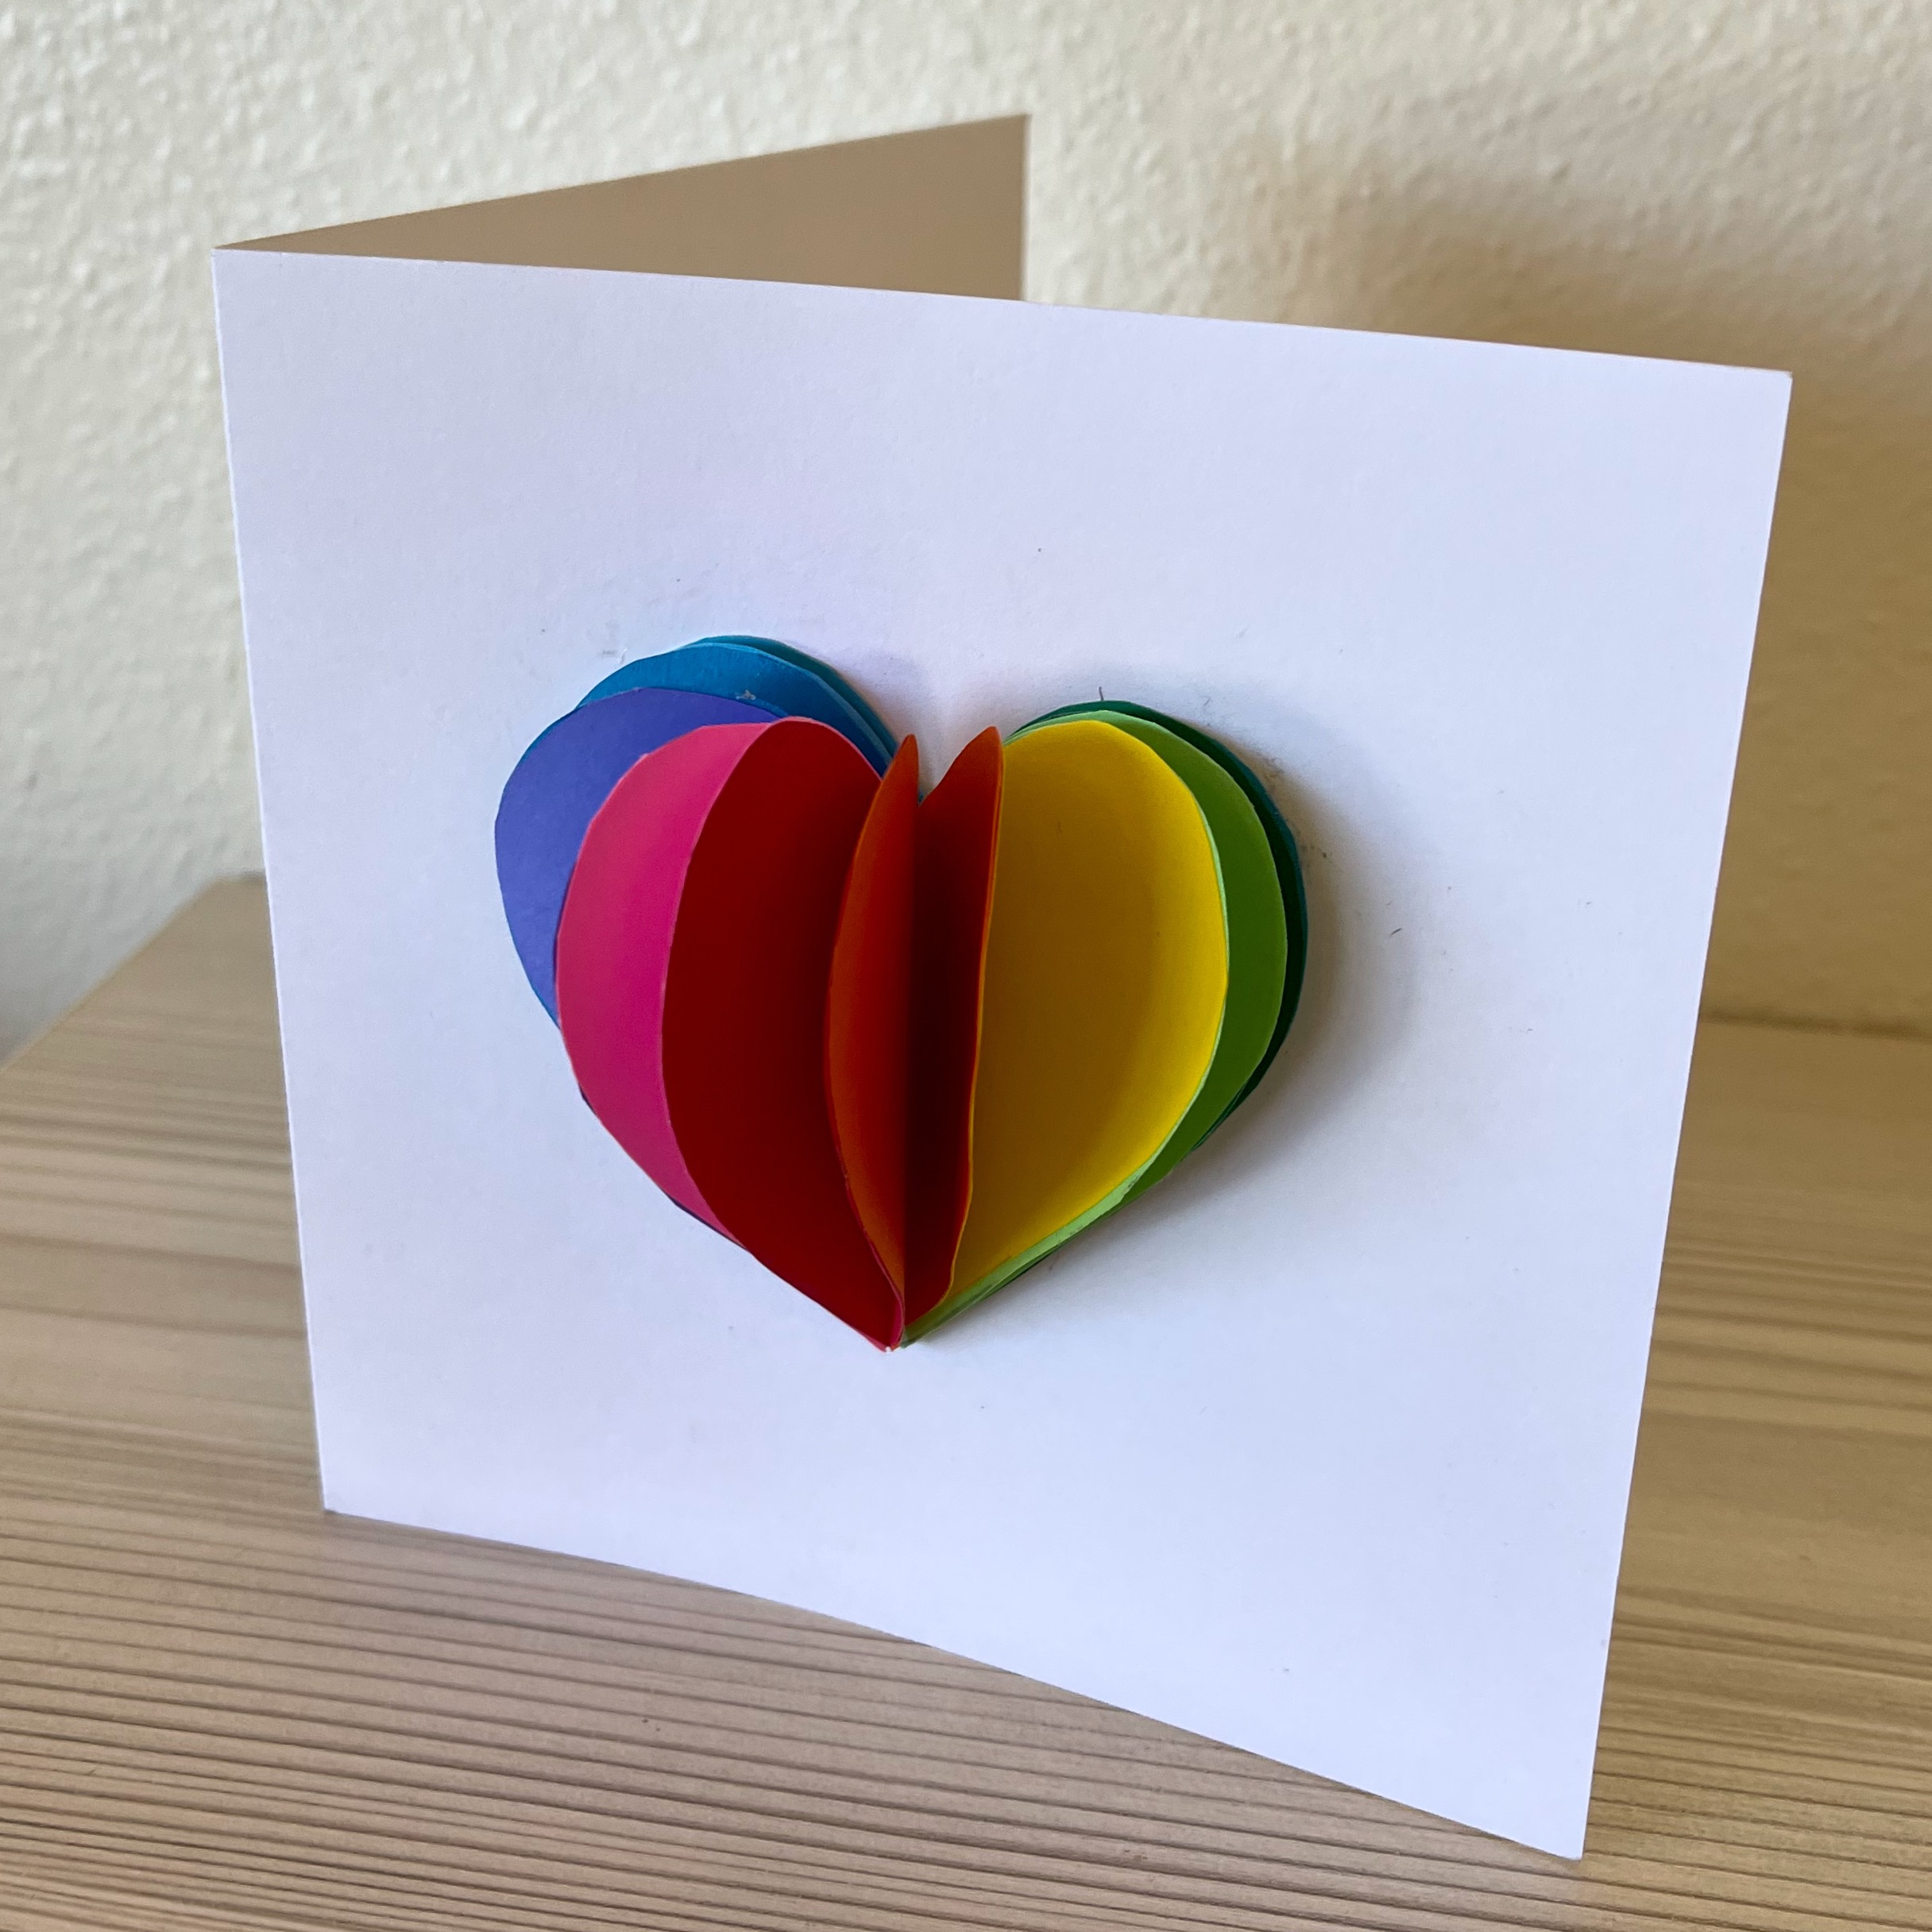
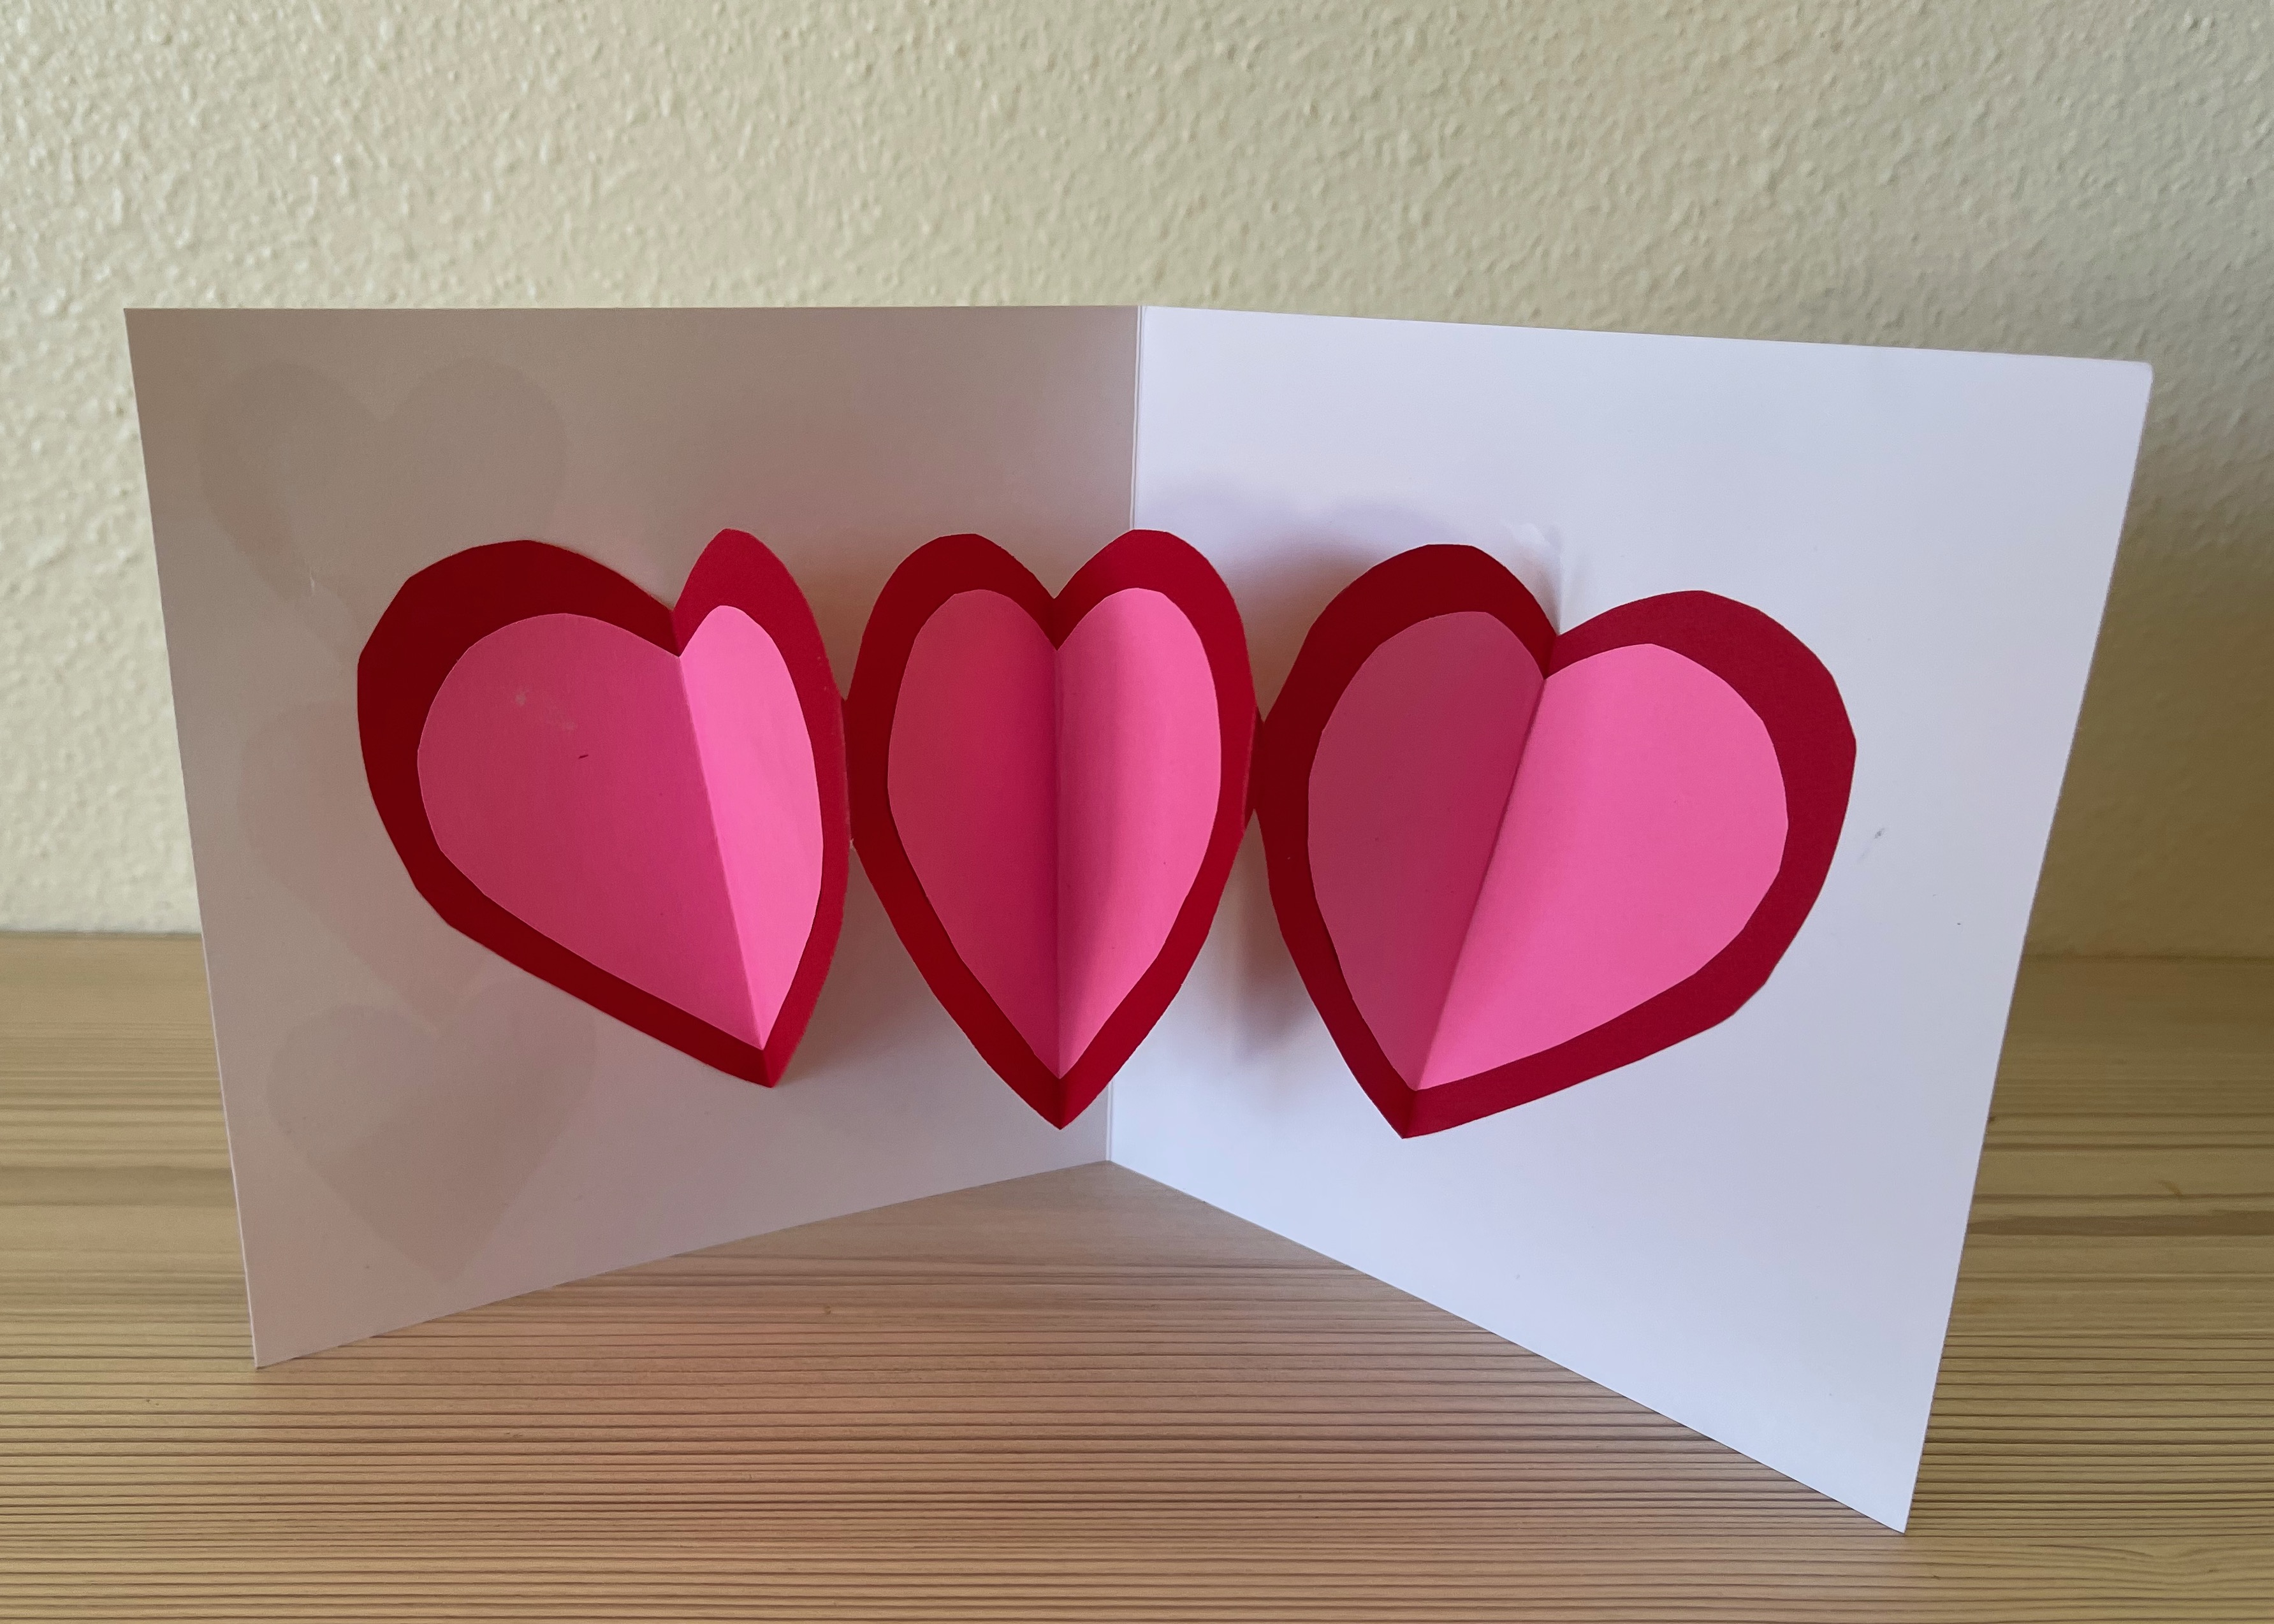
3-D VALENTINE CARD
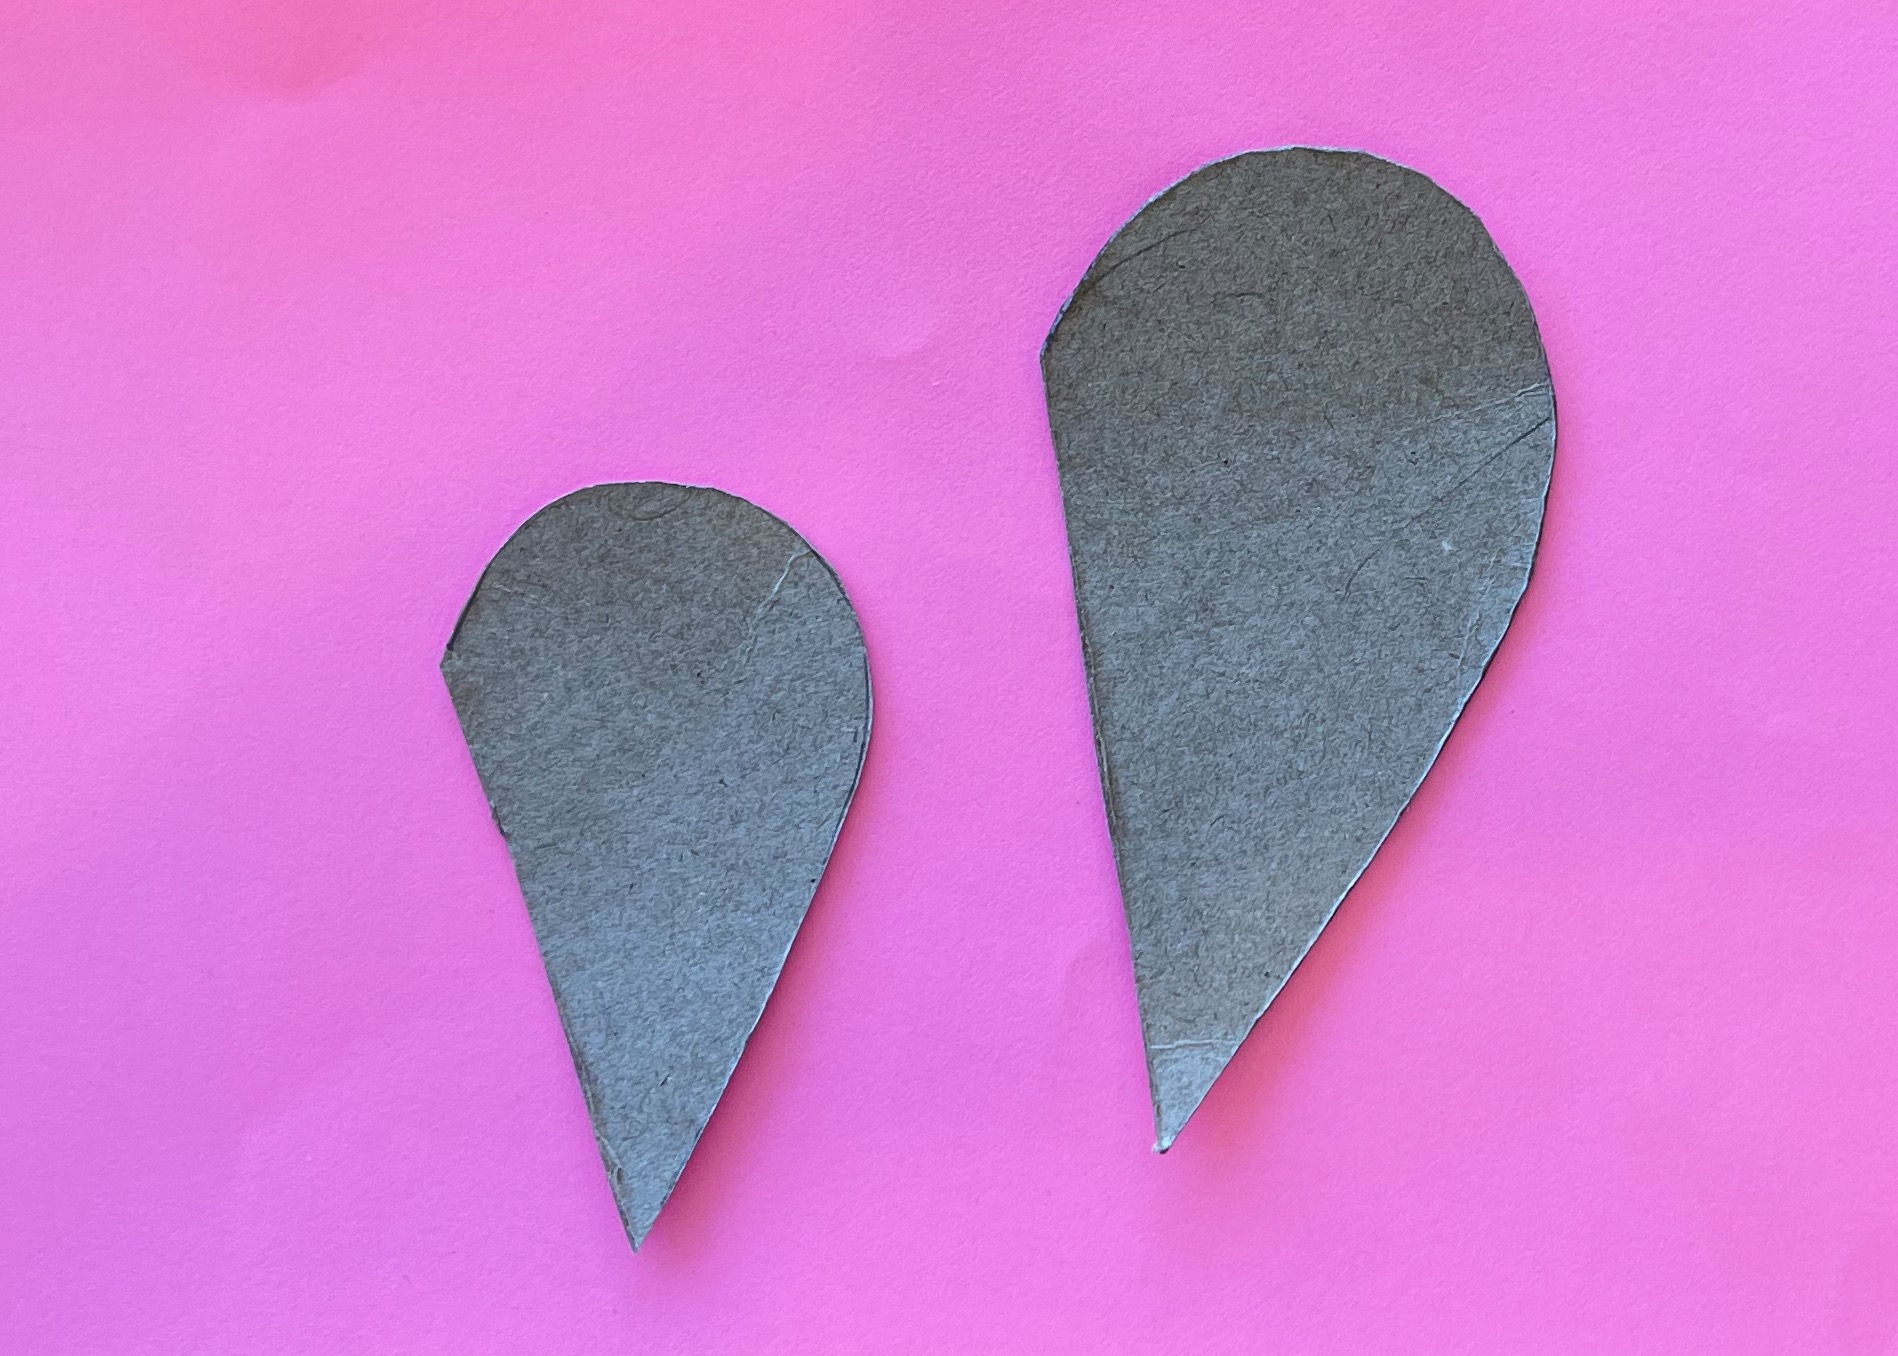
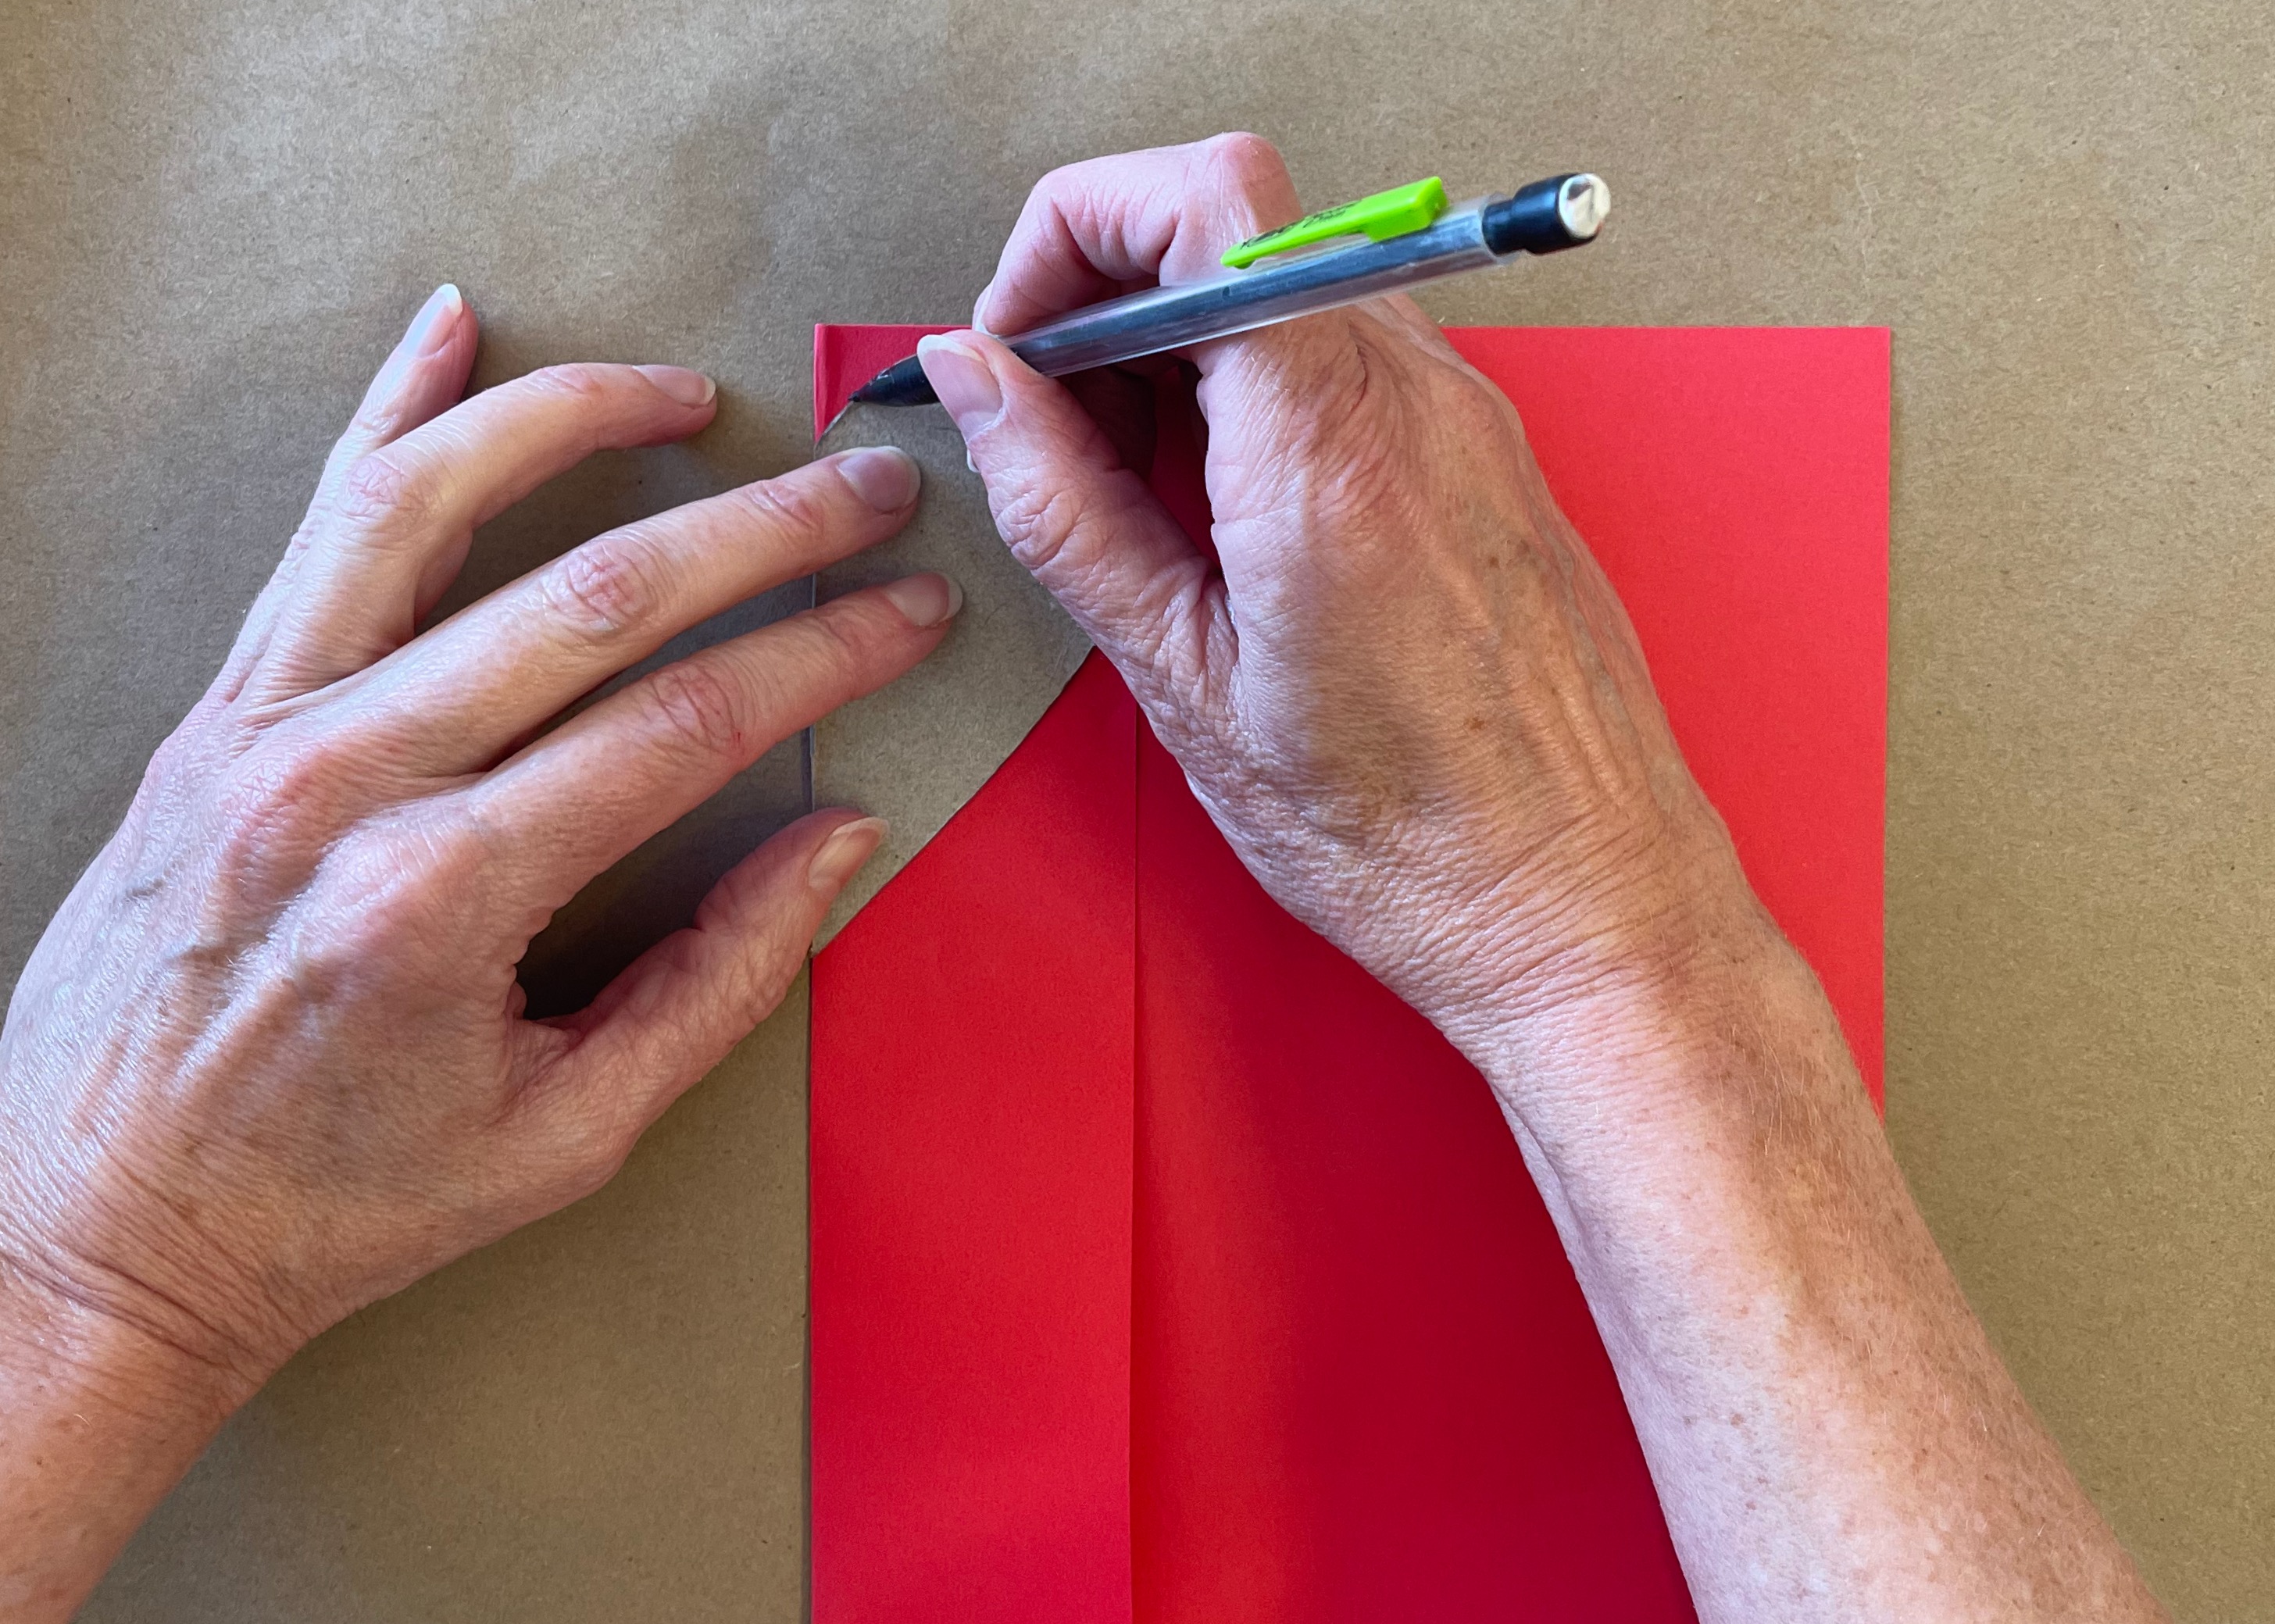
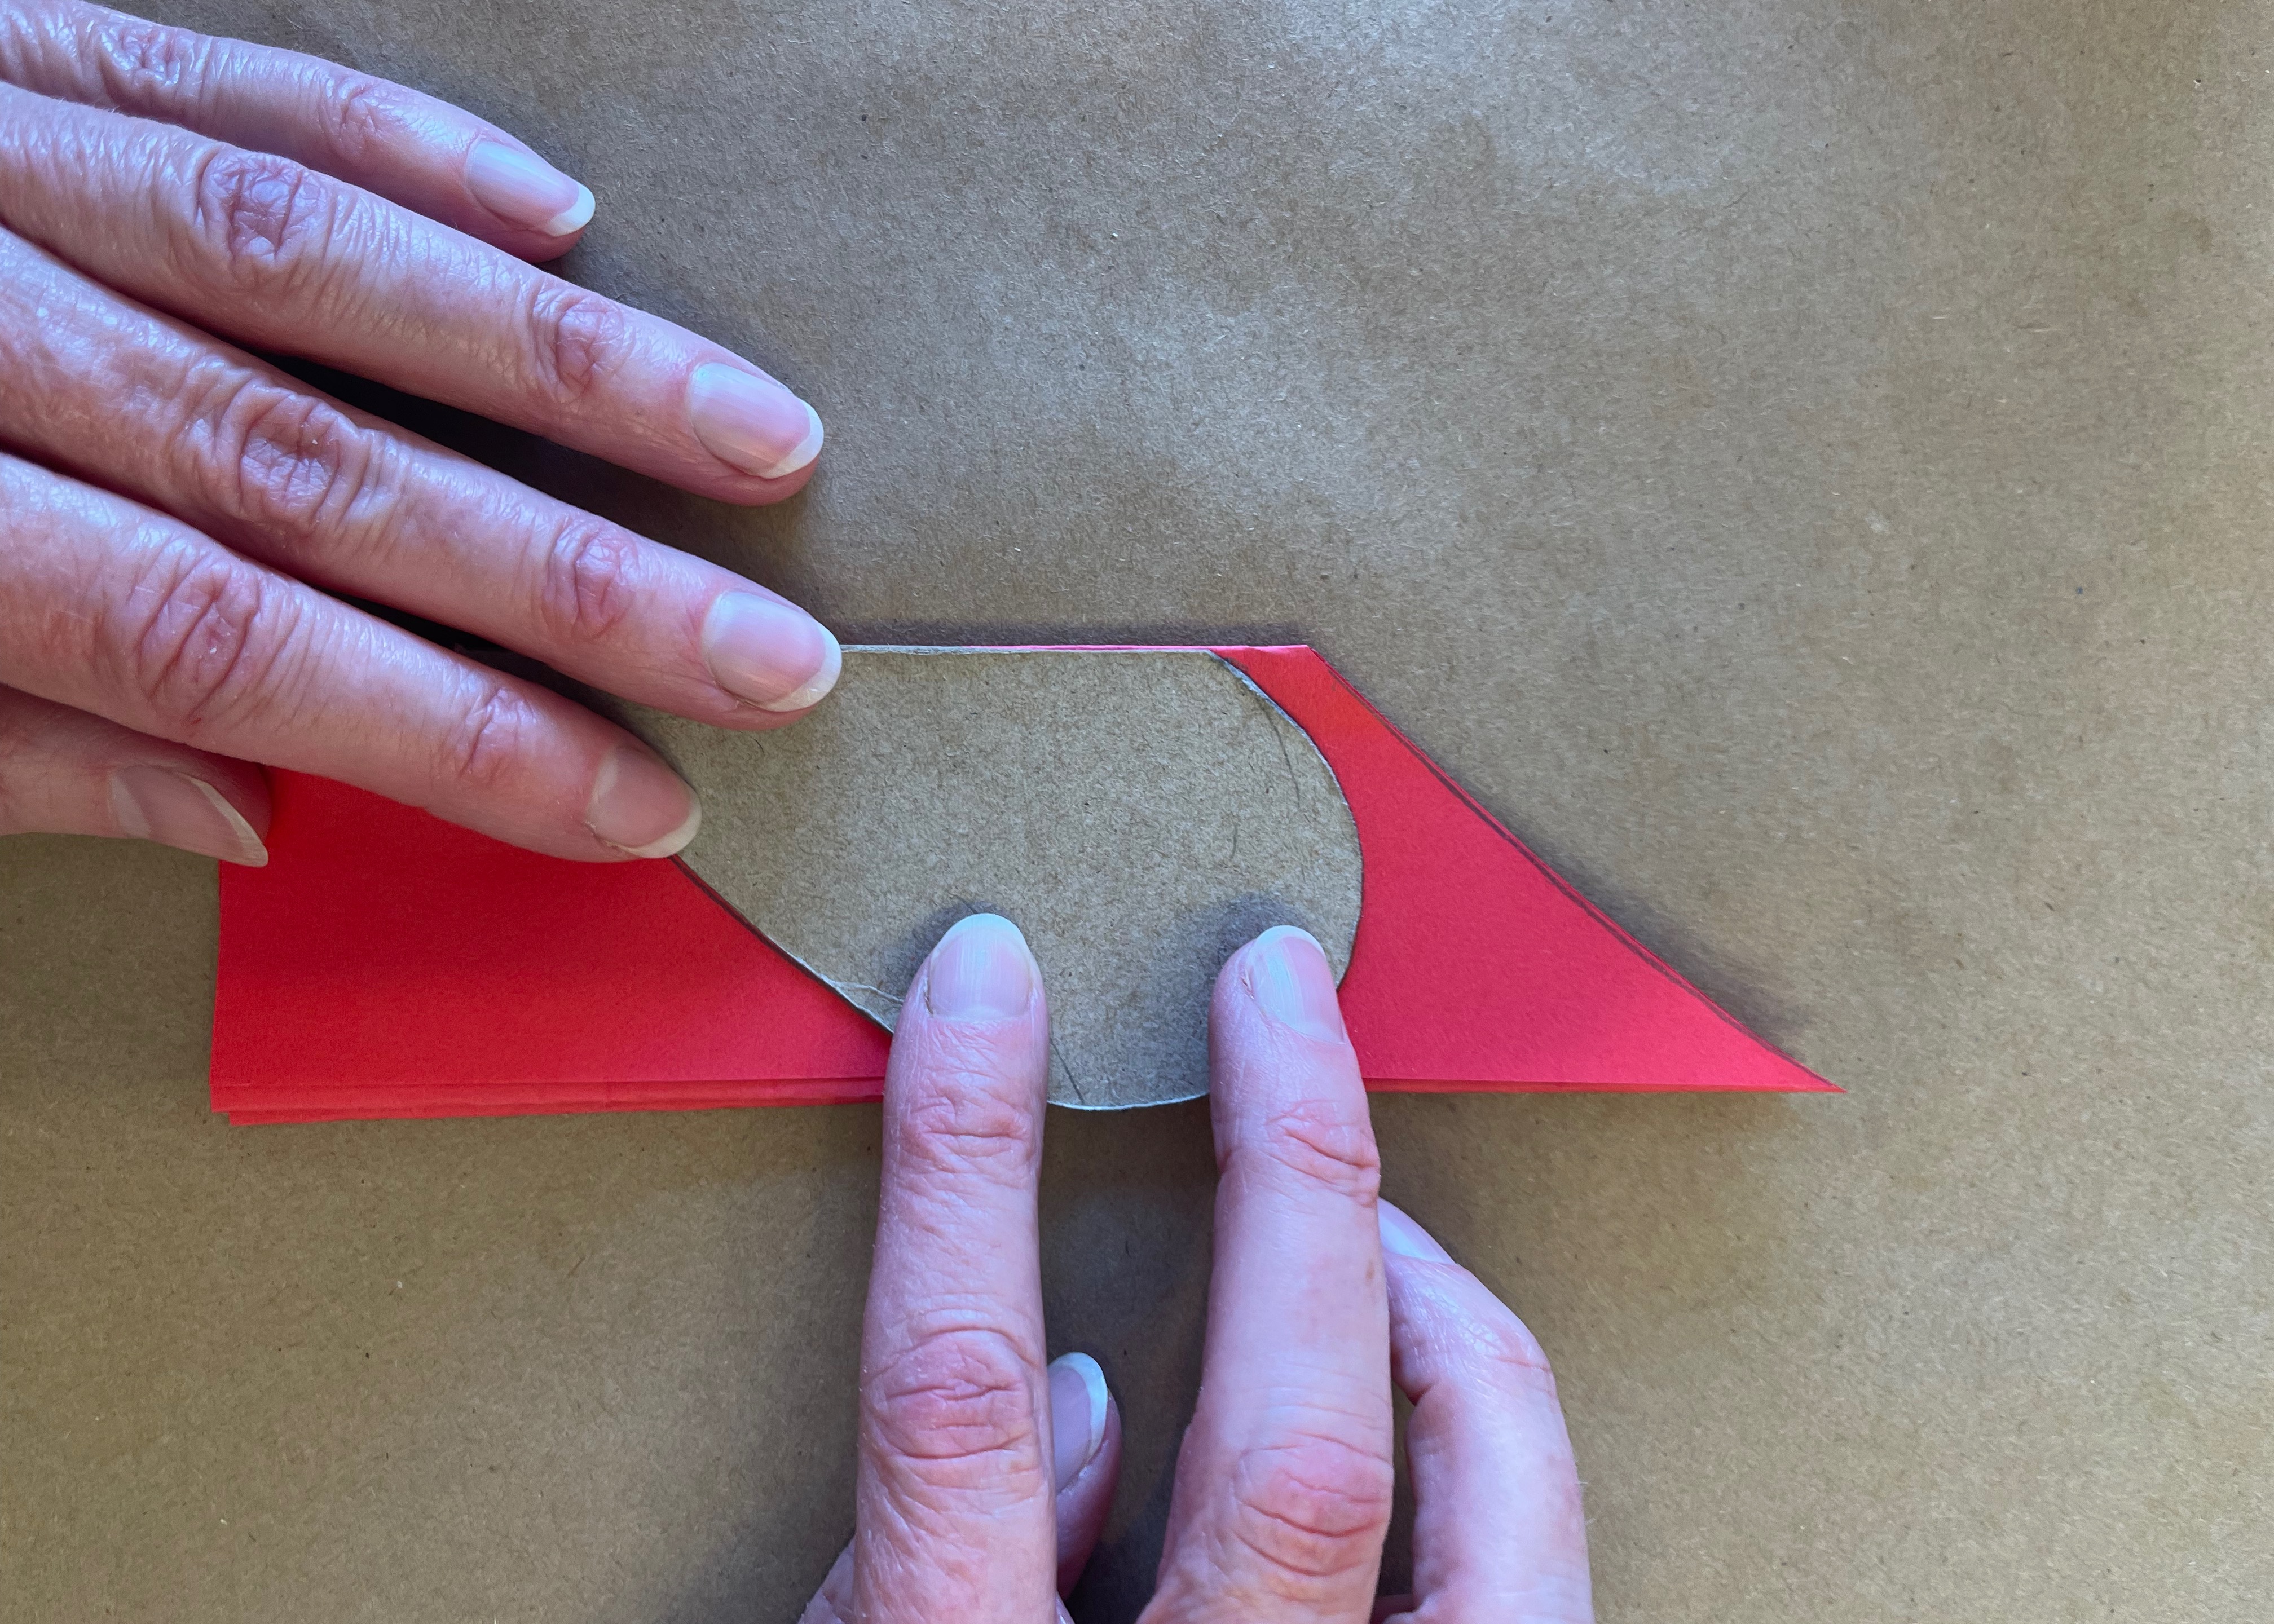
1) Create a template for your heart shapes using thin cardboard. We used a recycled cereal box to make ours.
2) Create a card using a letter size sheet of cardstock folded in half, or use a pre-made blank card.
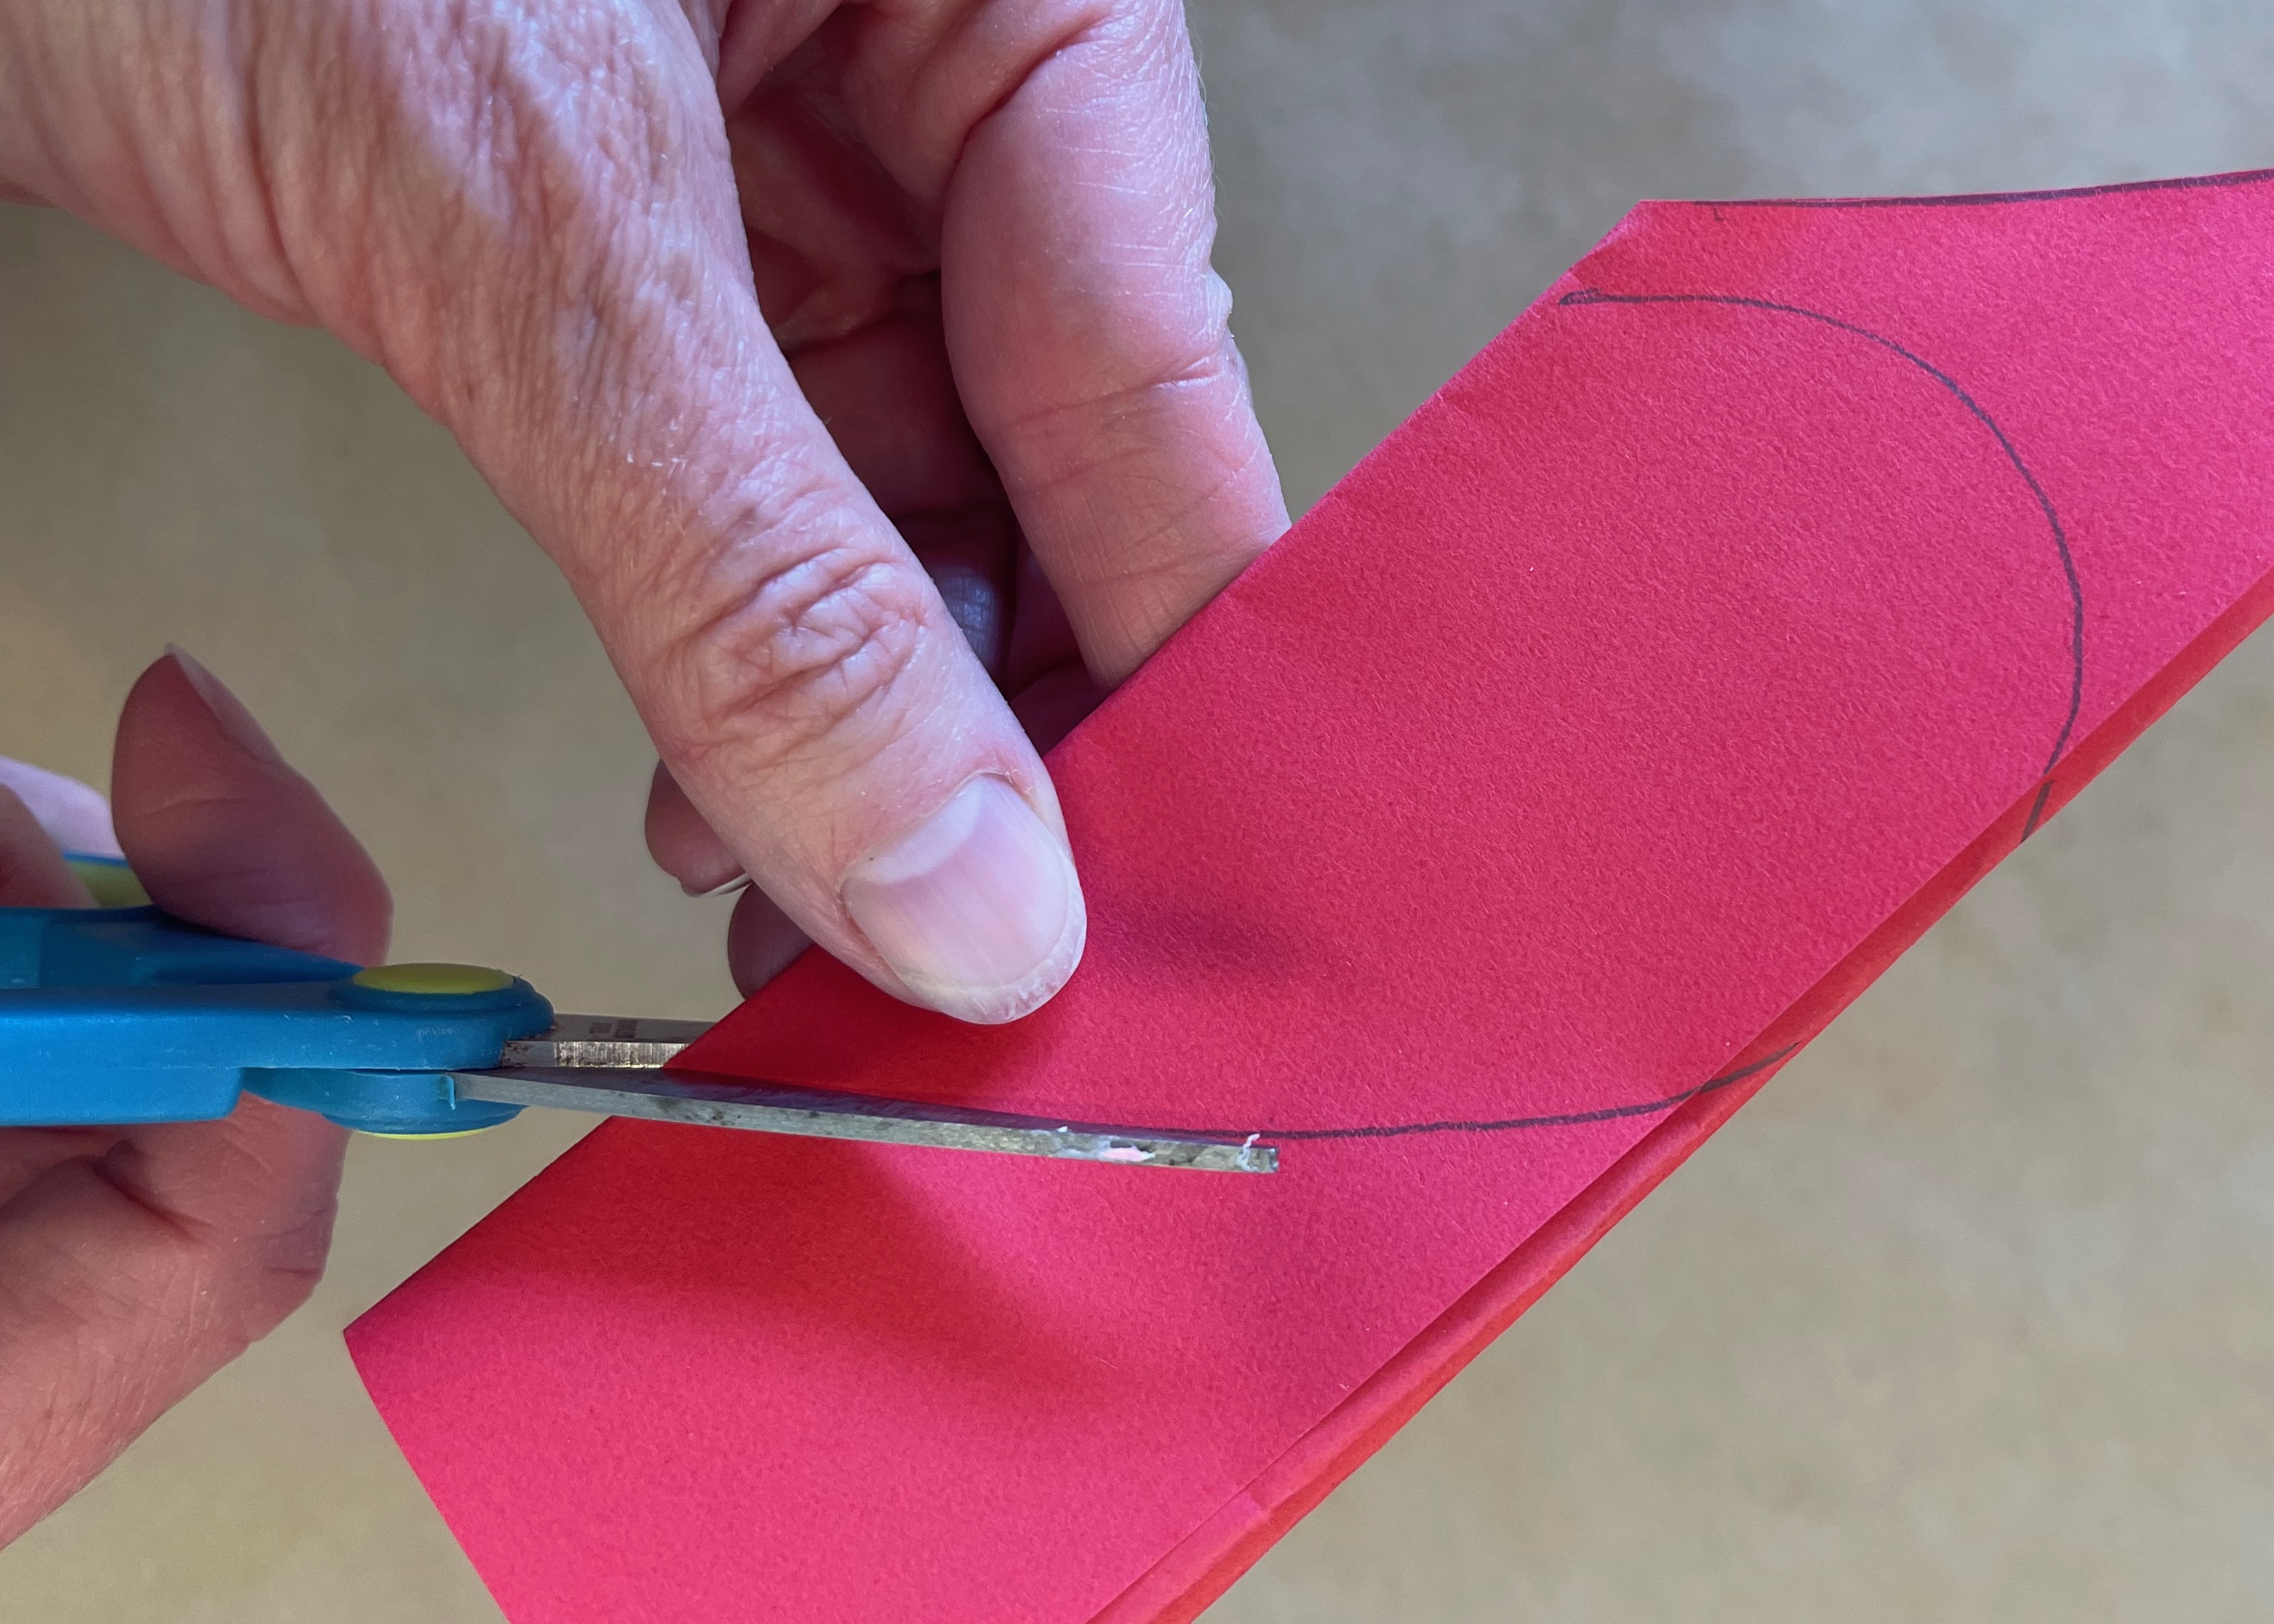
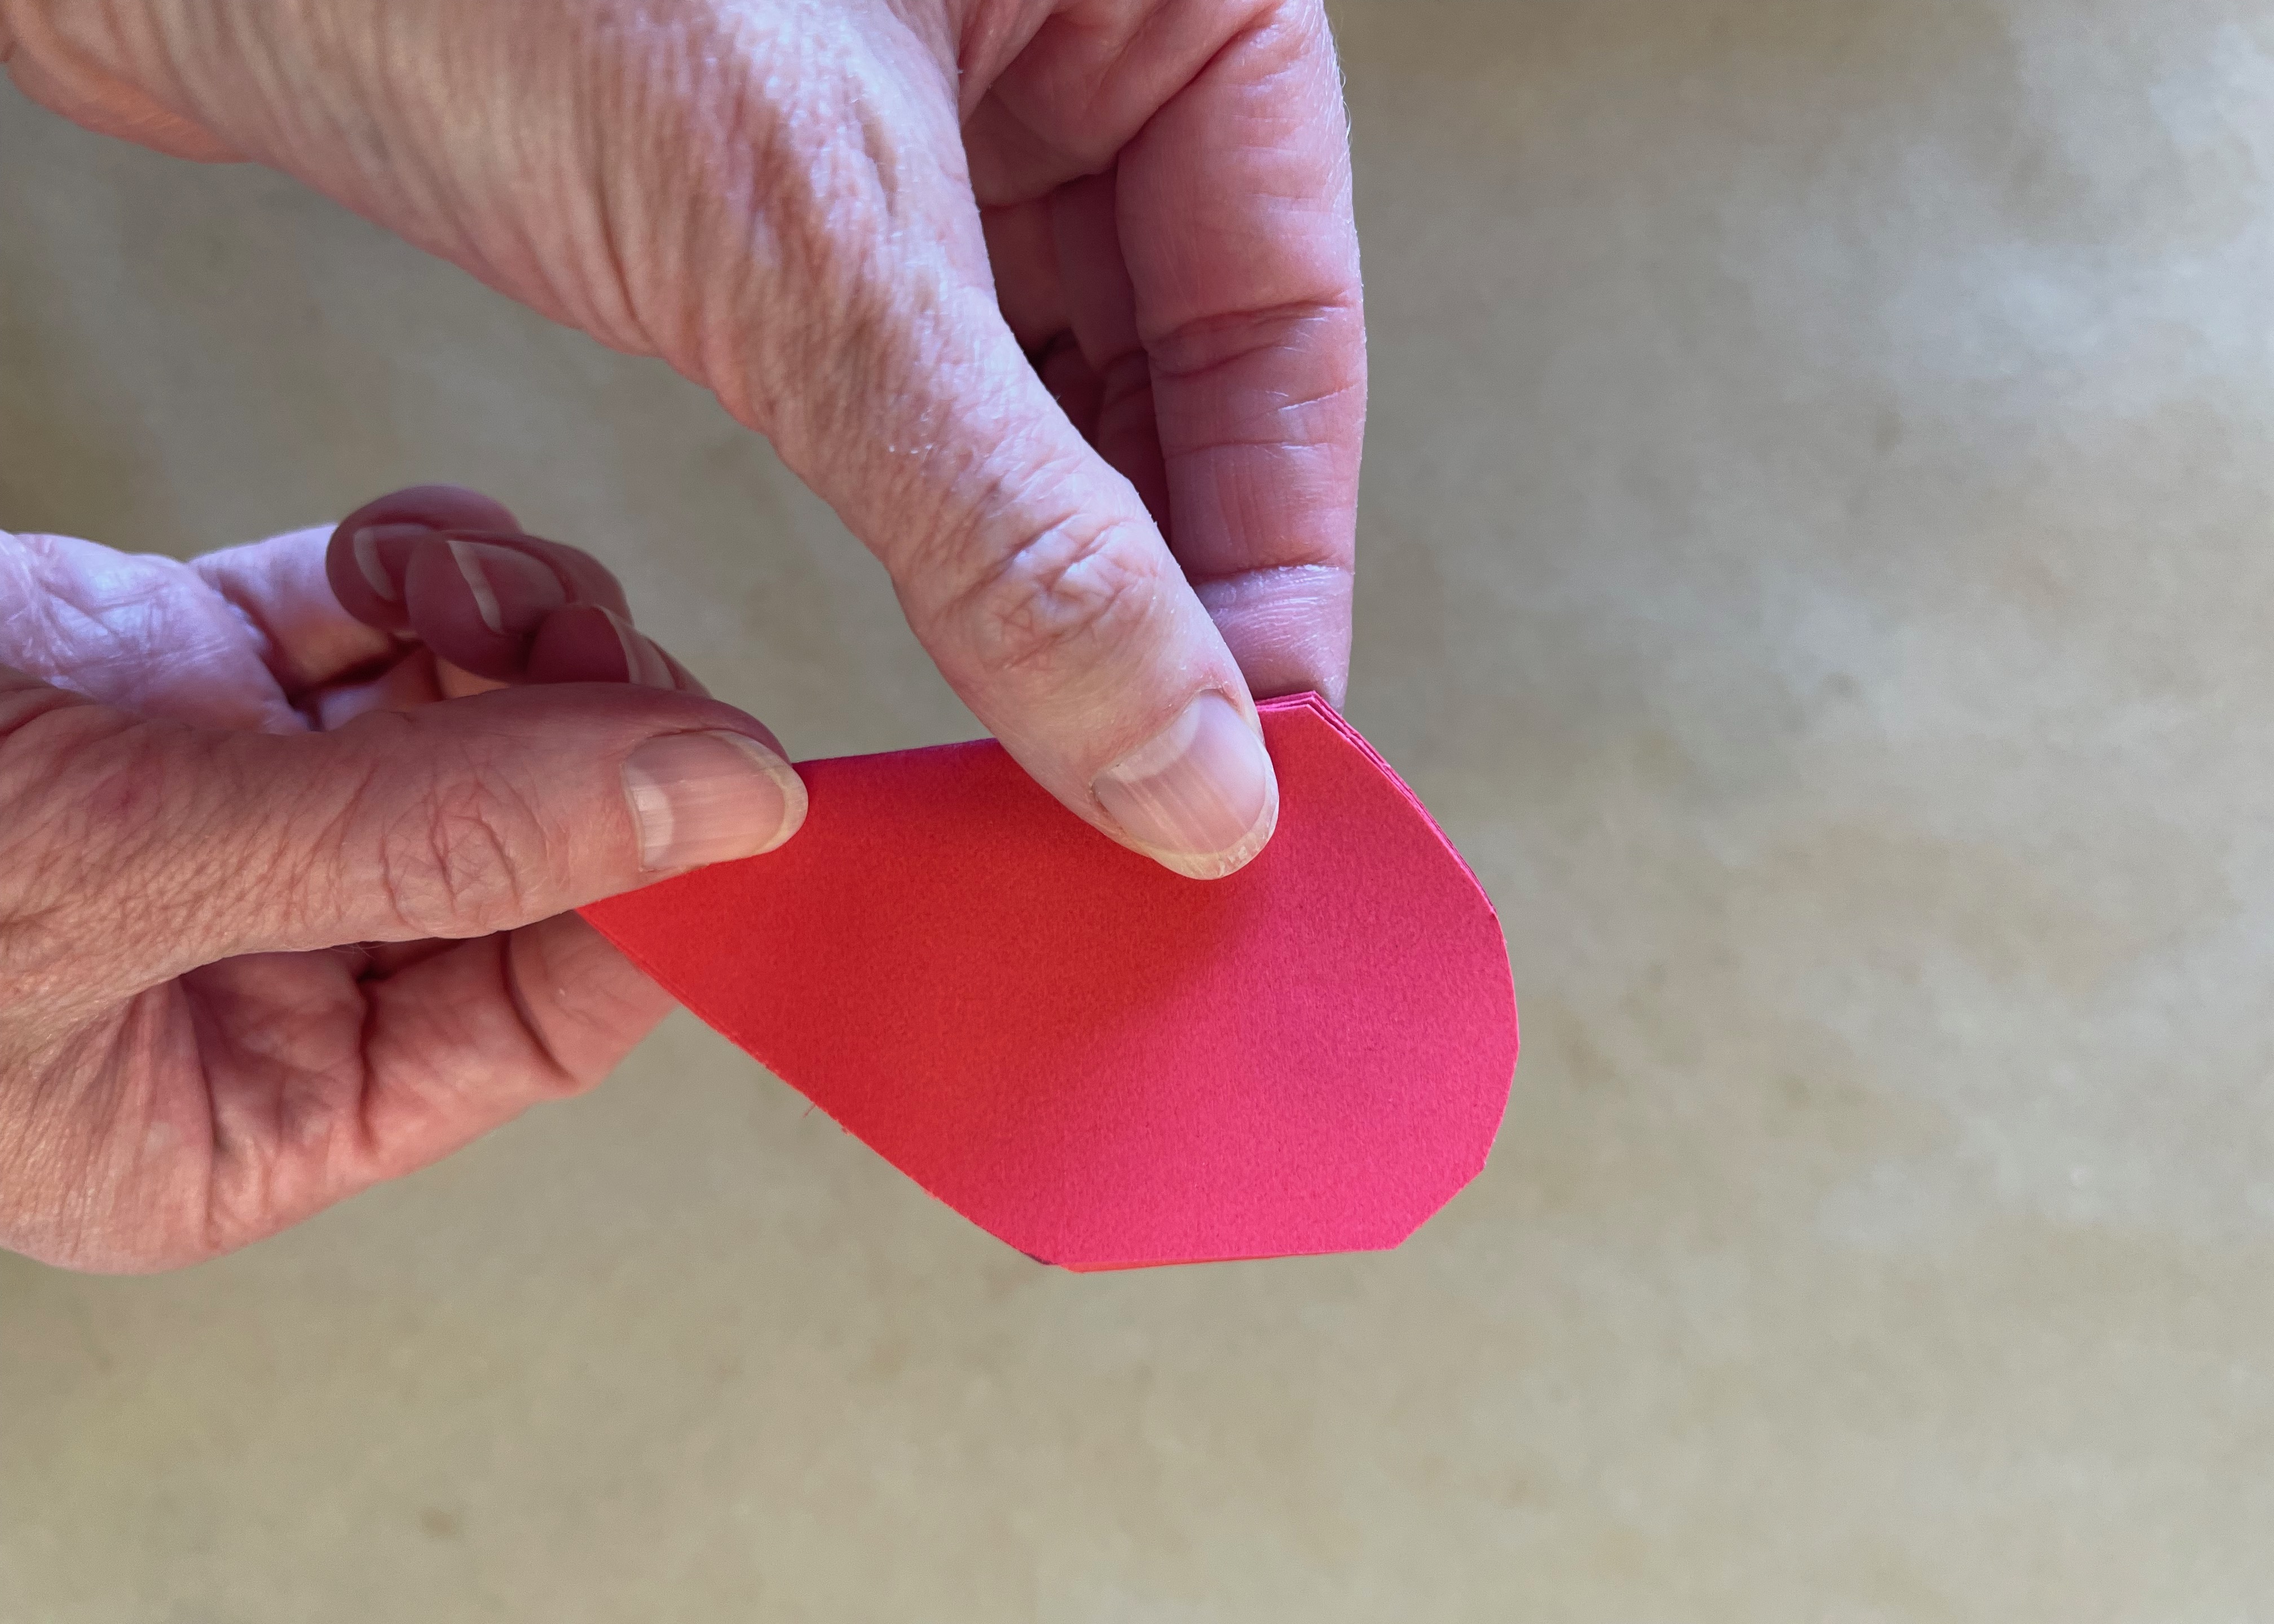
3) Fold one side of your colored paper to a width that will be just enough for your heart template, and place the straight side on the fold. Outline the template with a pencil and cut out. Repeat, cutting out 12-15 hearts in the colors of your choice. We did red and pink, as well as rainbow for our designs.
4) Glue the first heart to the center of the card.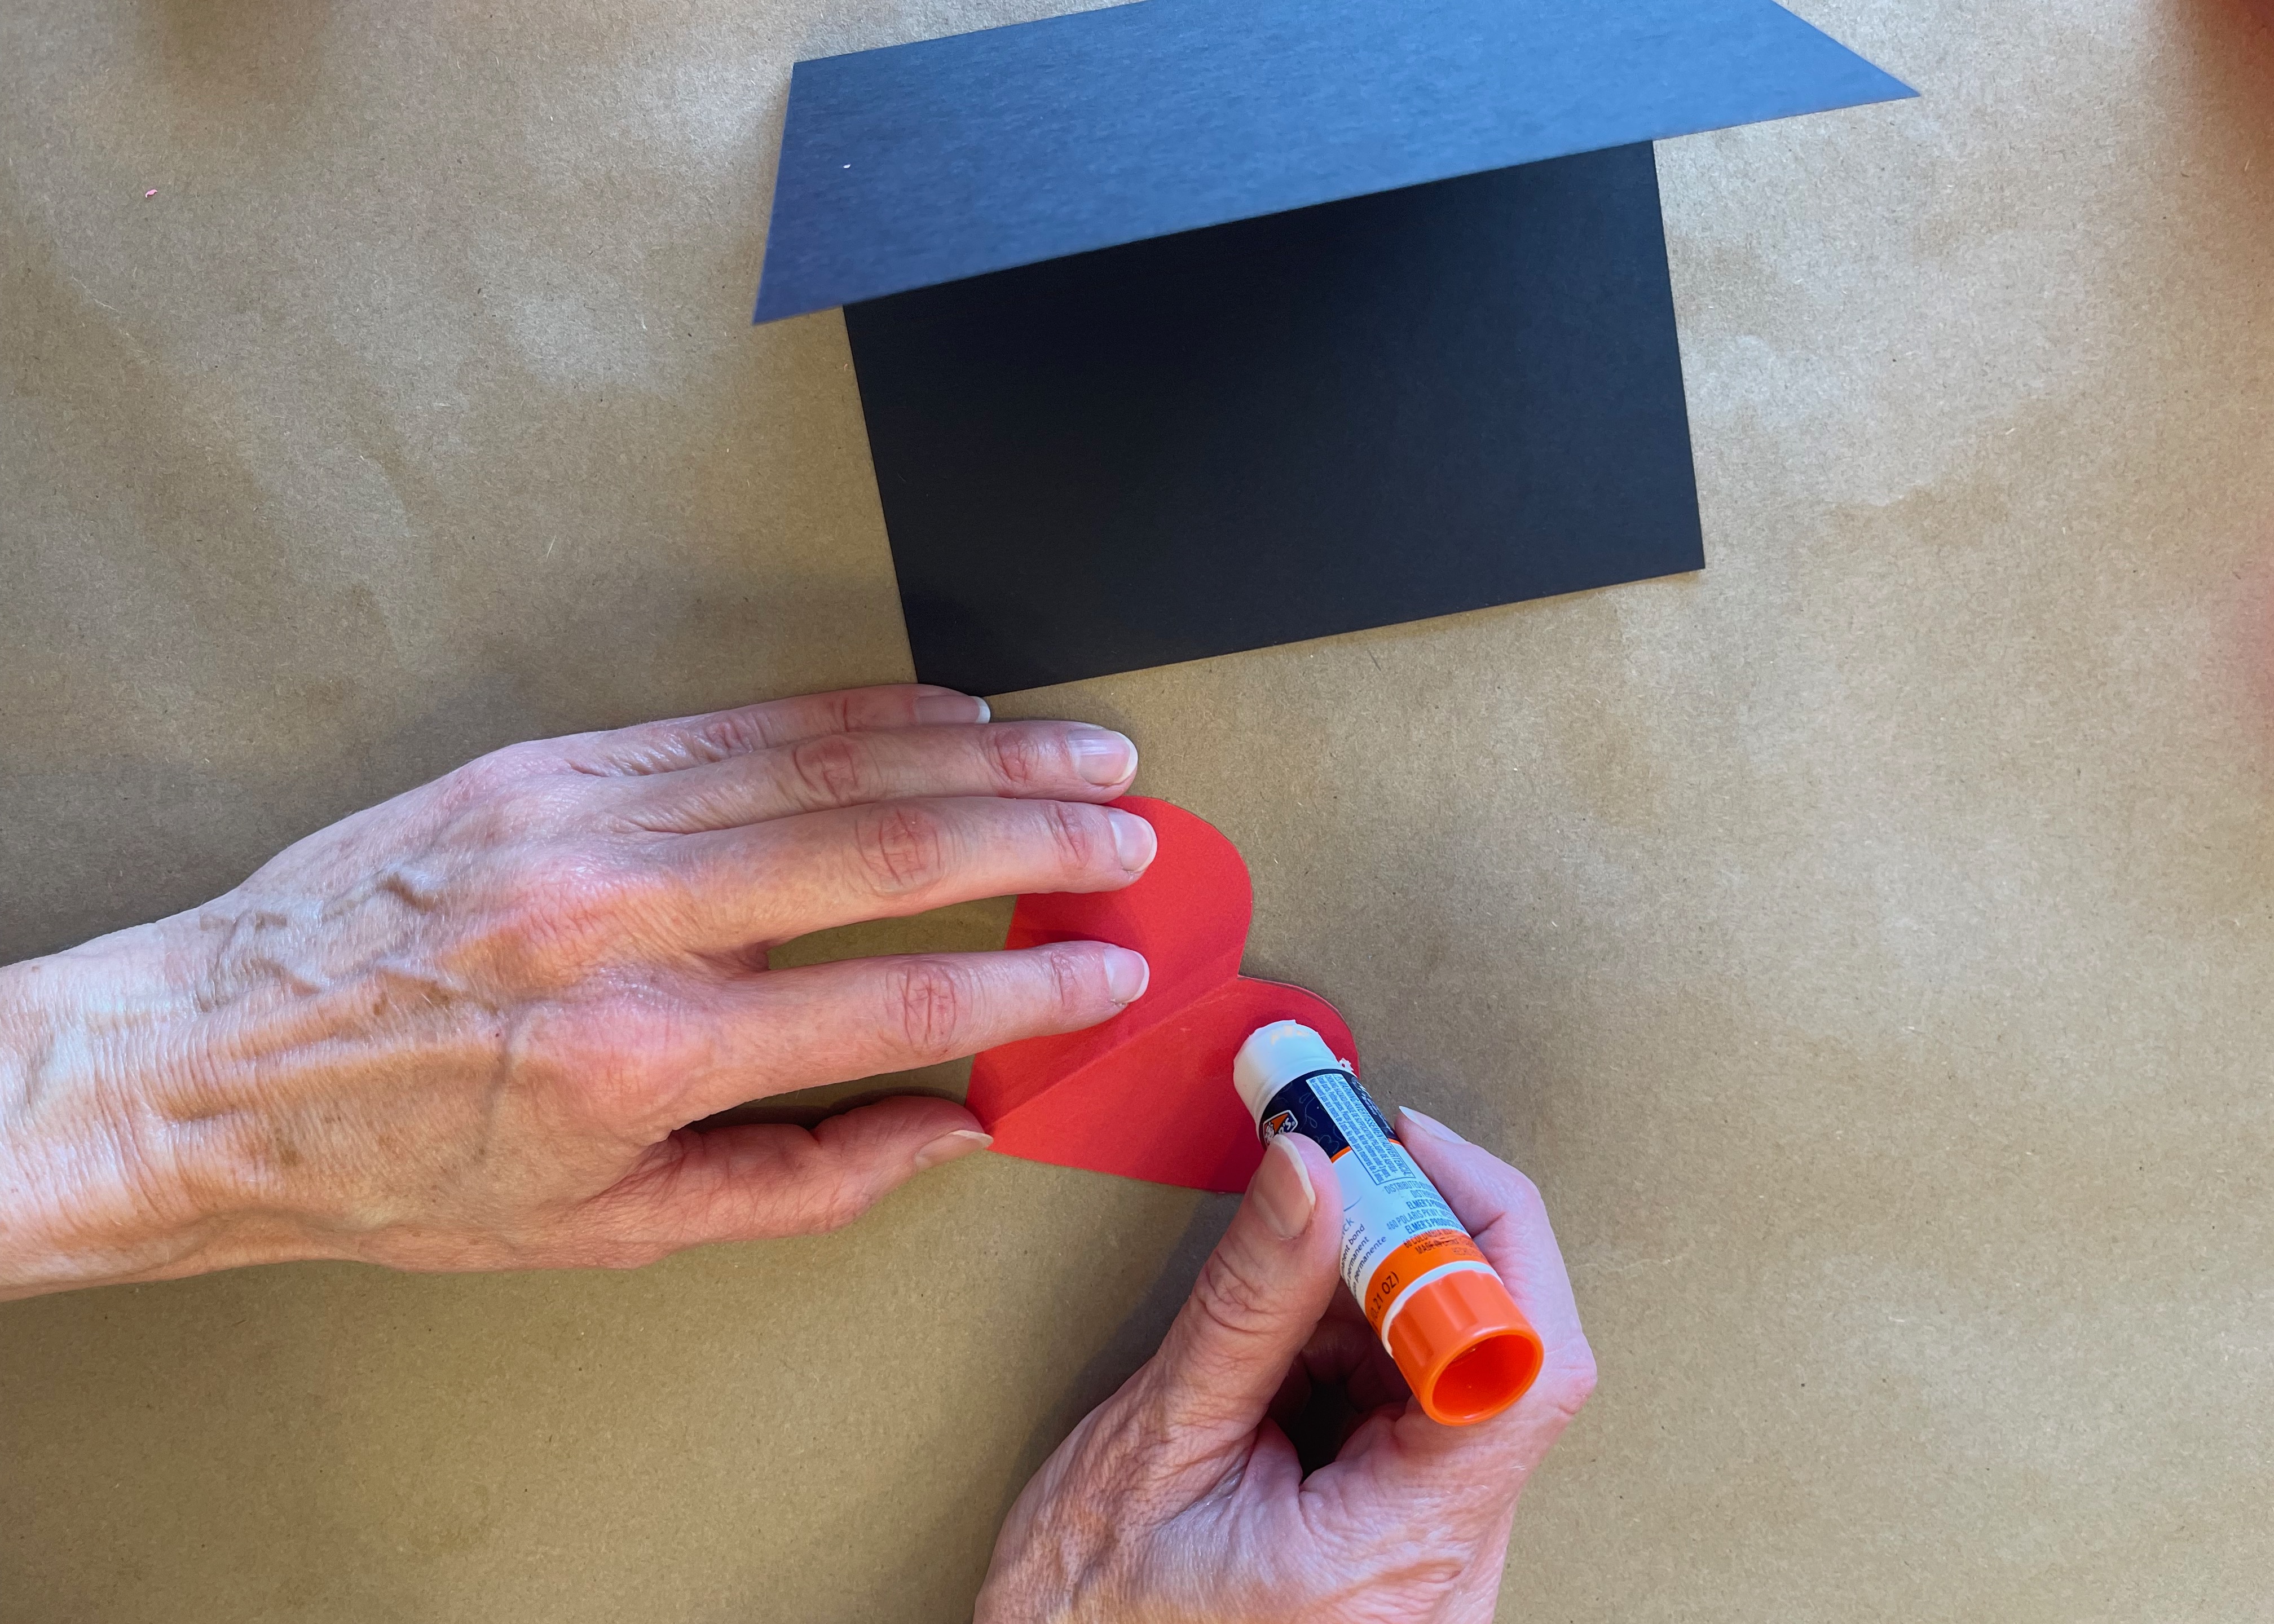
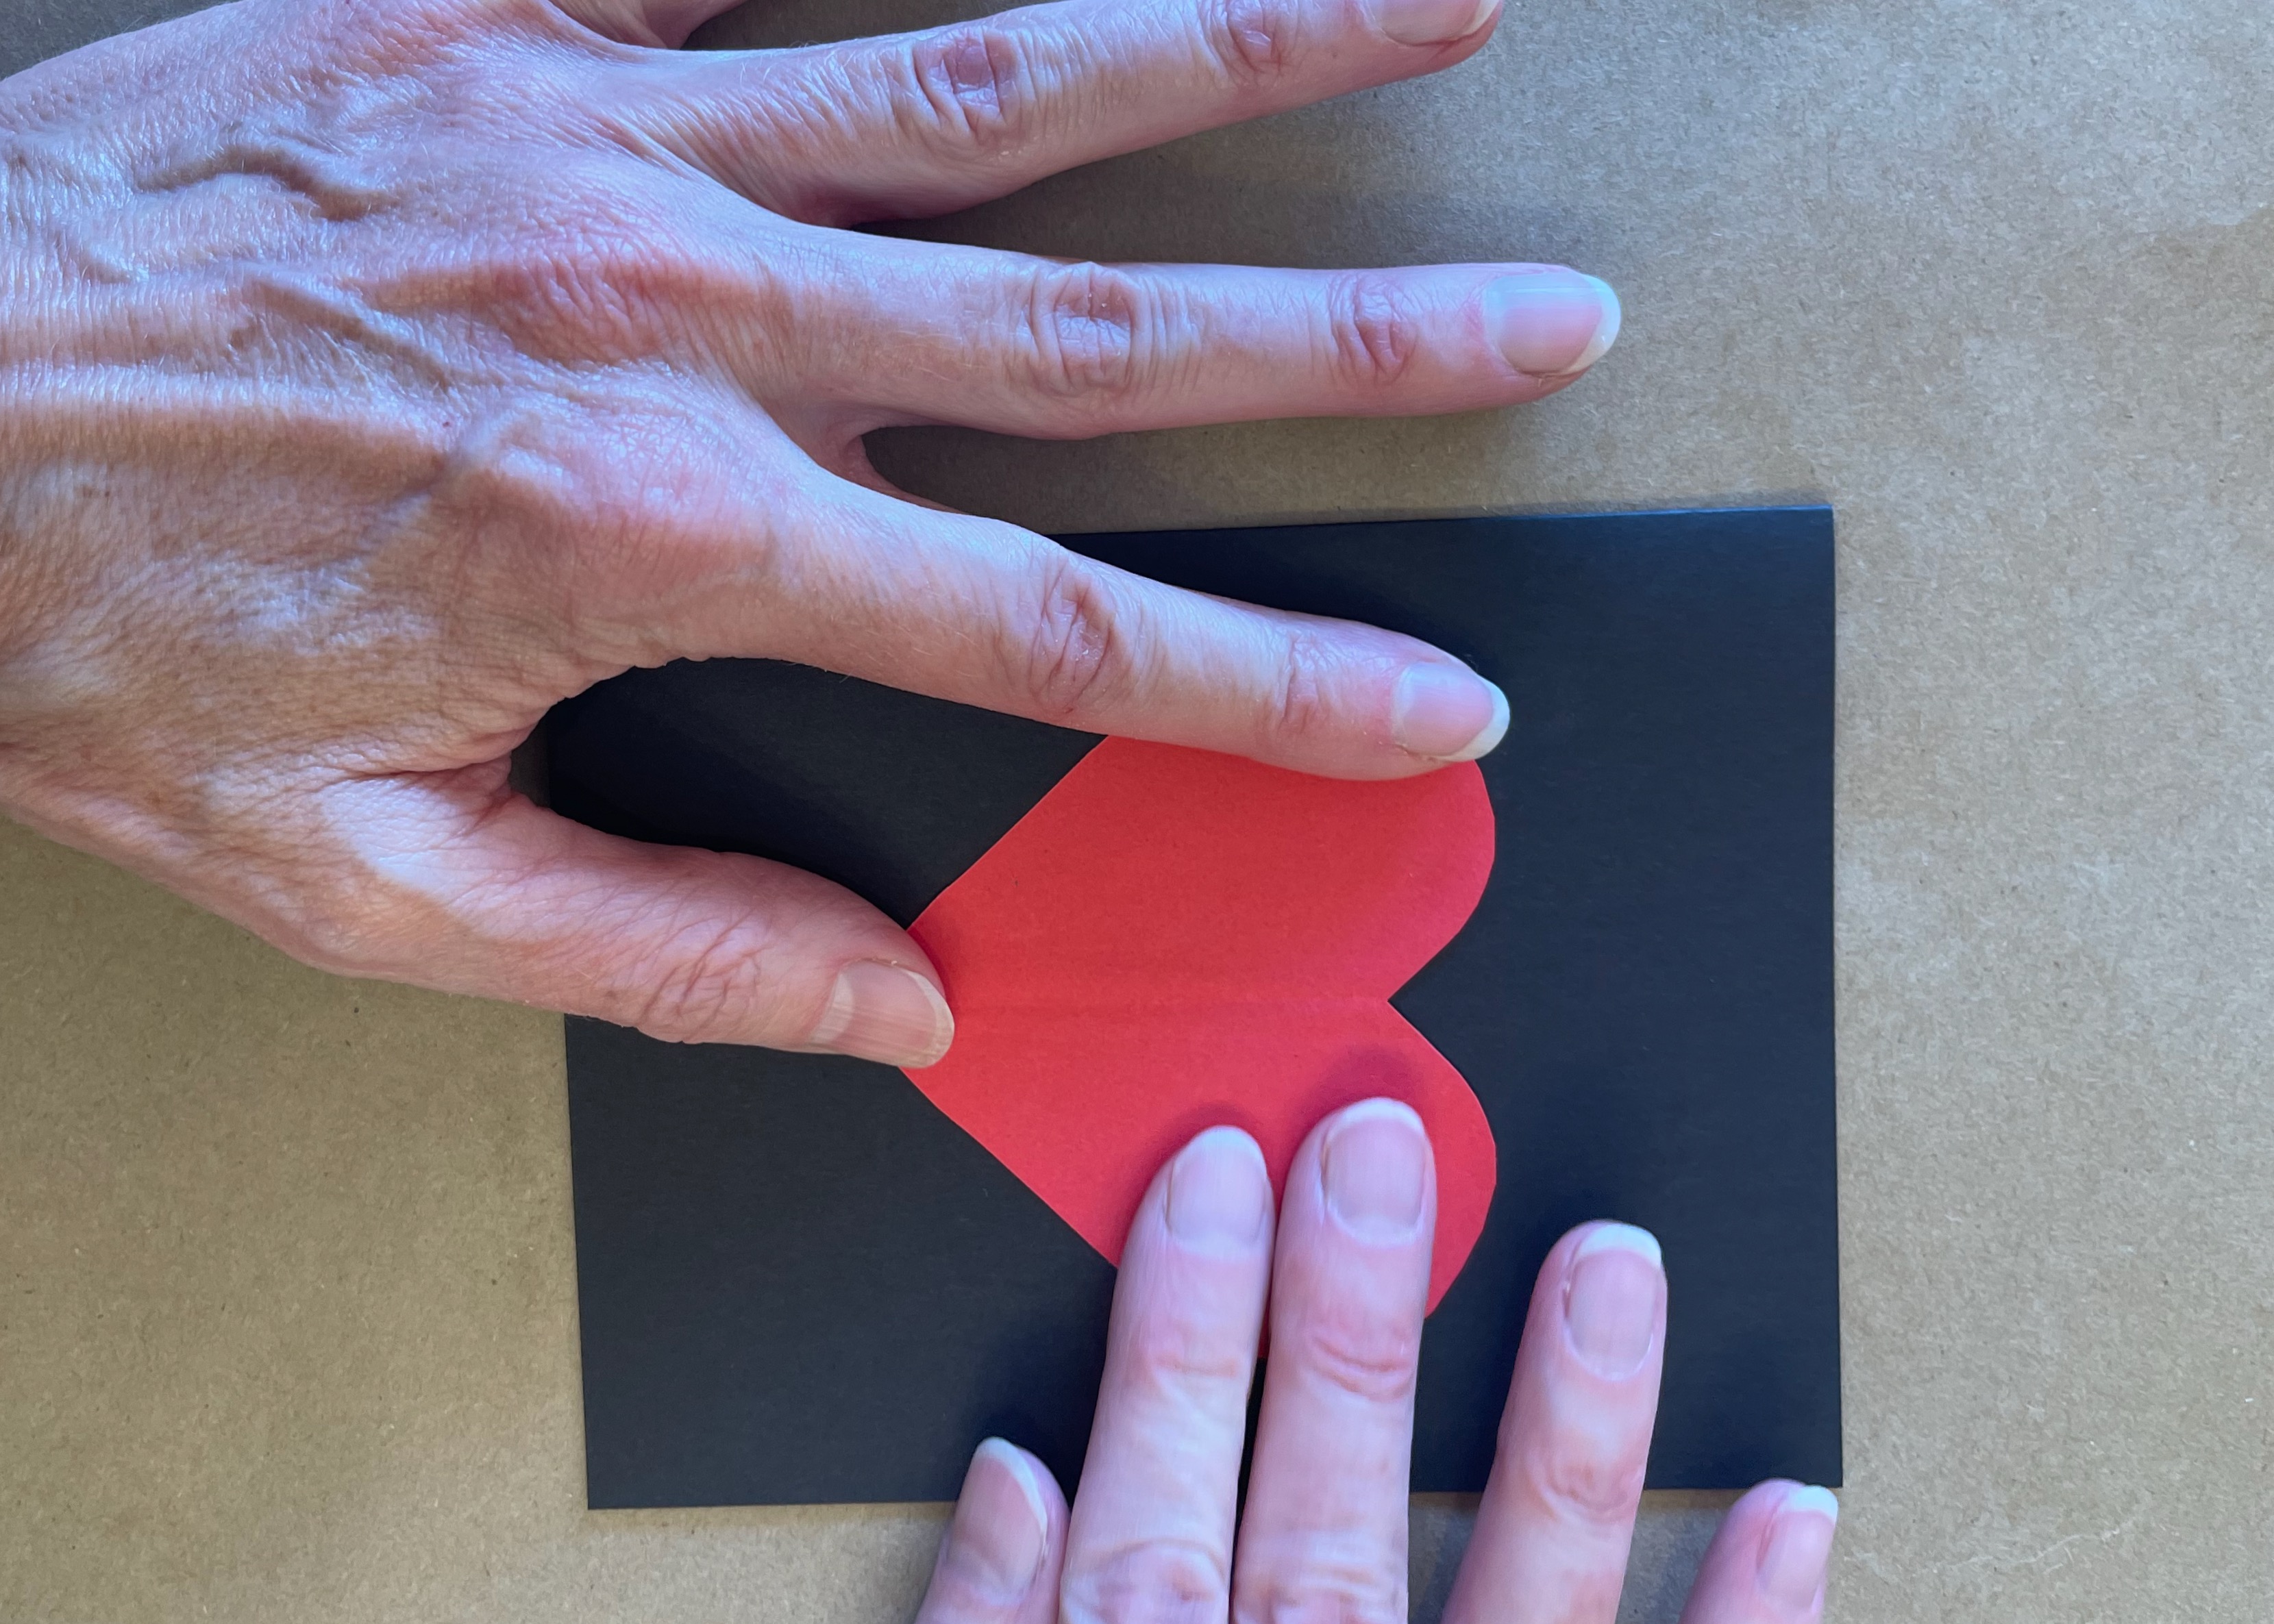
5)Next, glue a folded heart on the left side, and another on the right side, and continue to repeat until you have only one heart left.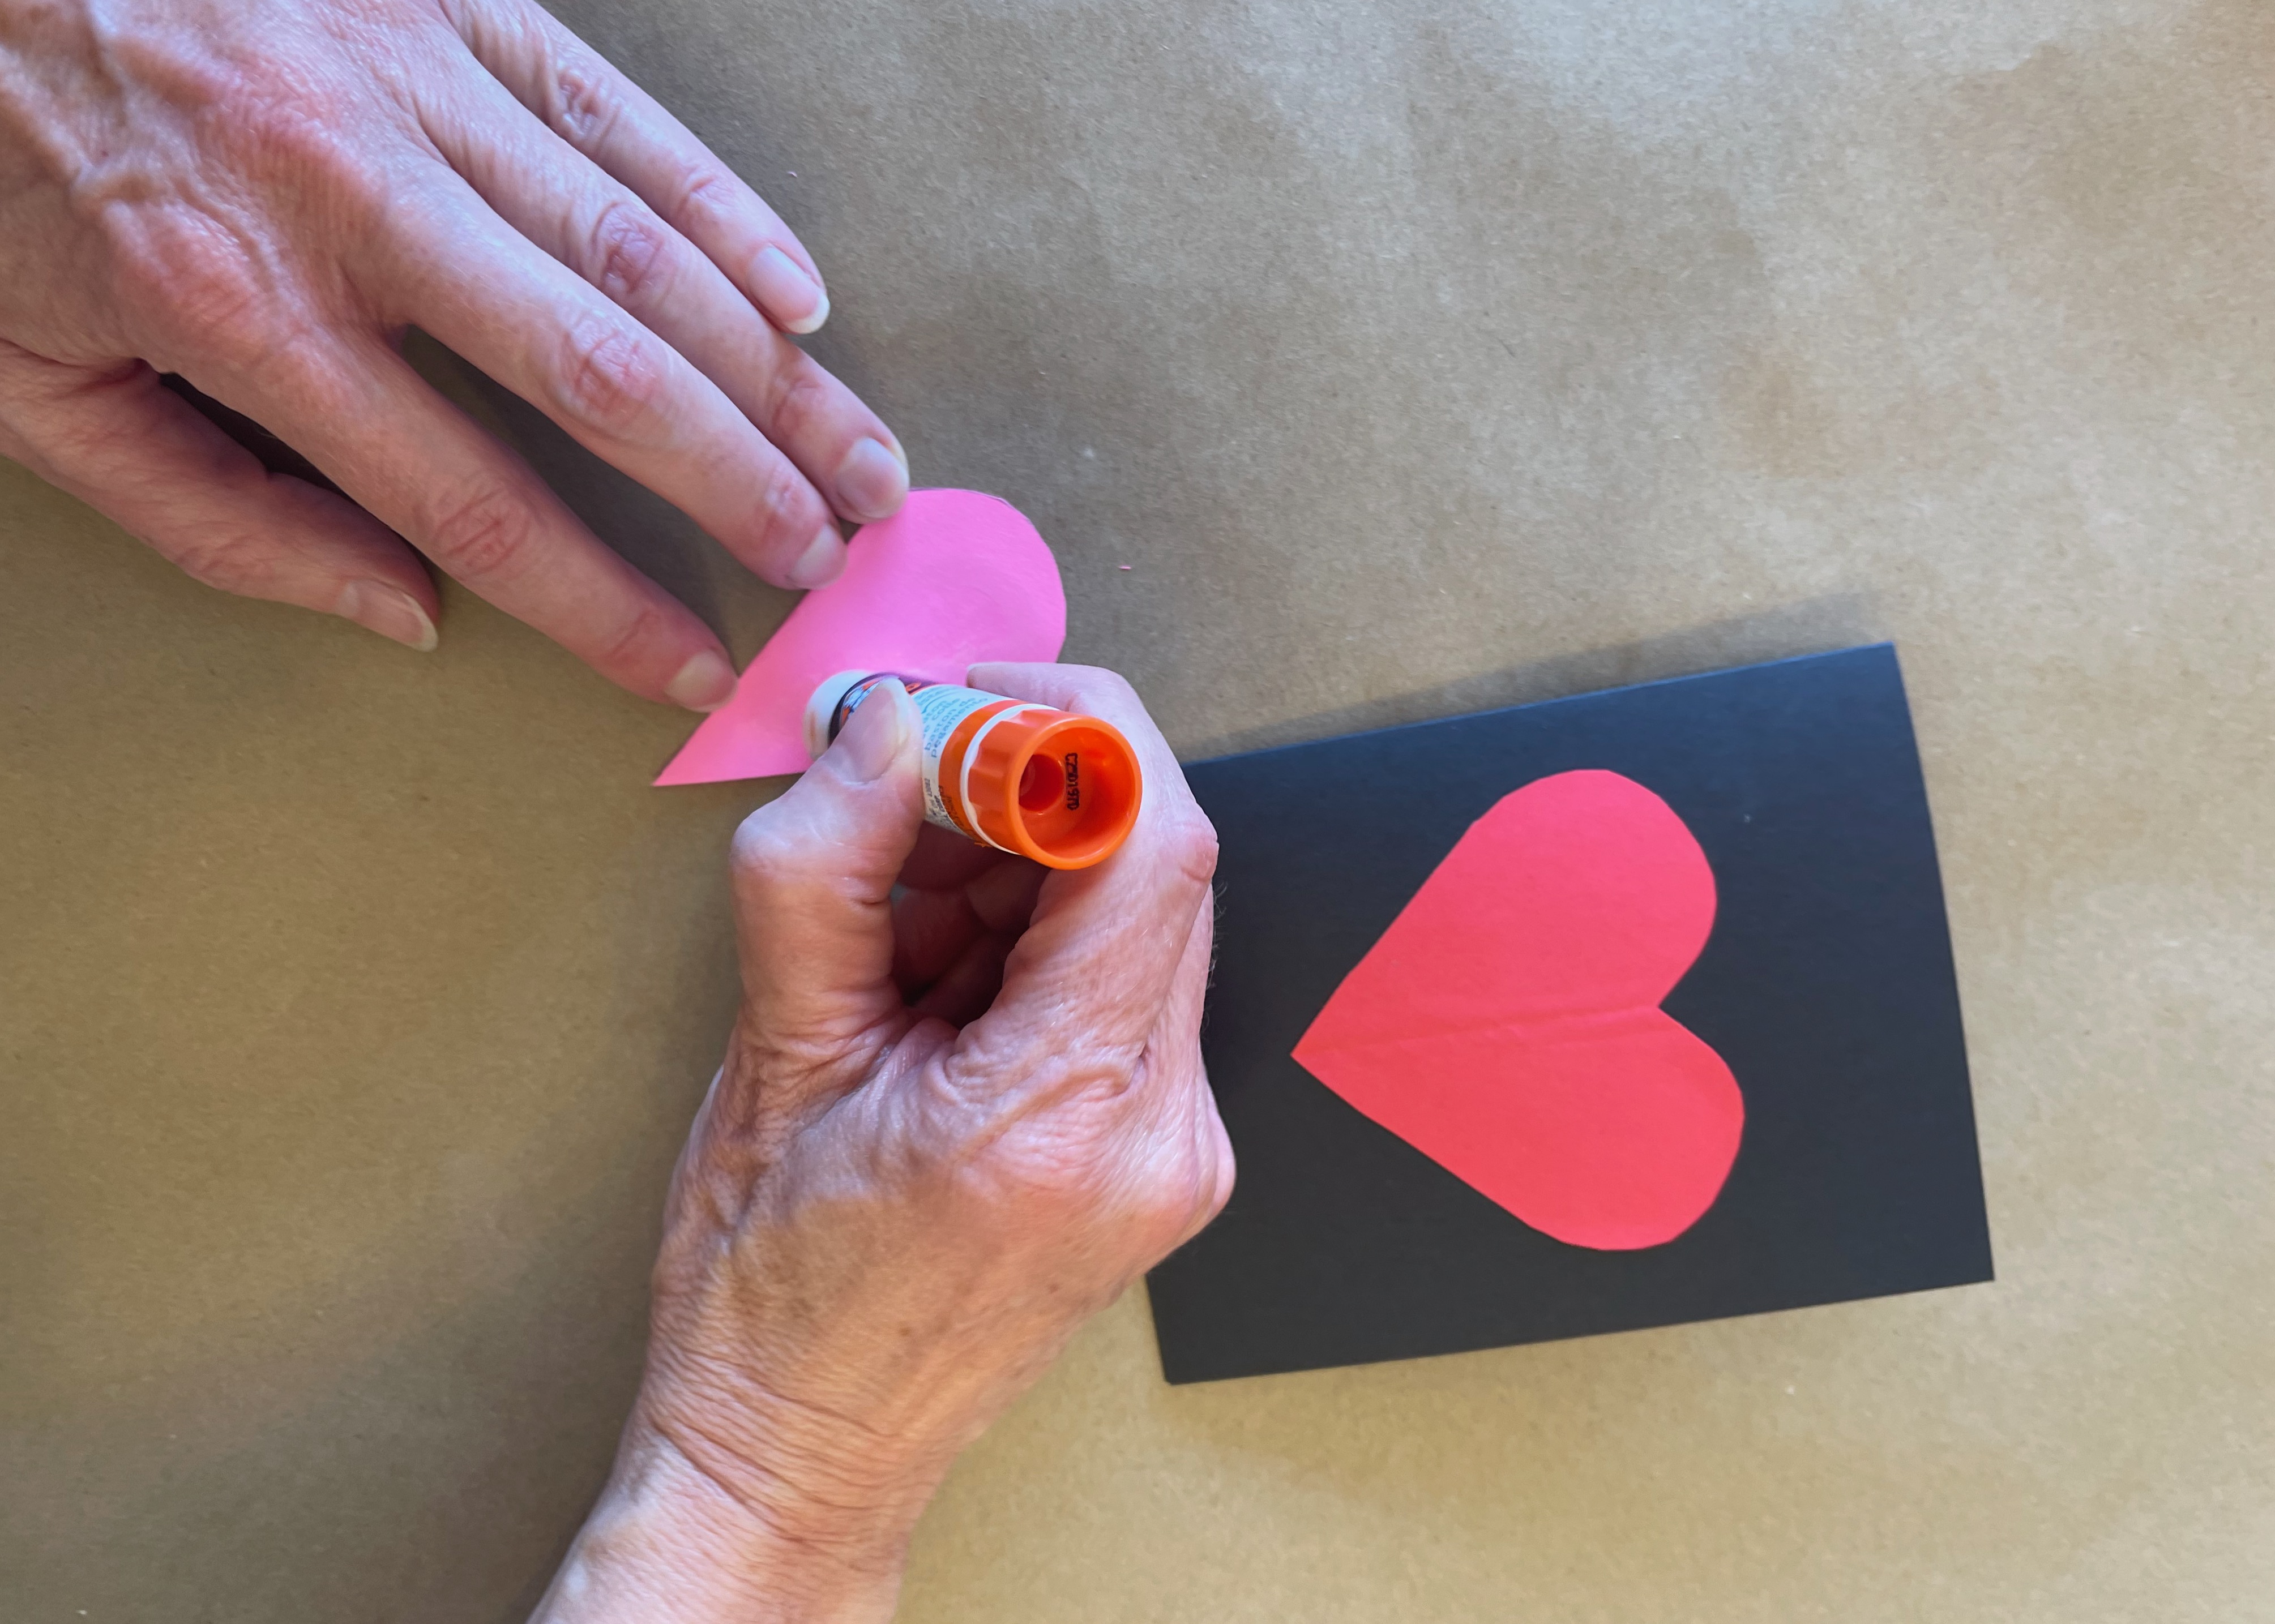
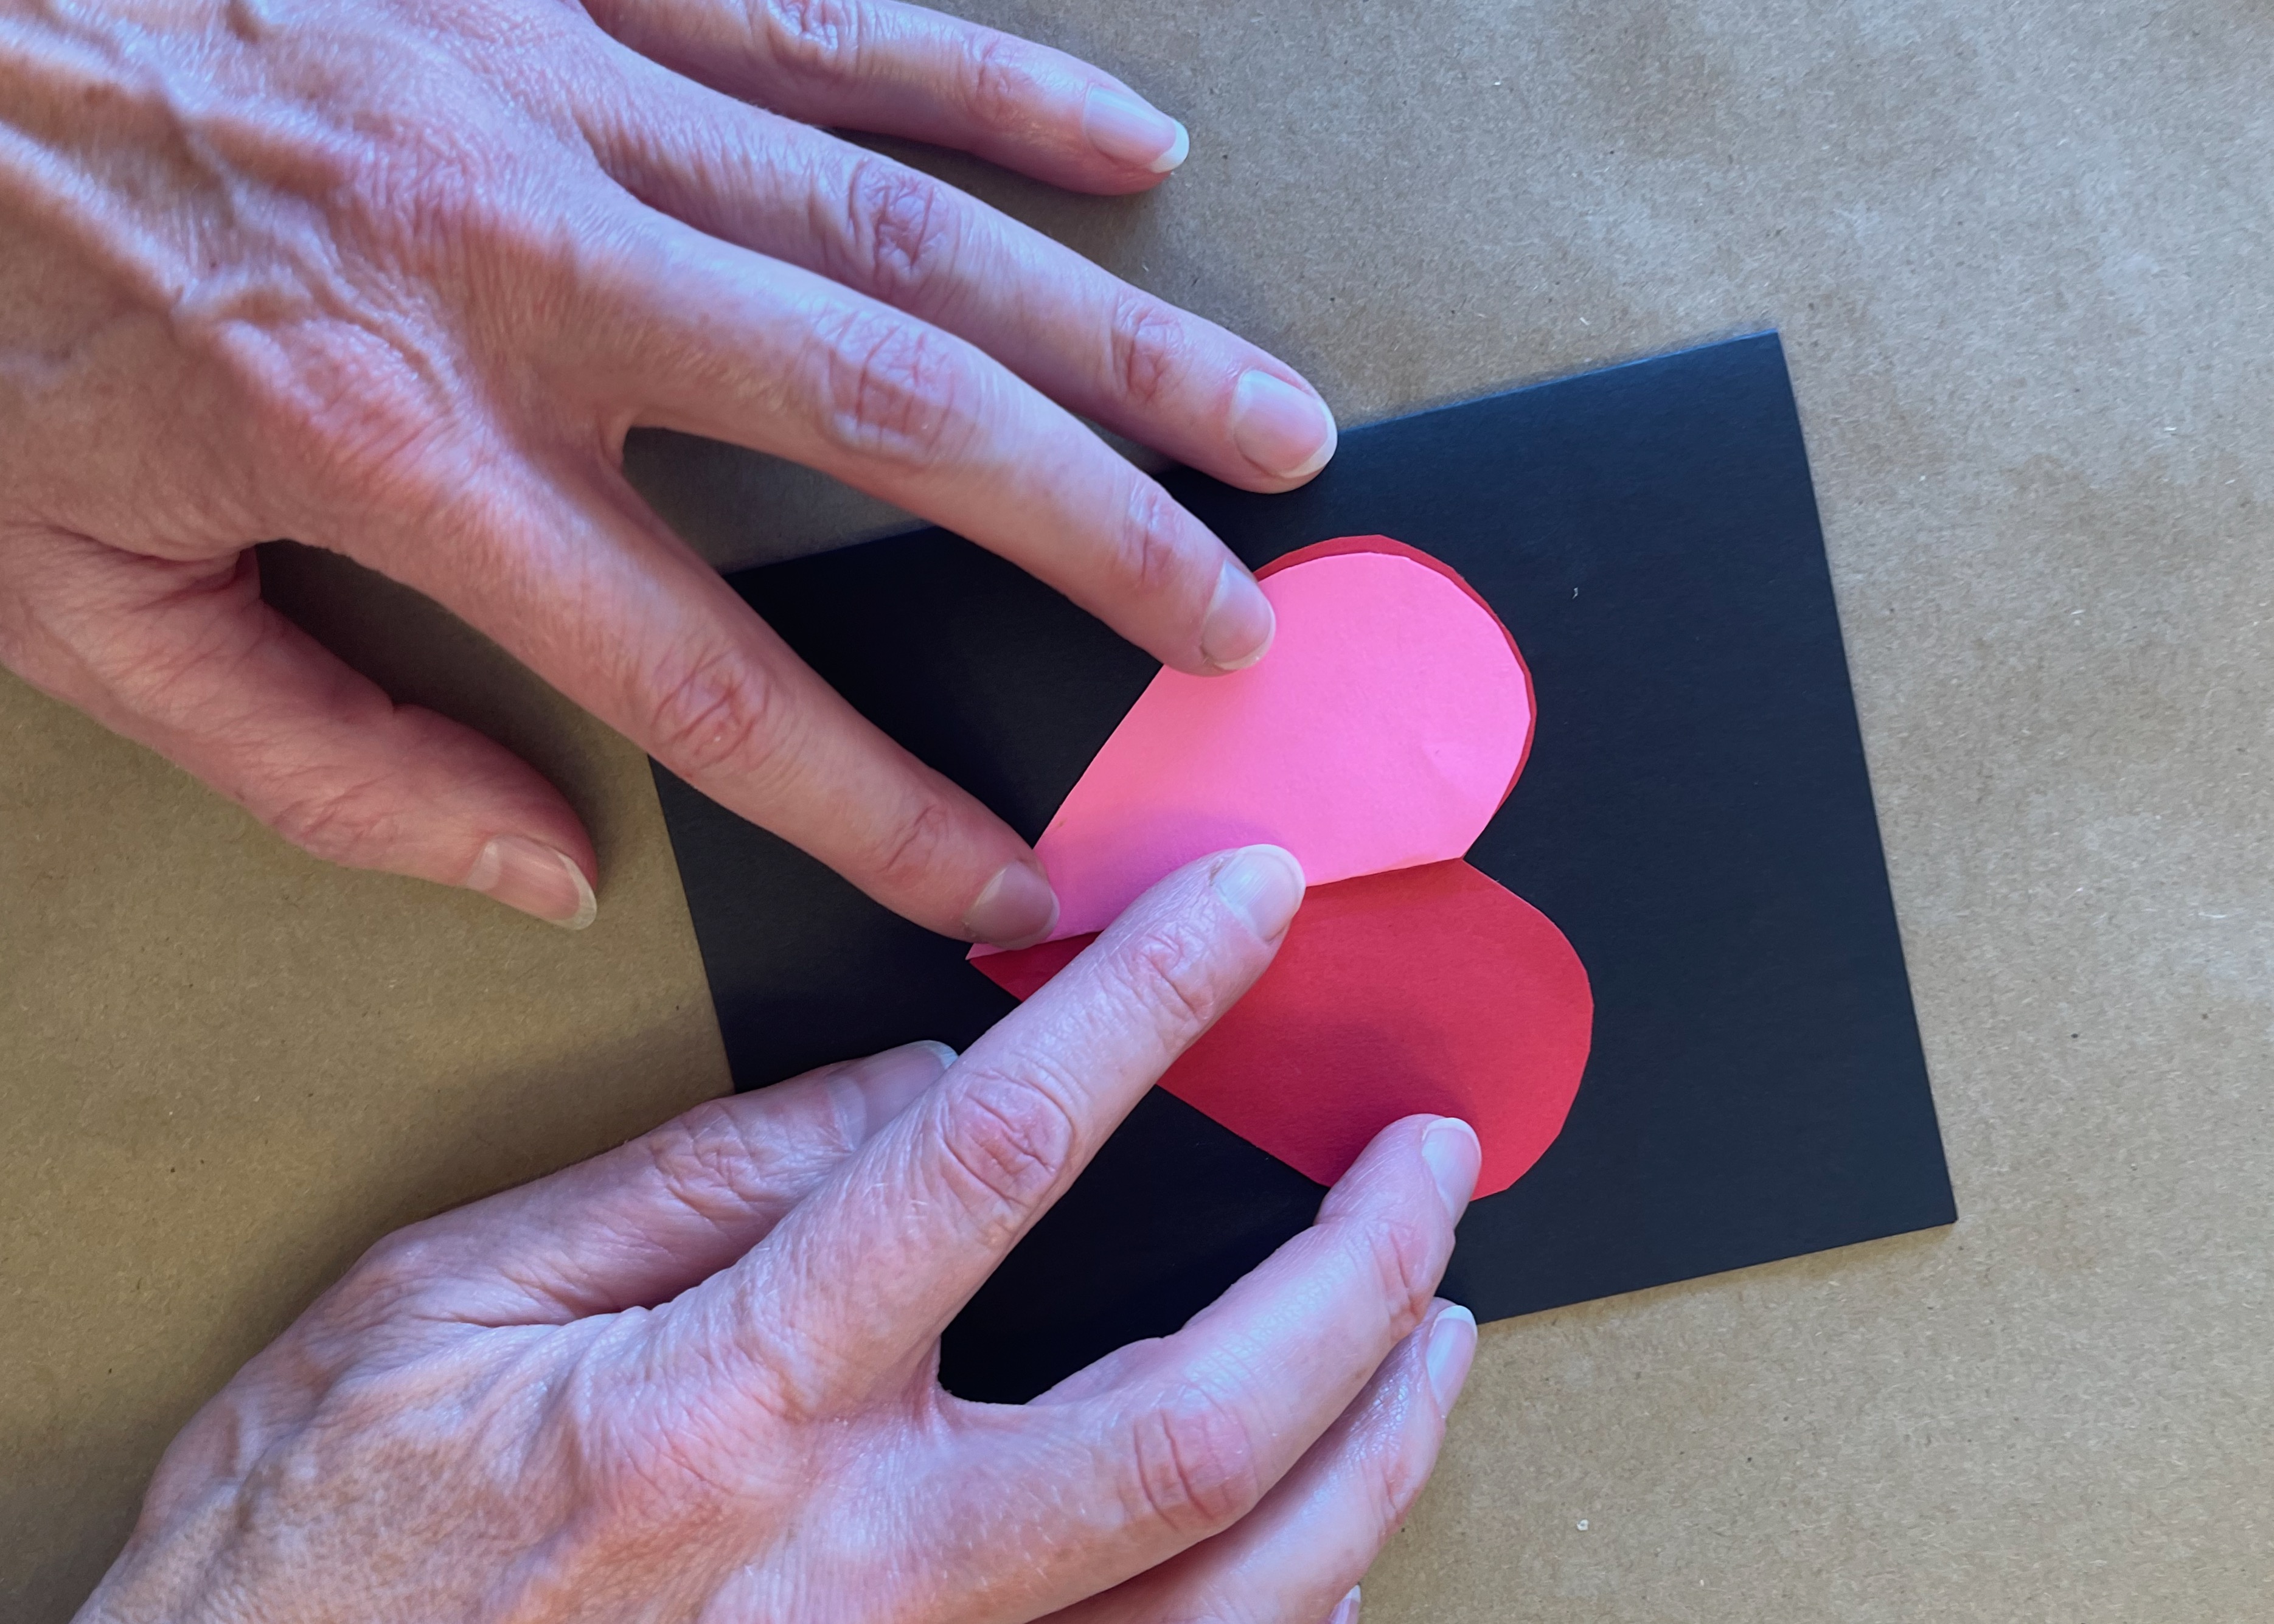
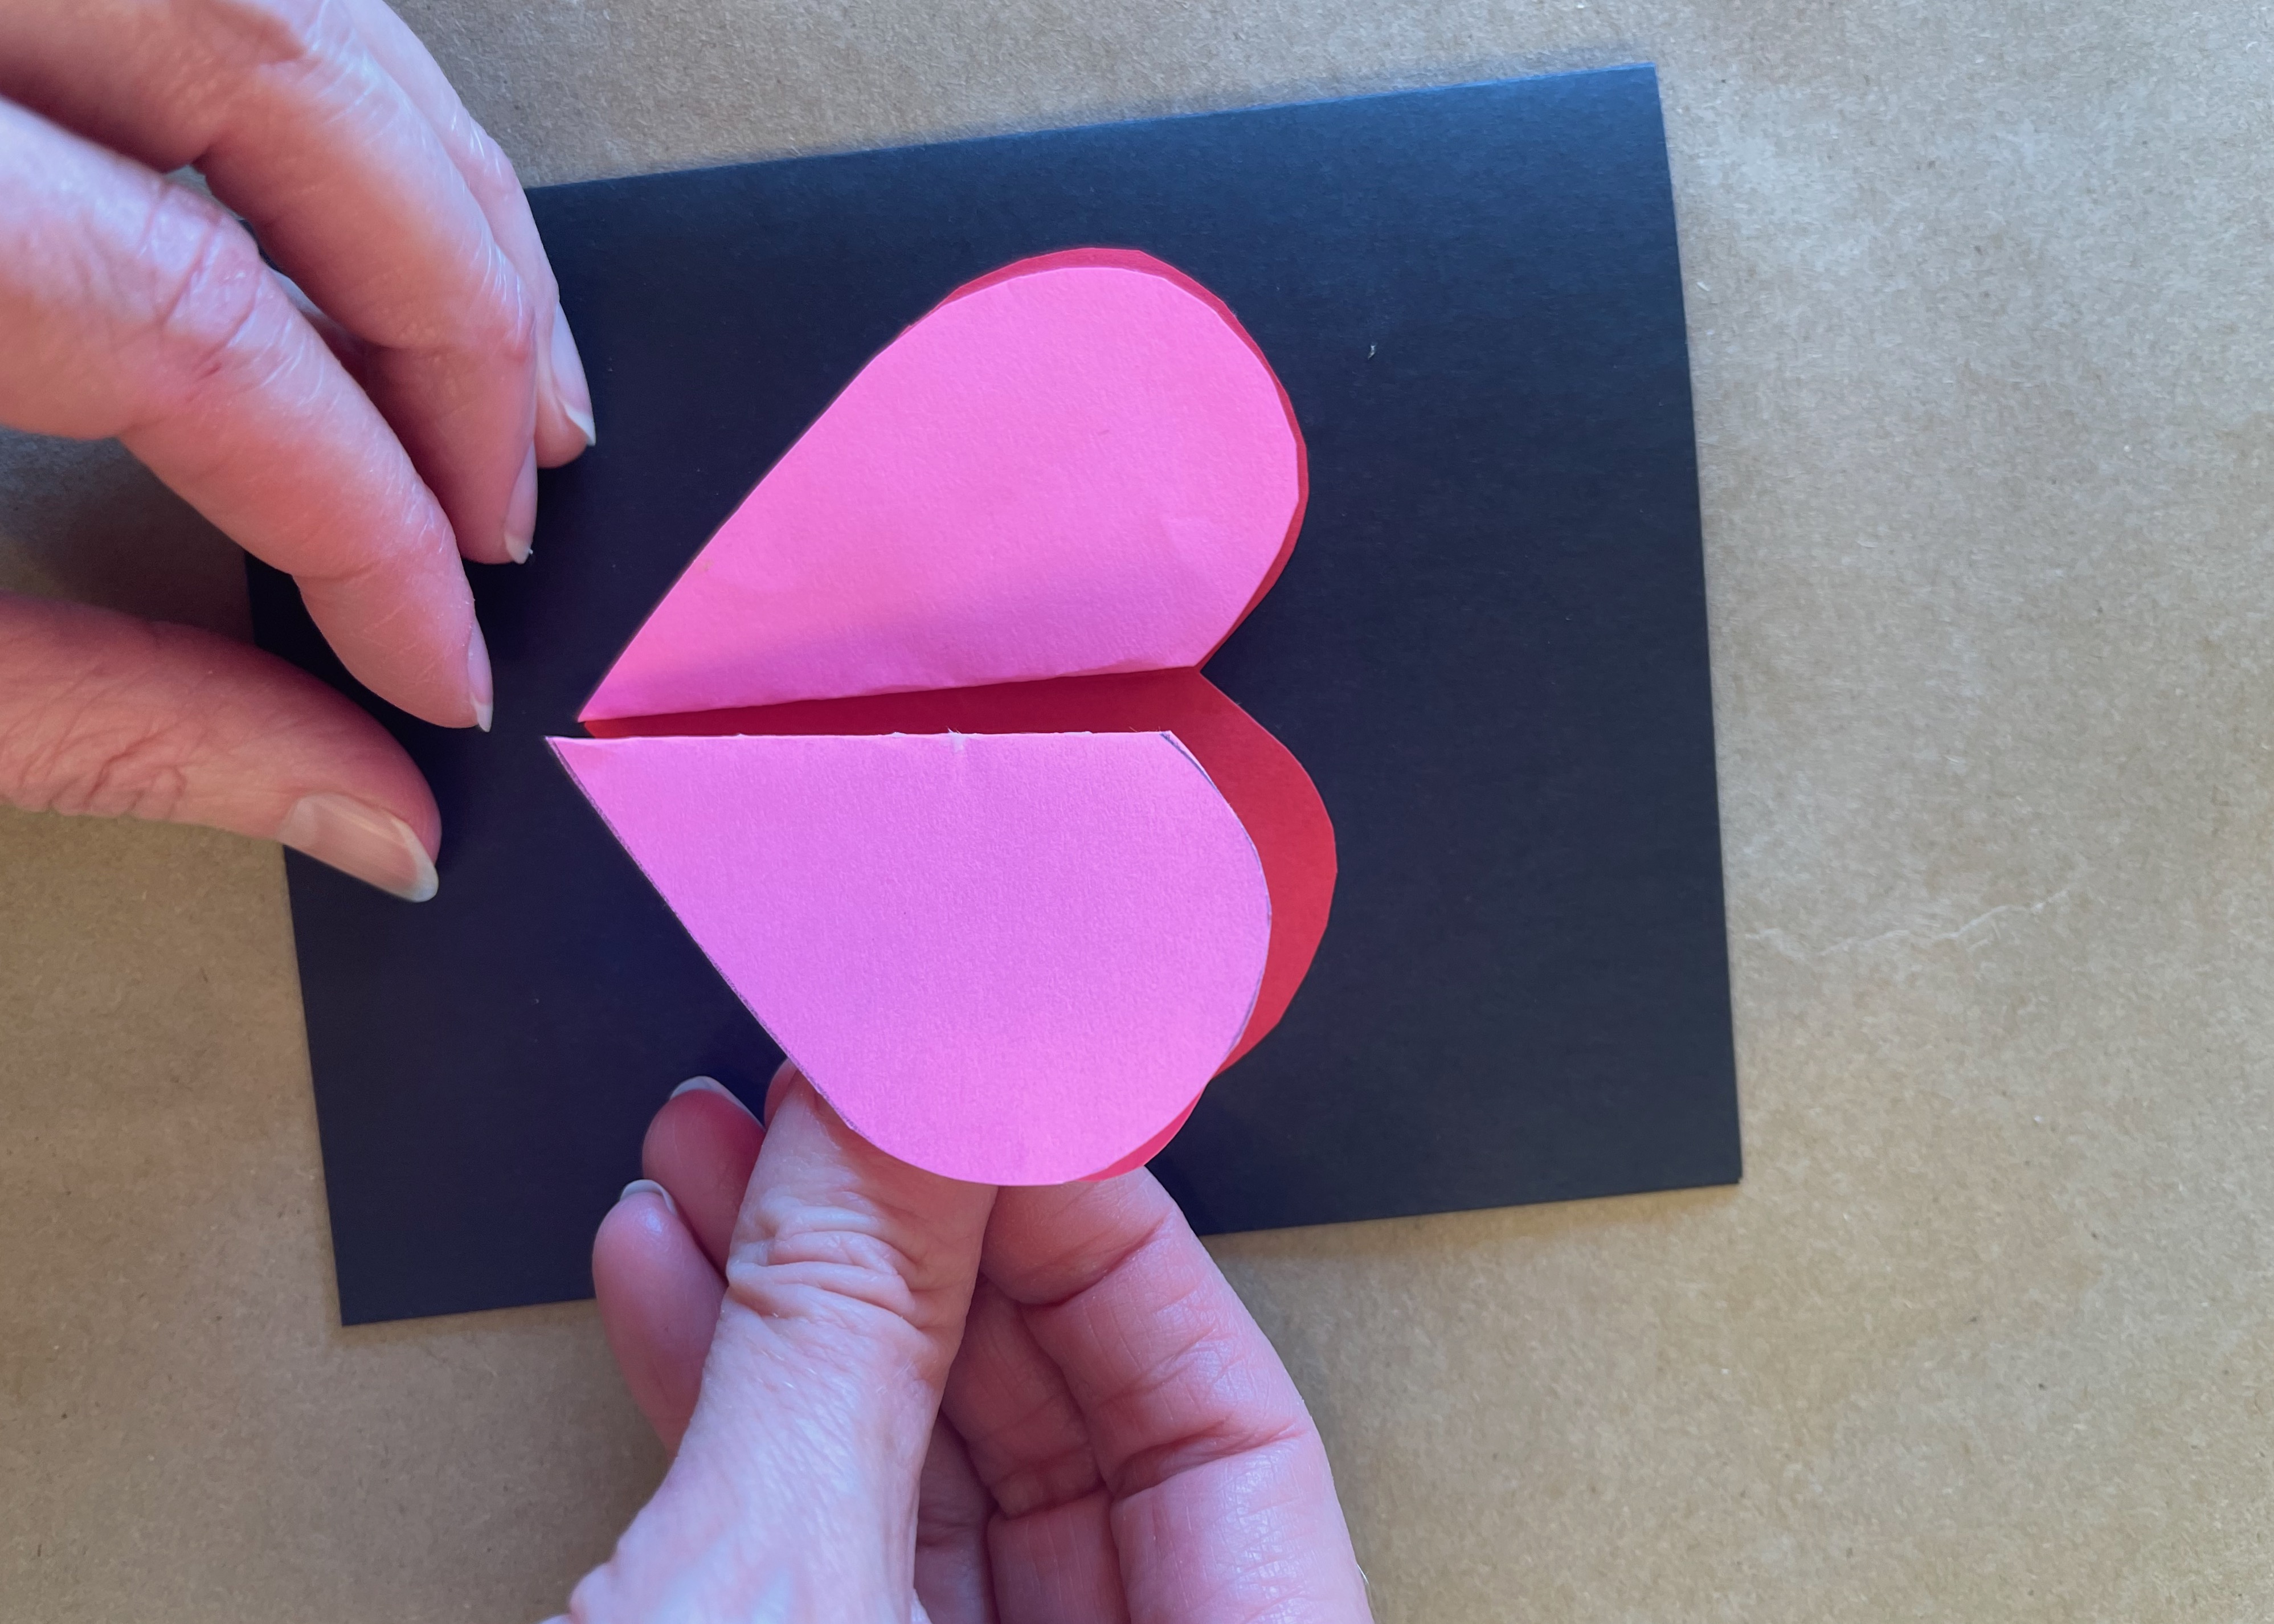
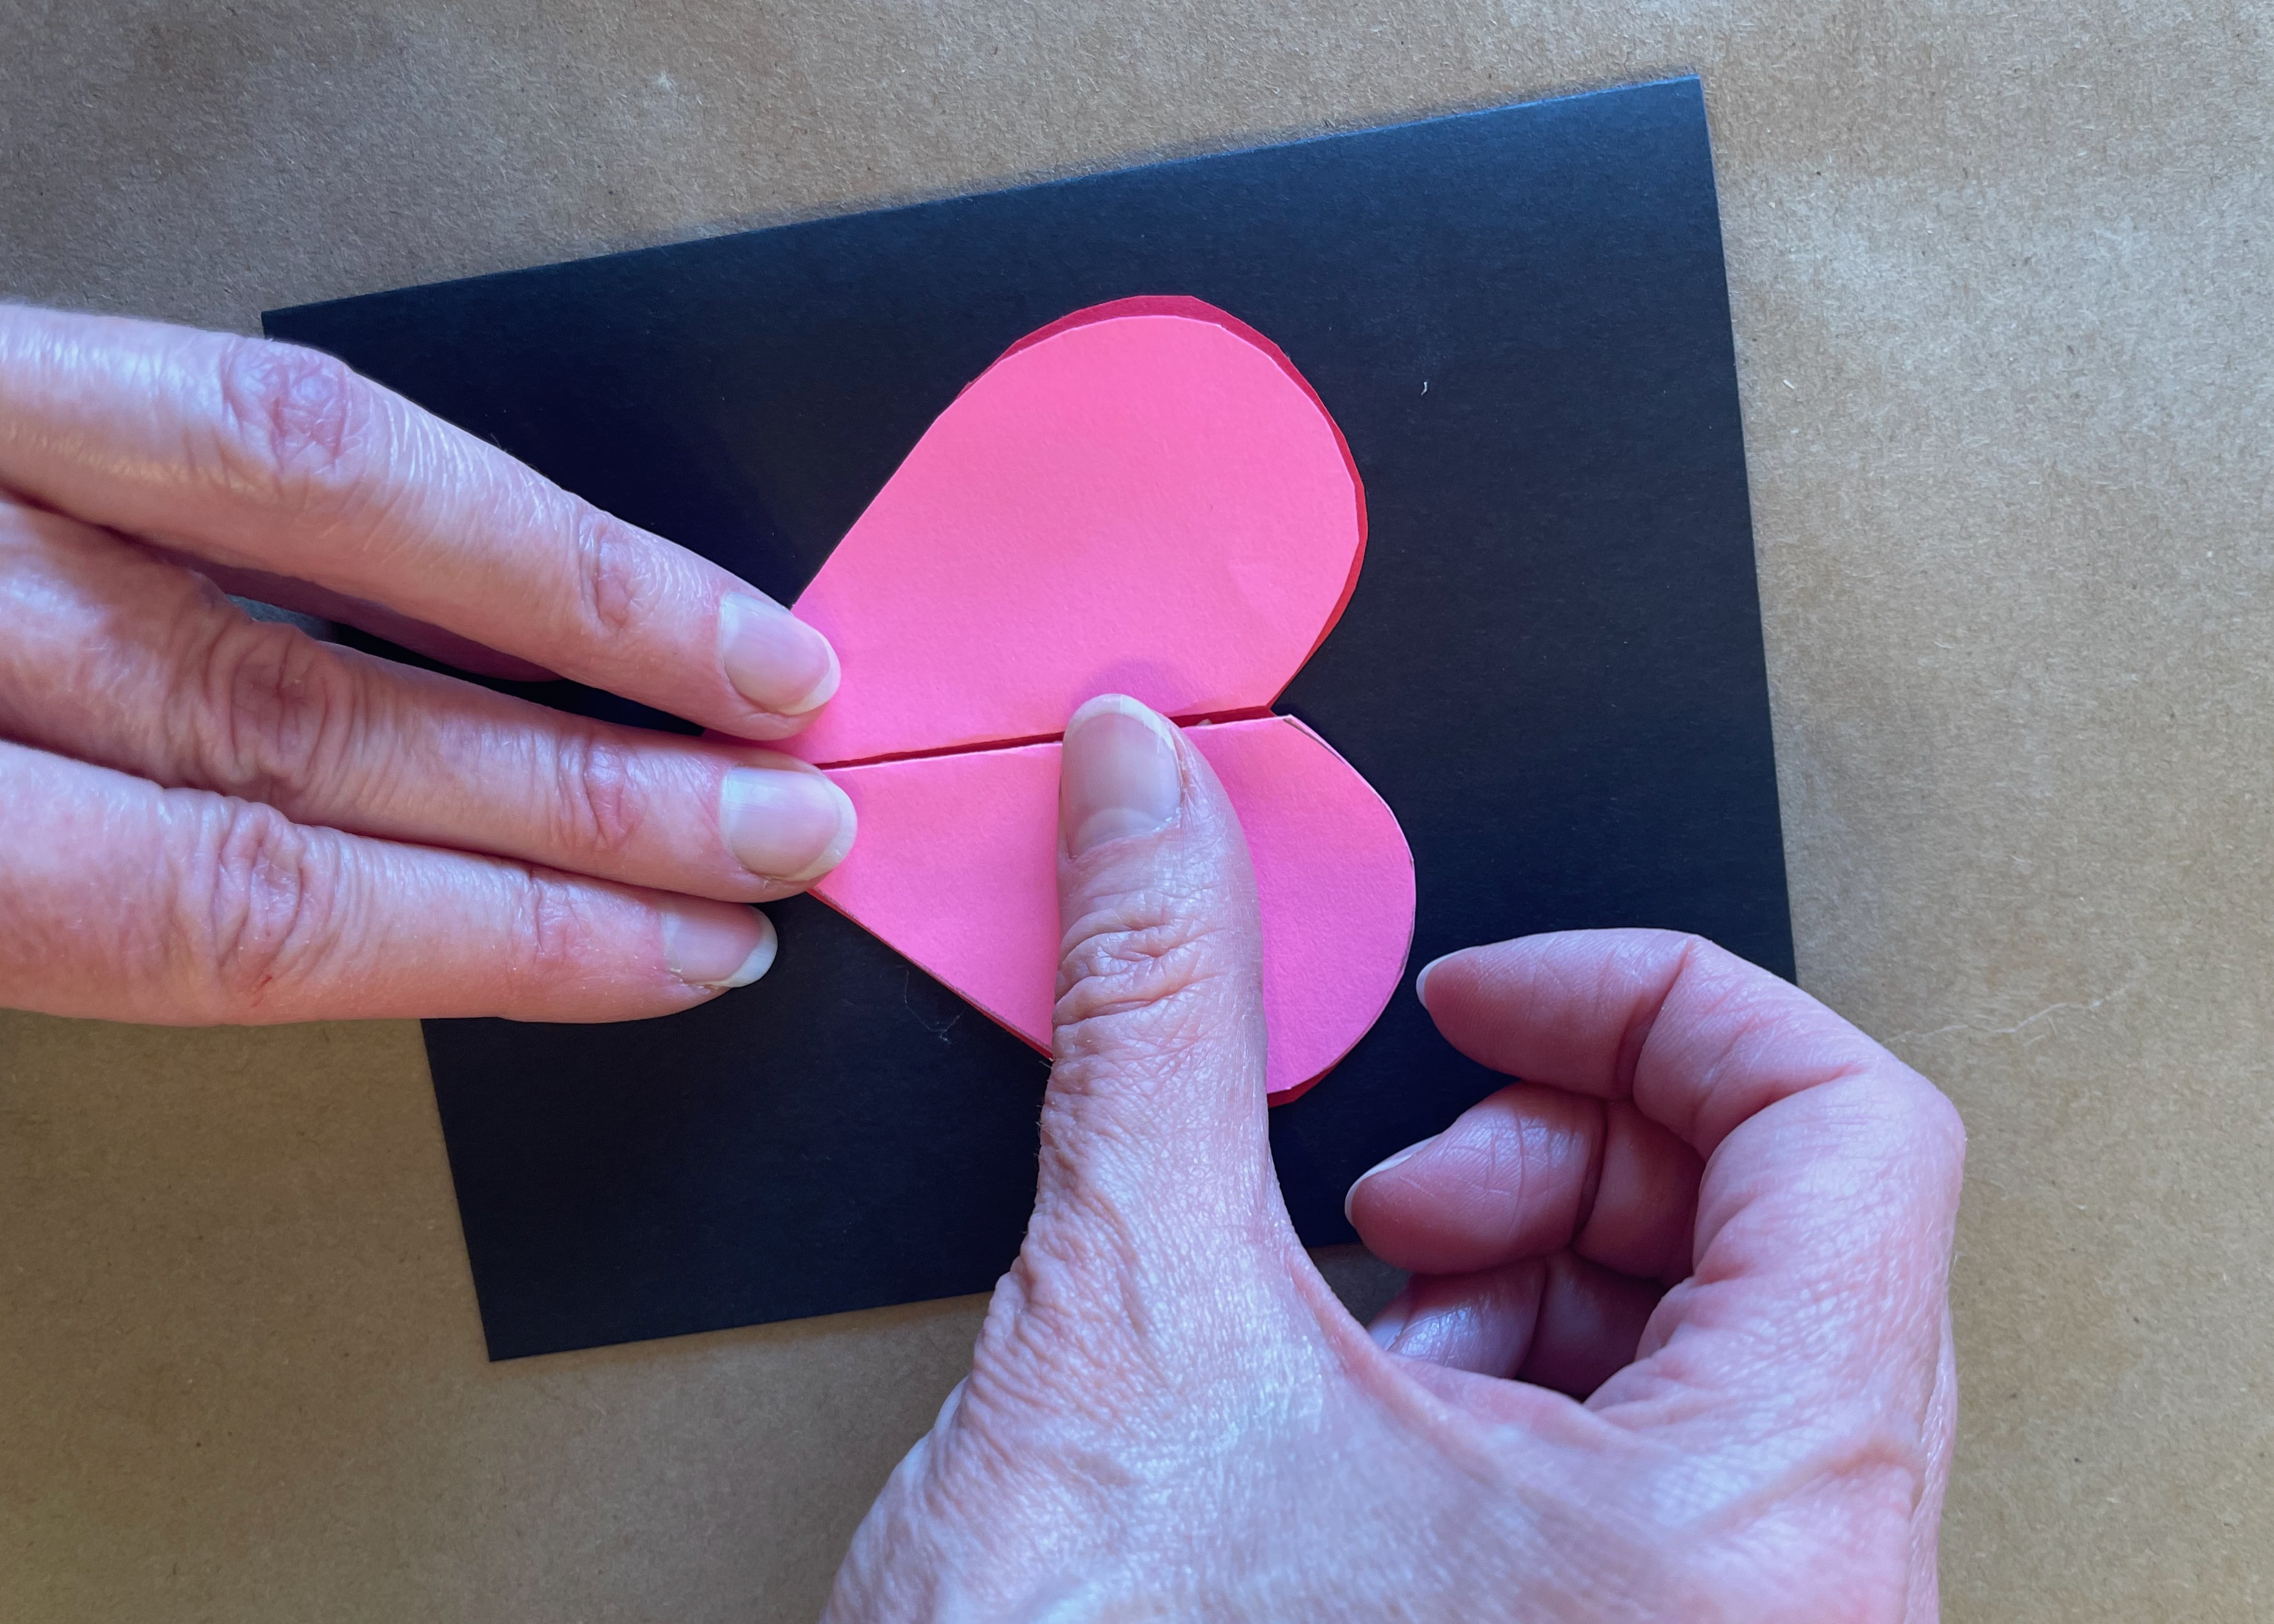
6) Glue down the last heart shape in the middle of your card. Spread that heart out across the two folded ones below, and that will be the center of your 3-D shape.
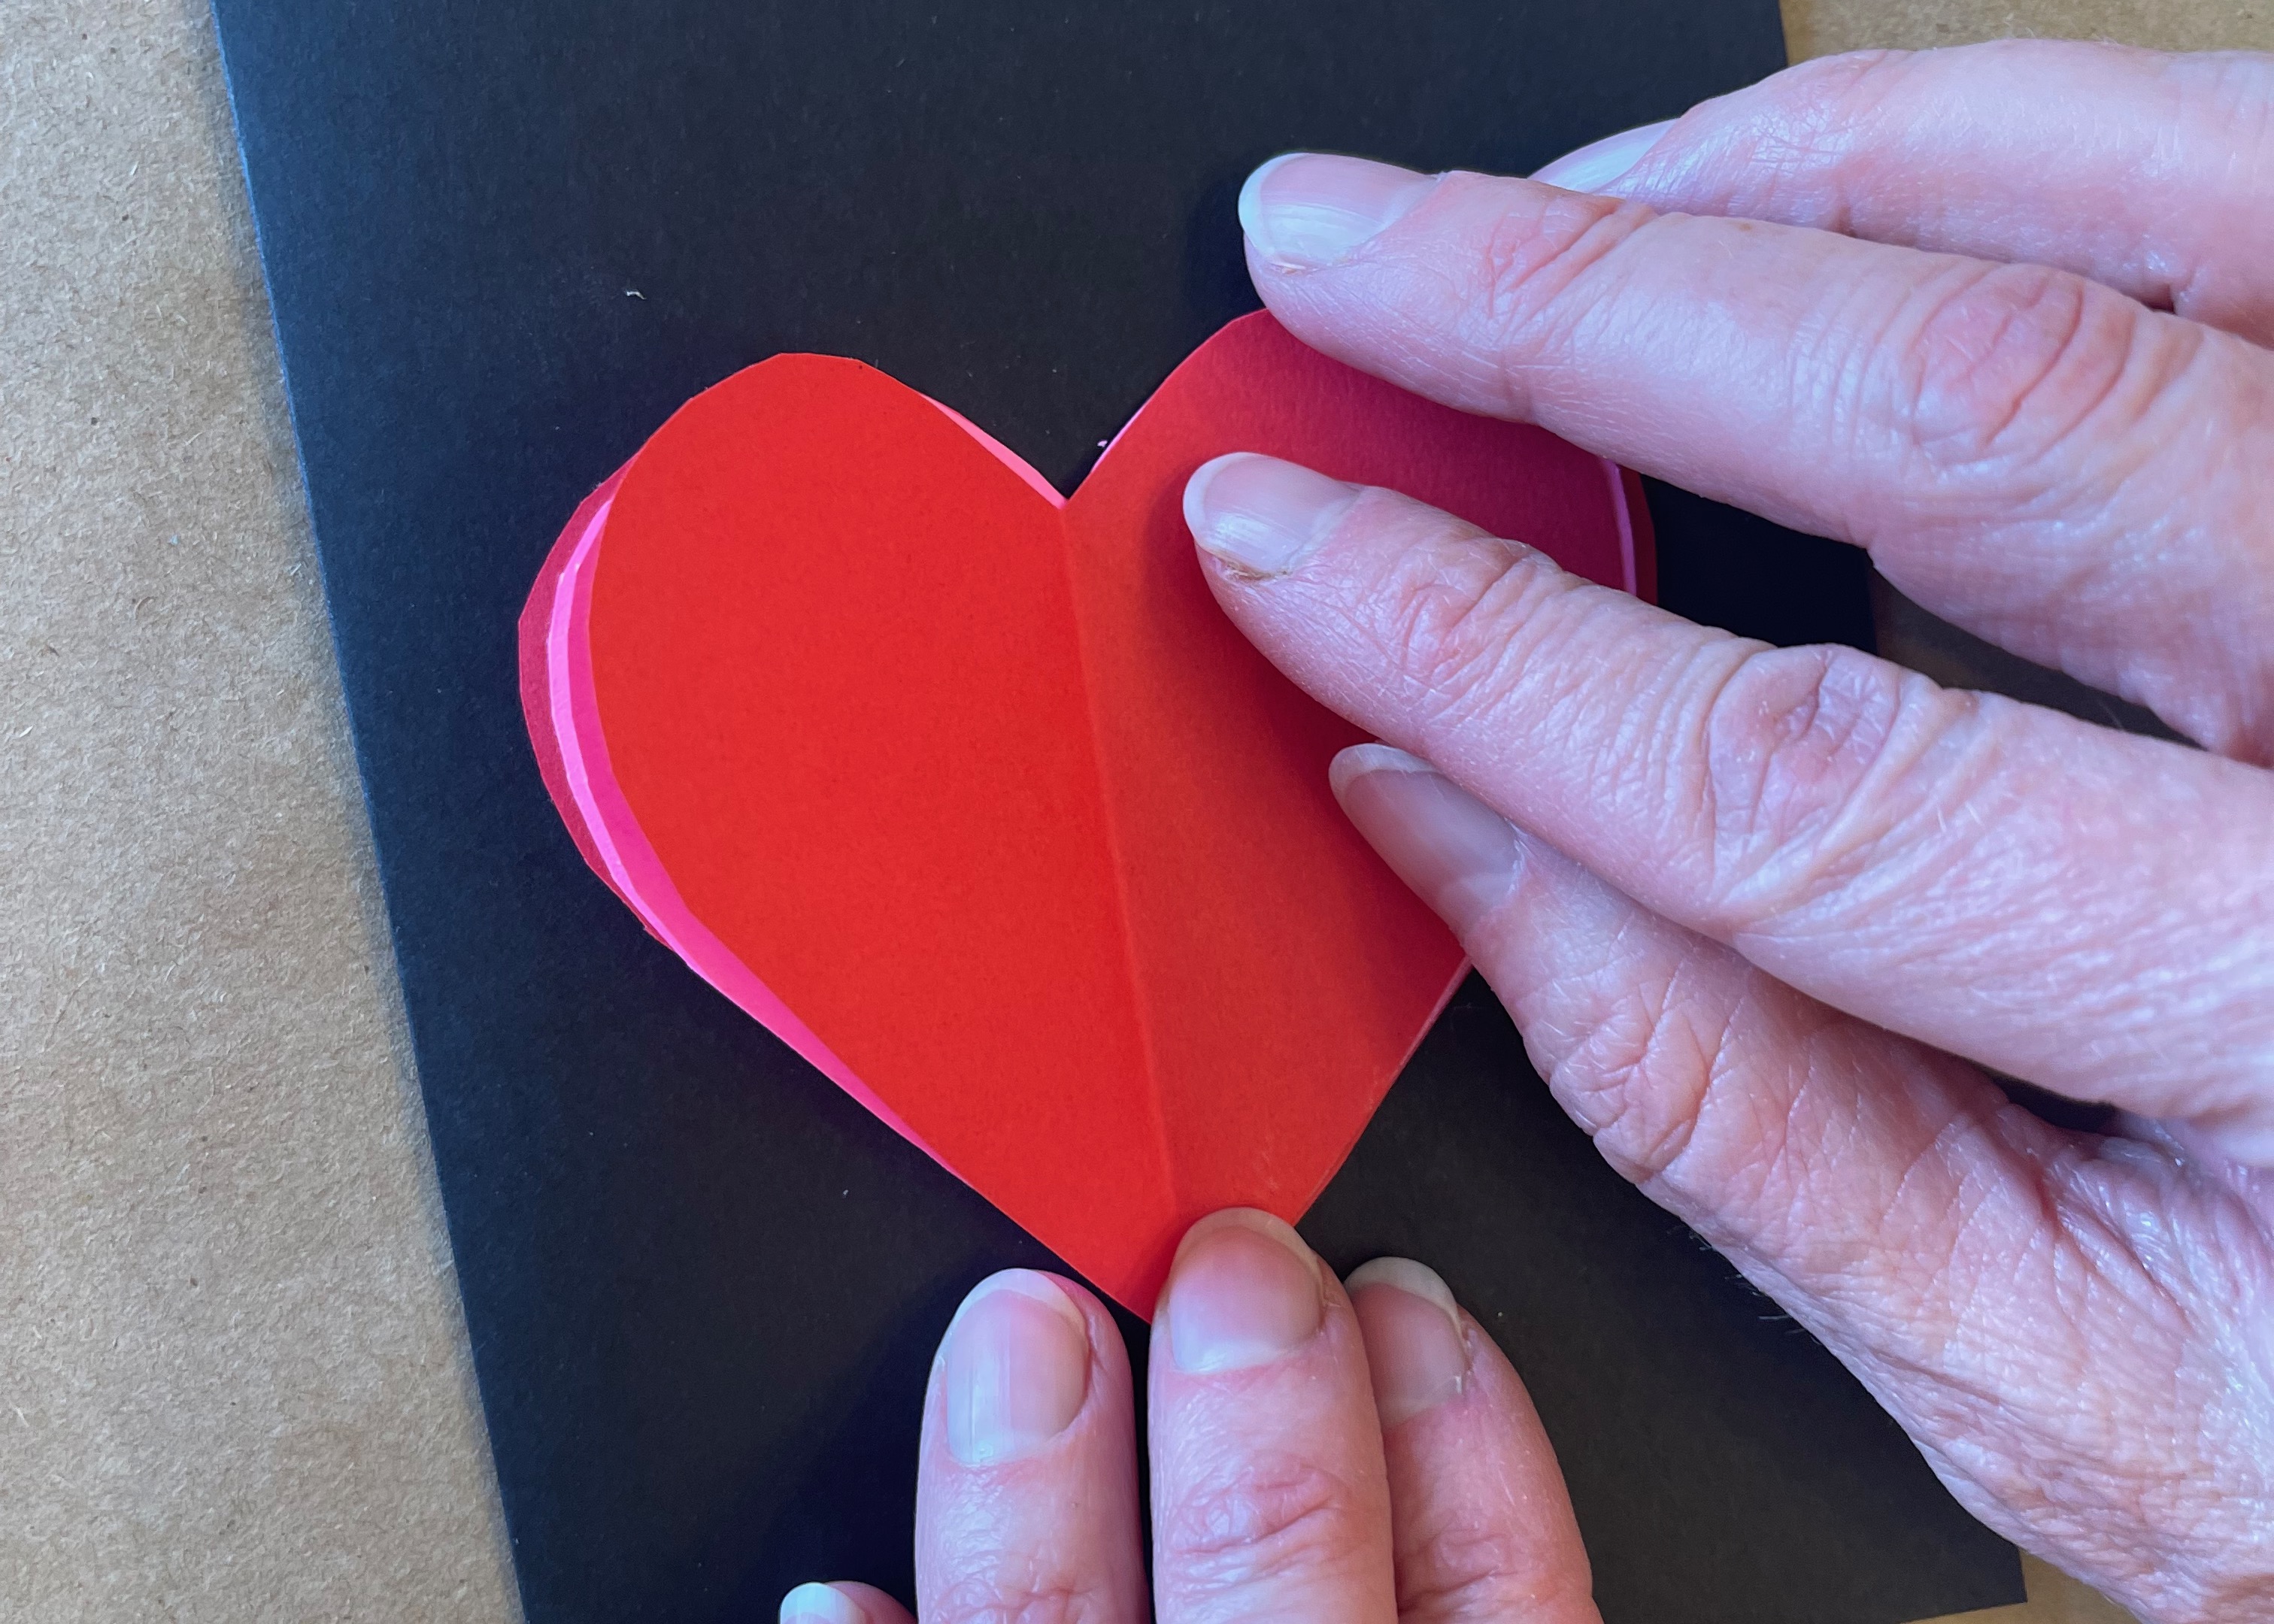
7) After the glue has dried, fan out the shapes to spread them out evenly, and you have a 3-D heart! If you're putting your card in an envelope, press the two sides down evenly. When it's removed from the envelope it will unfurl a bit on its own, but might need a little help opening all the way.
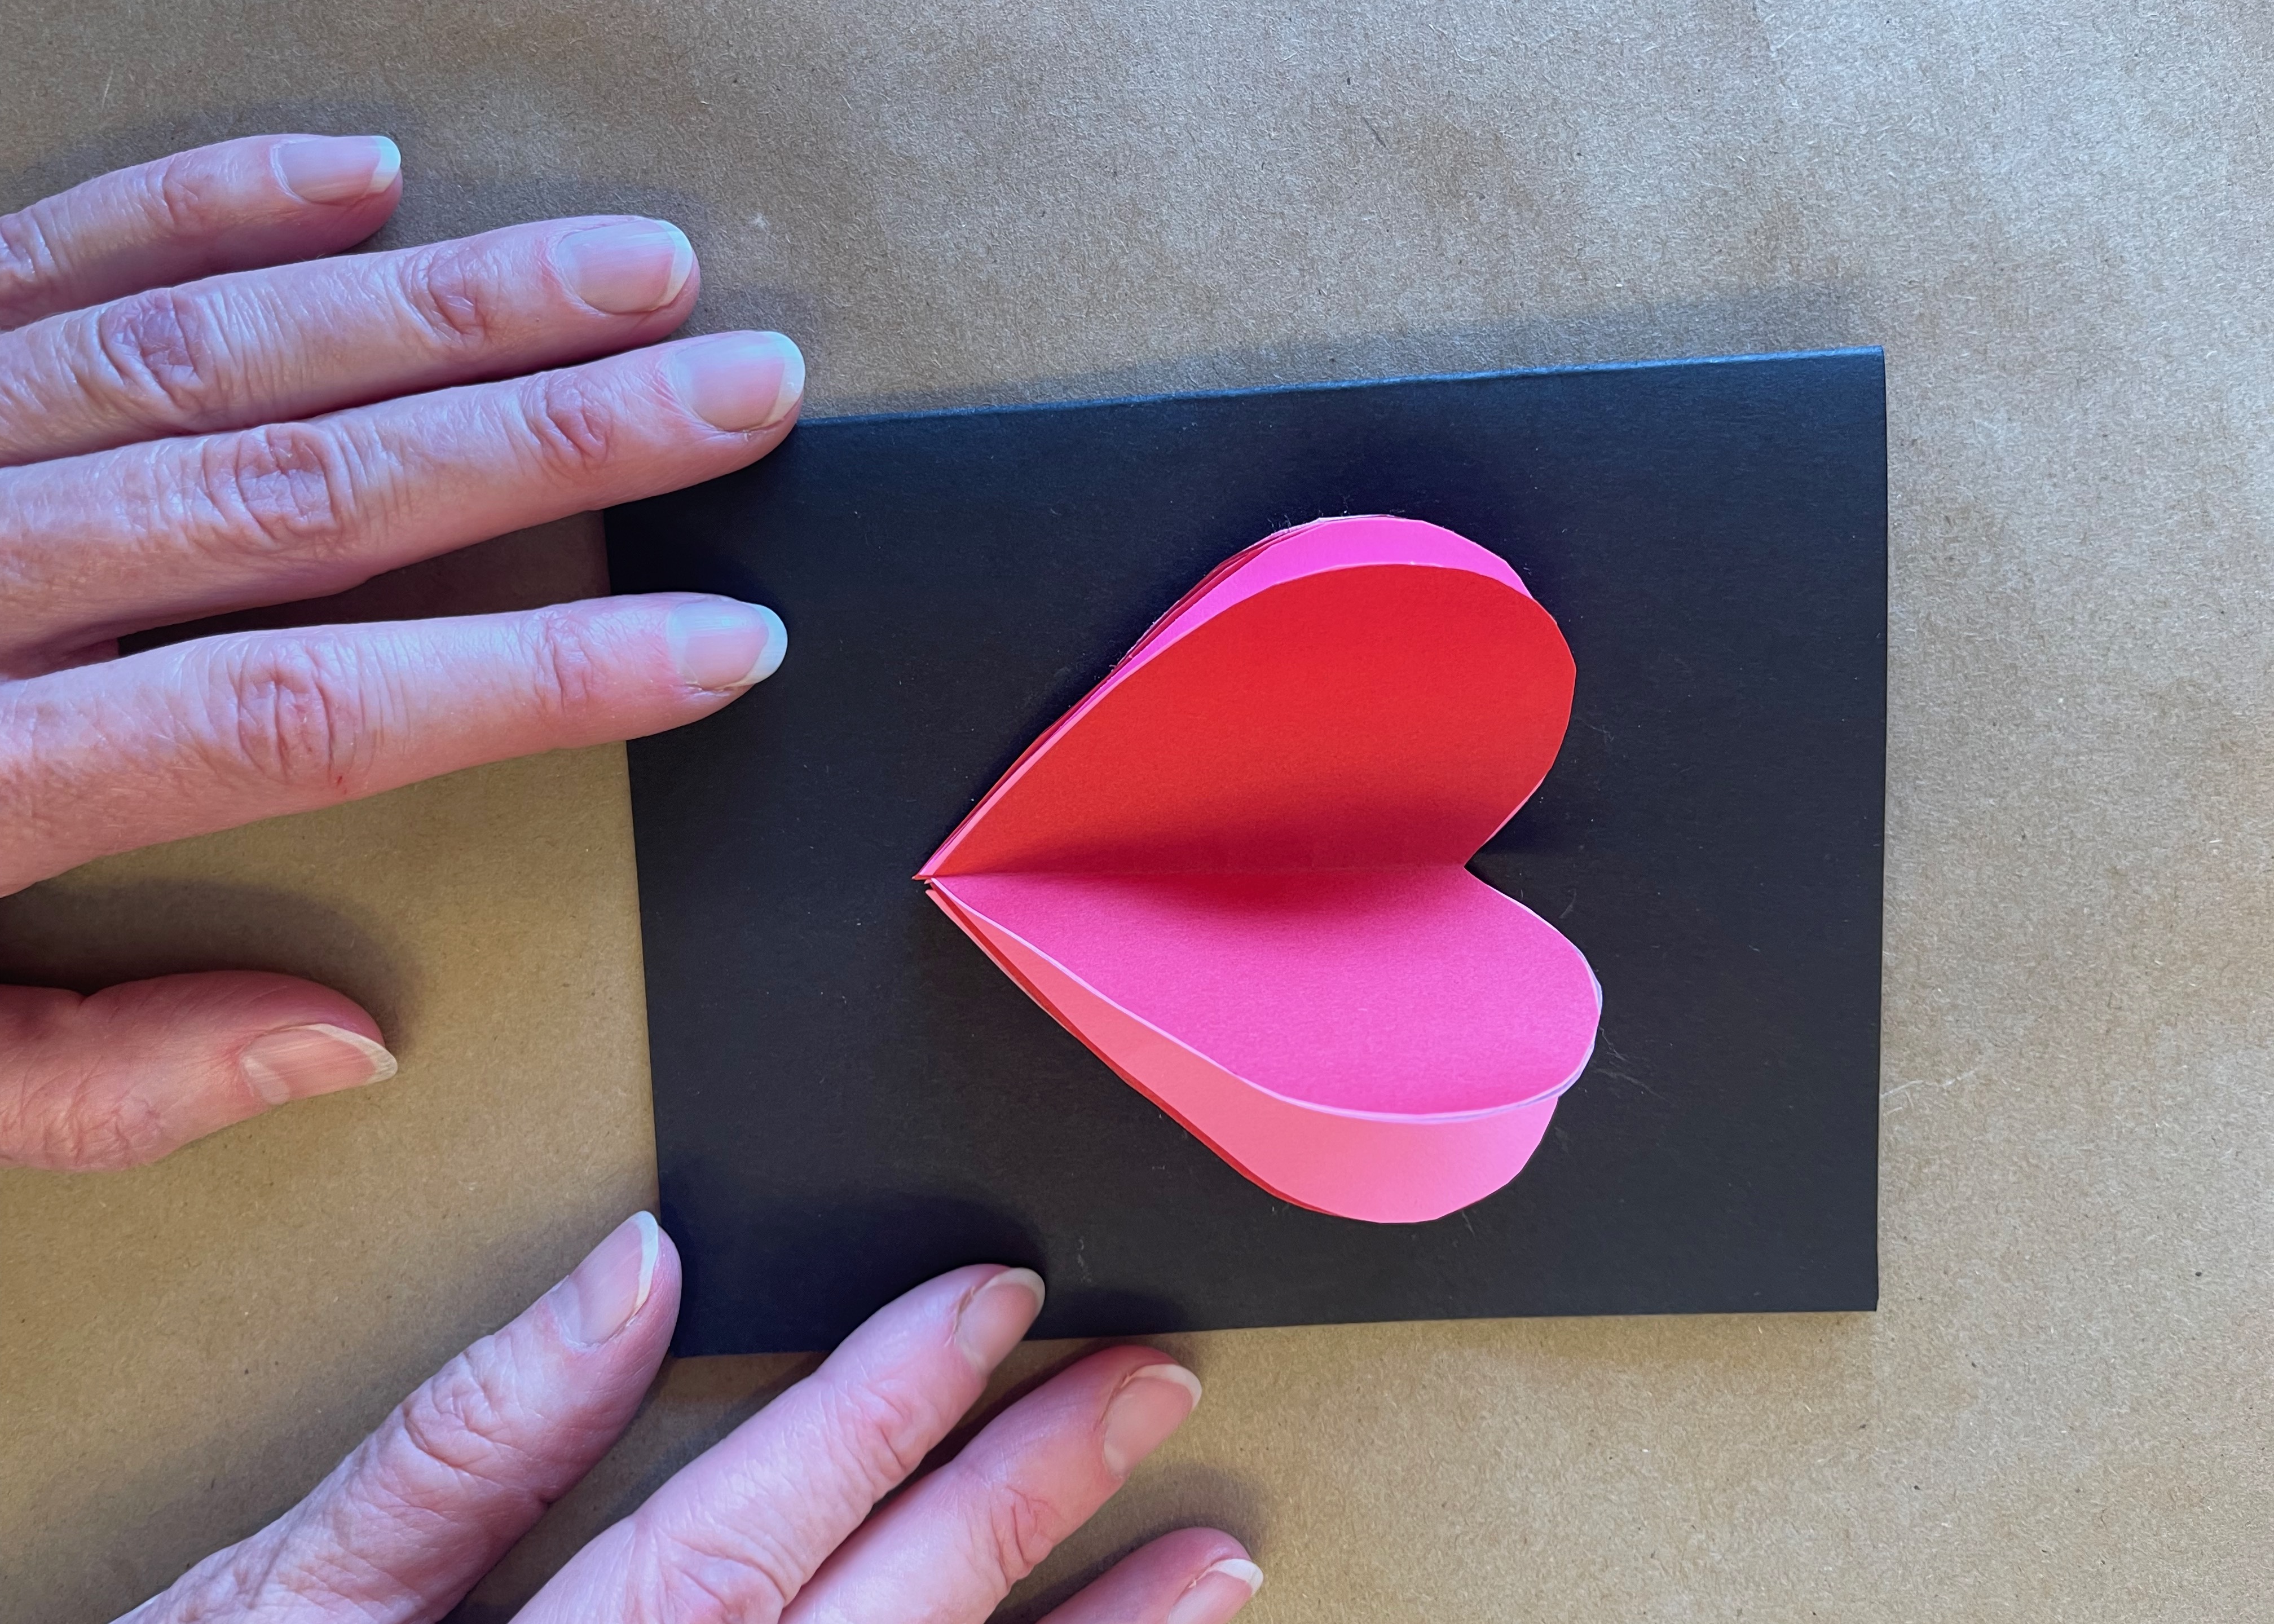
8) Don't limit yourself to traditional Valentine colors. Bright colors in any combo work well too!
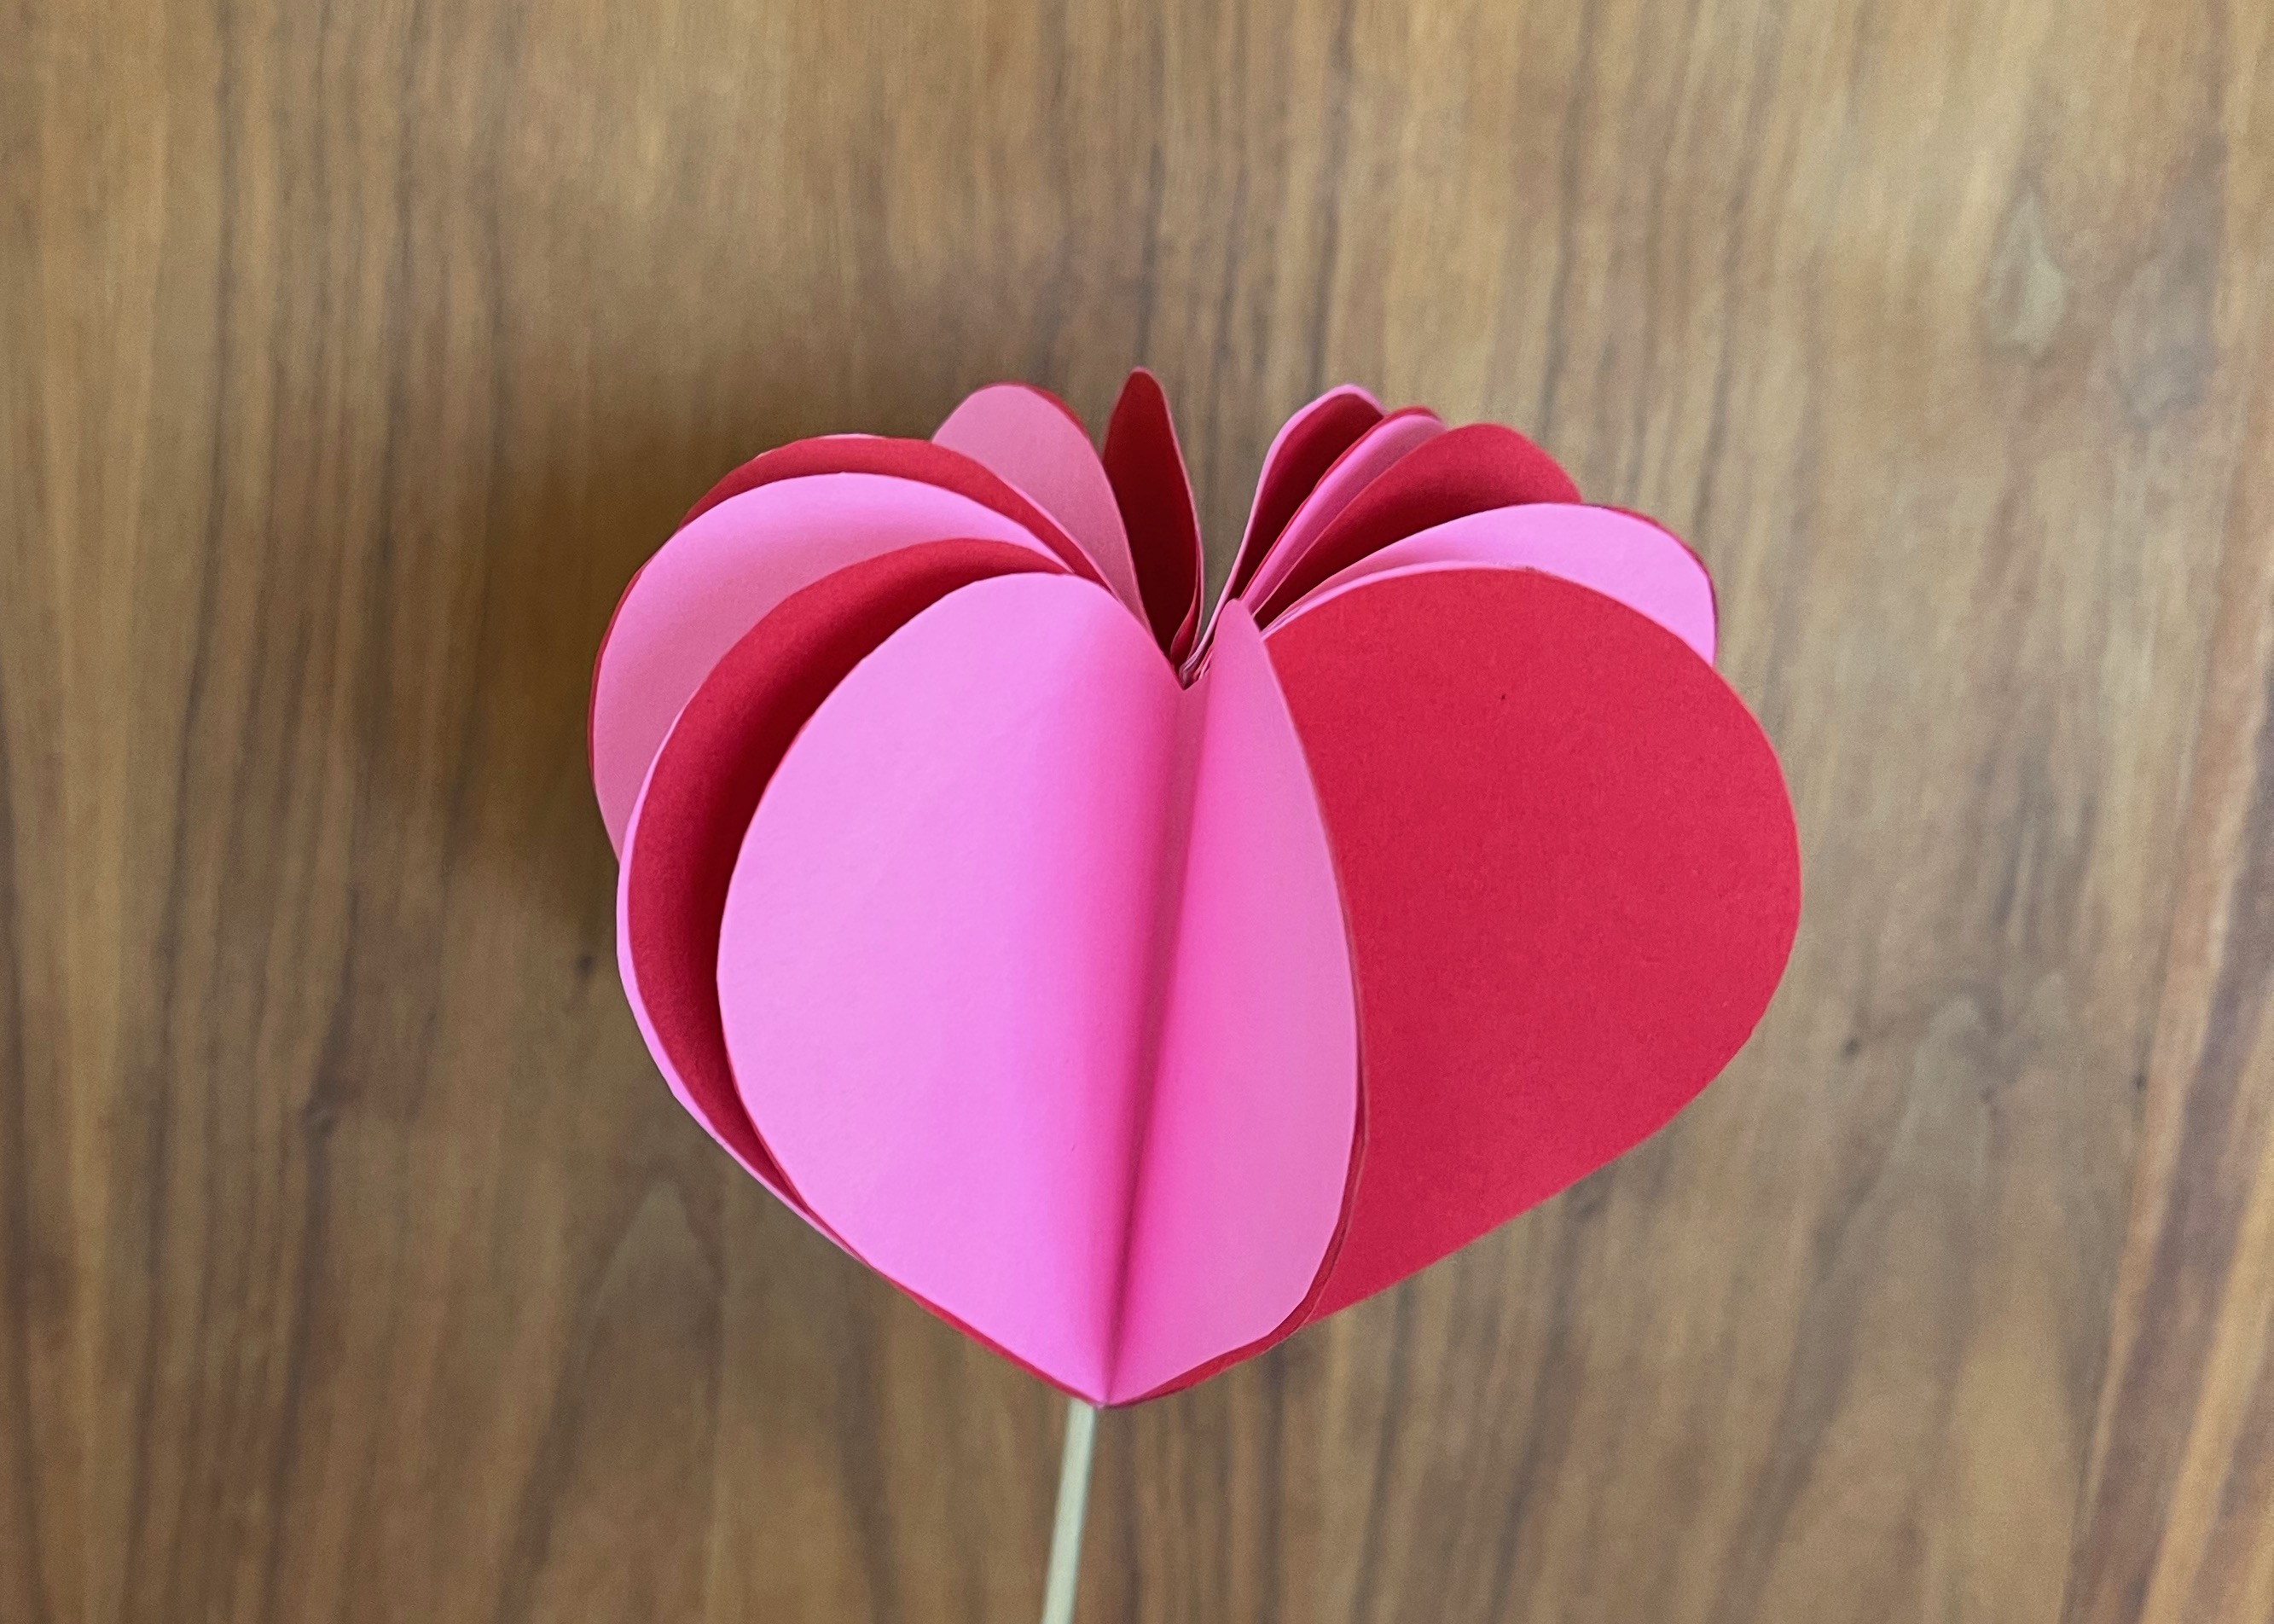
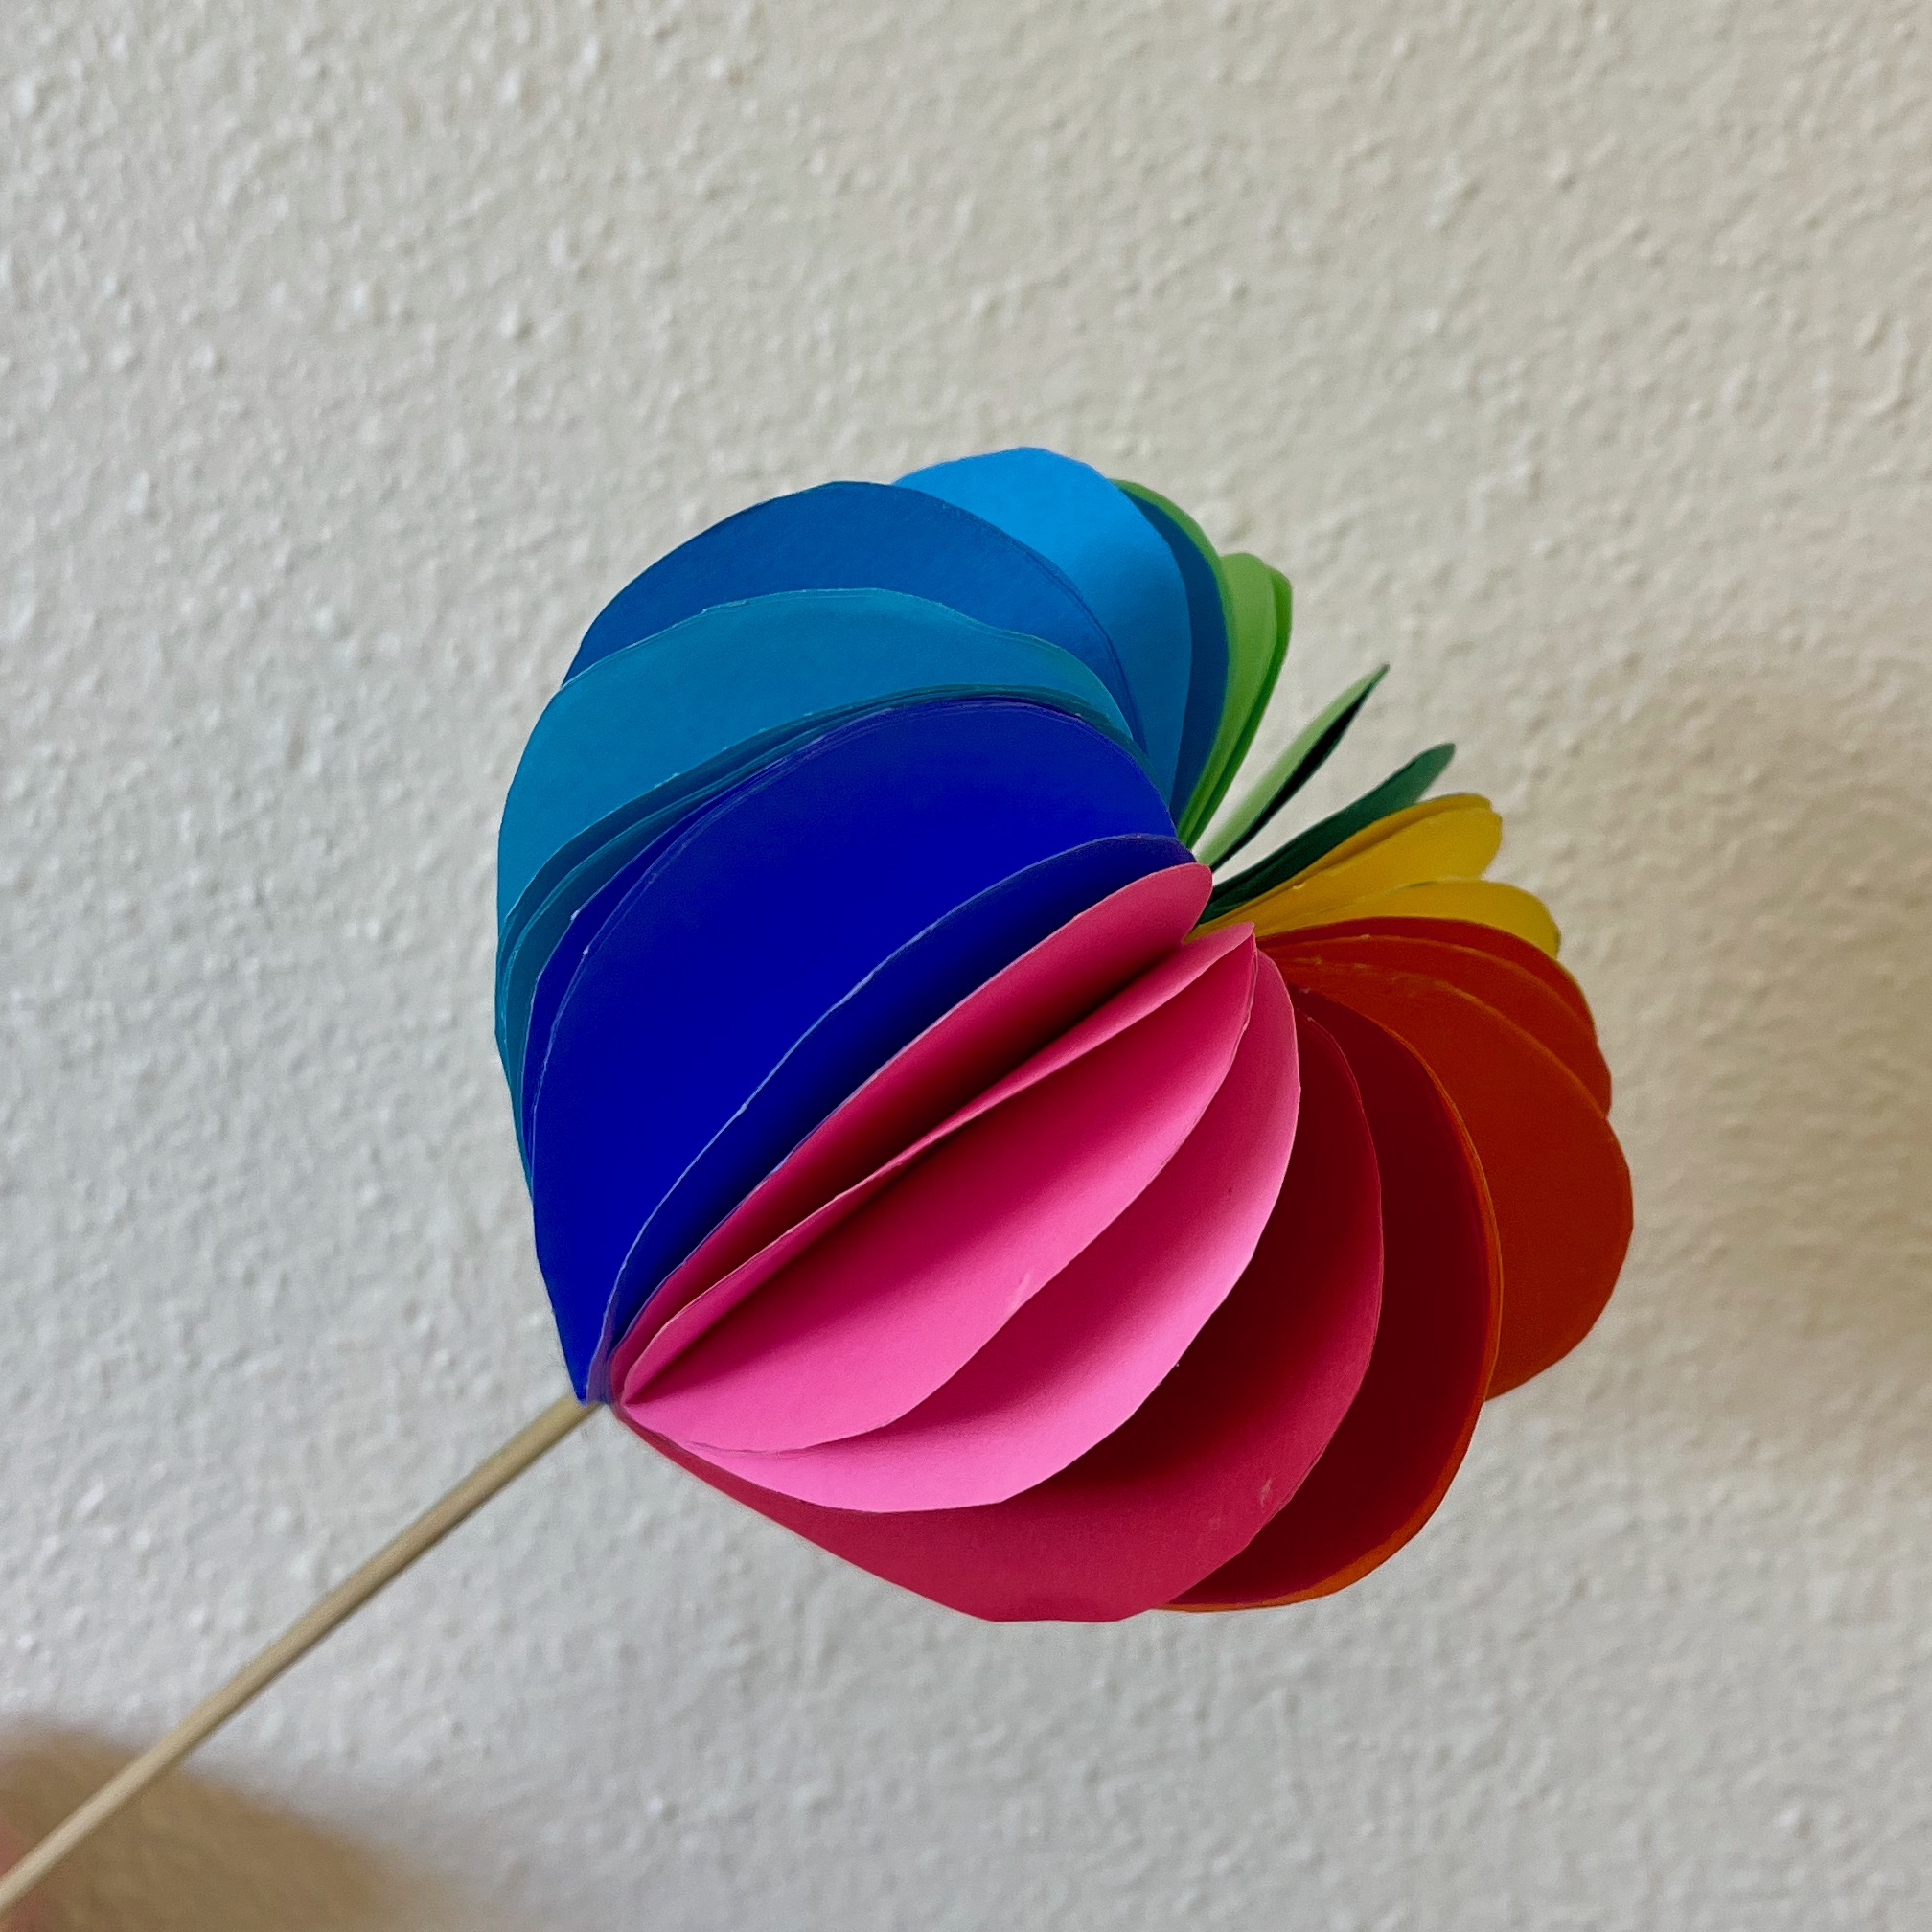
3-D VALENTINE FLOWER PICK
Using the same techniques as used for the 3-D card, create a 360 degree 3-D heart to use as a hanging ornament, or as in our case, as a floral pick. Simply glue a skewer in the center, and glue together the open sides to form a circle.
 \
\
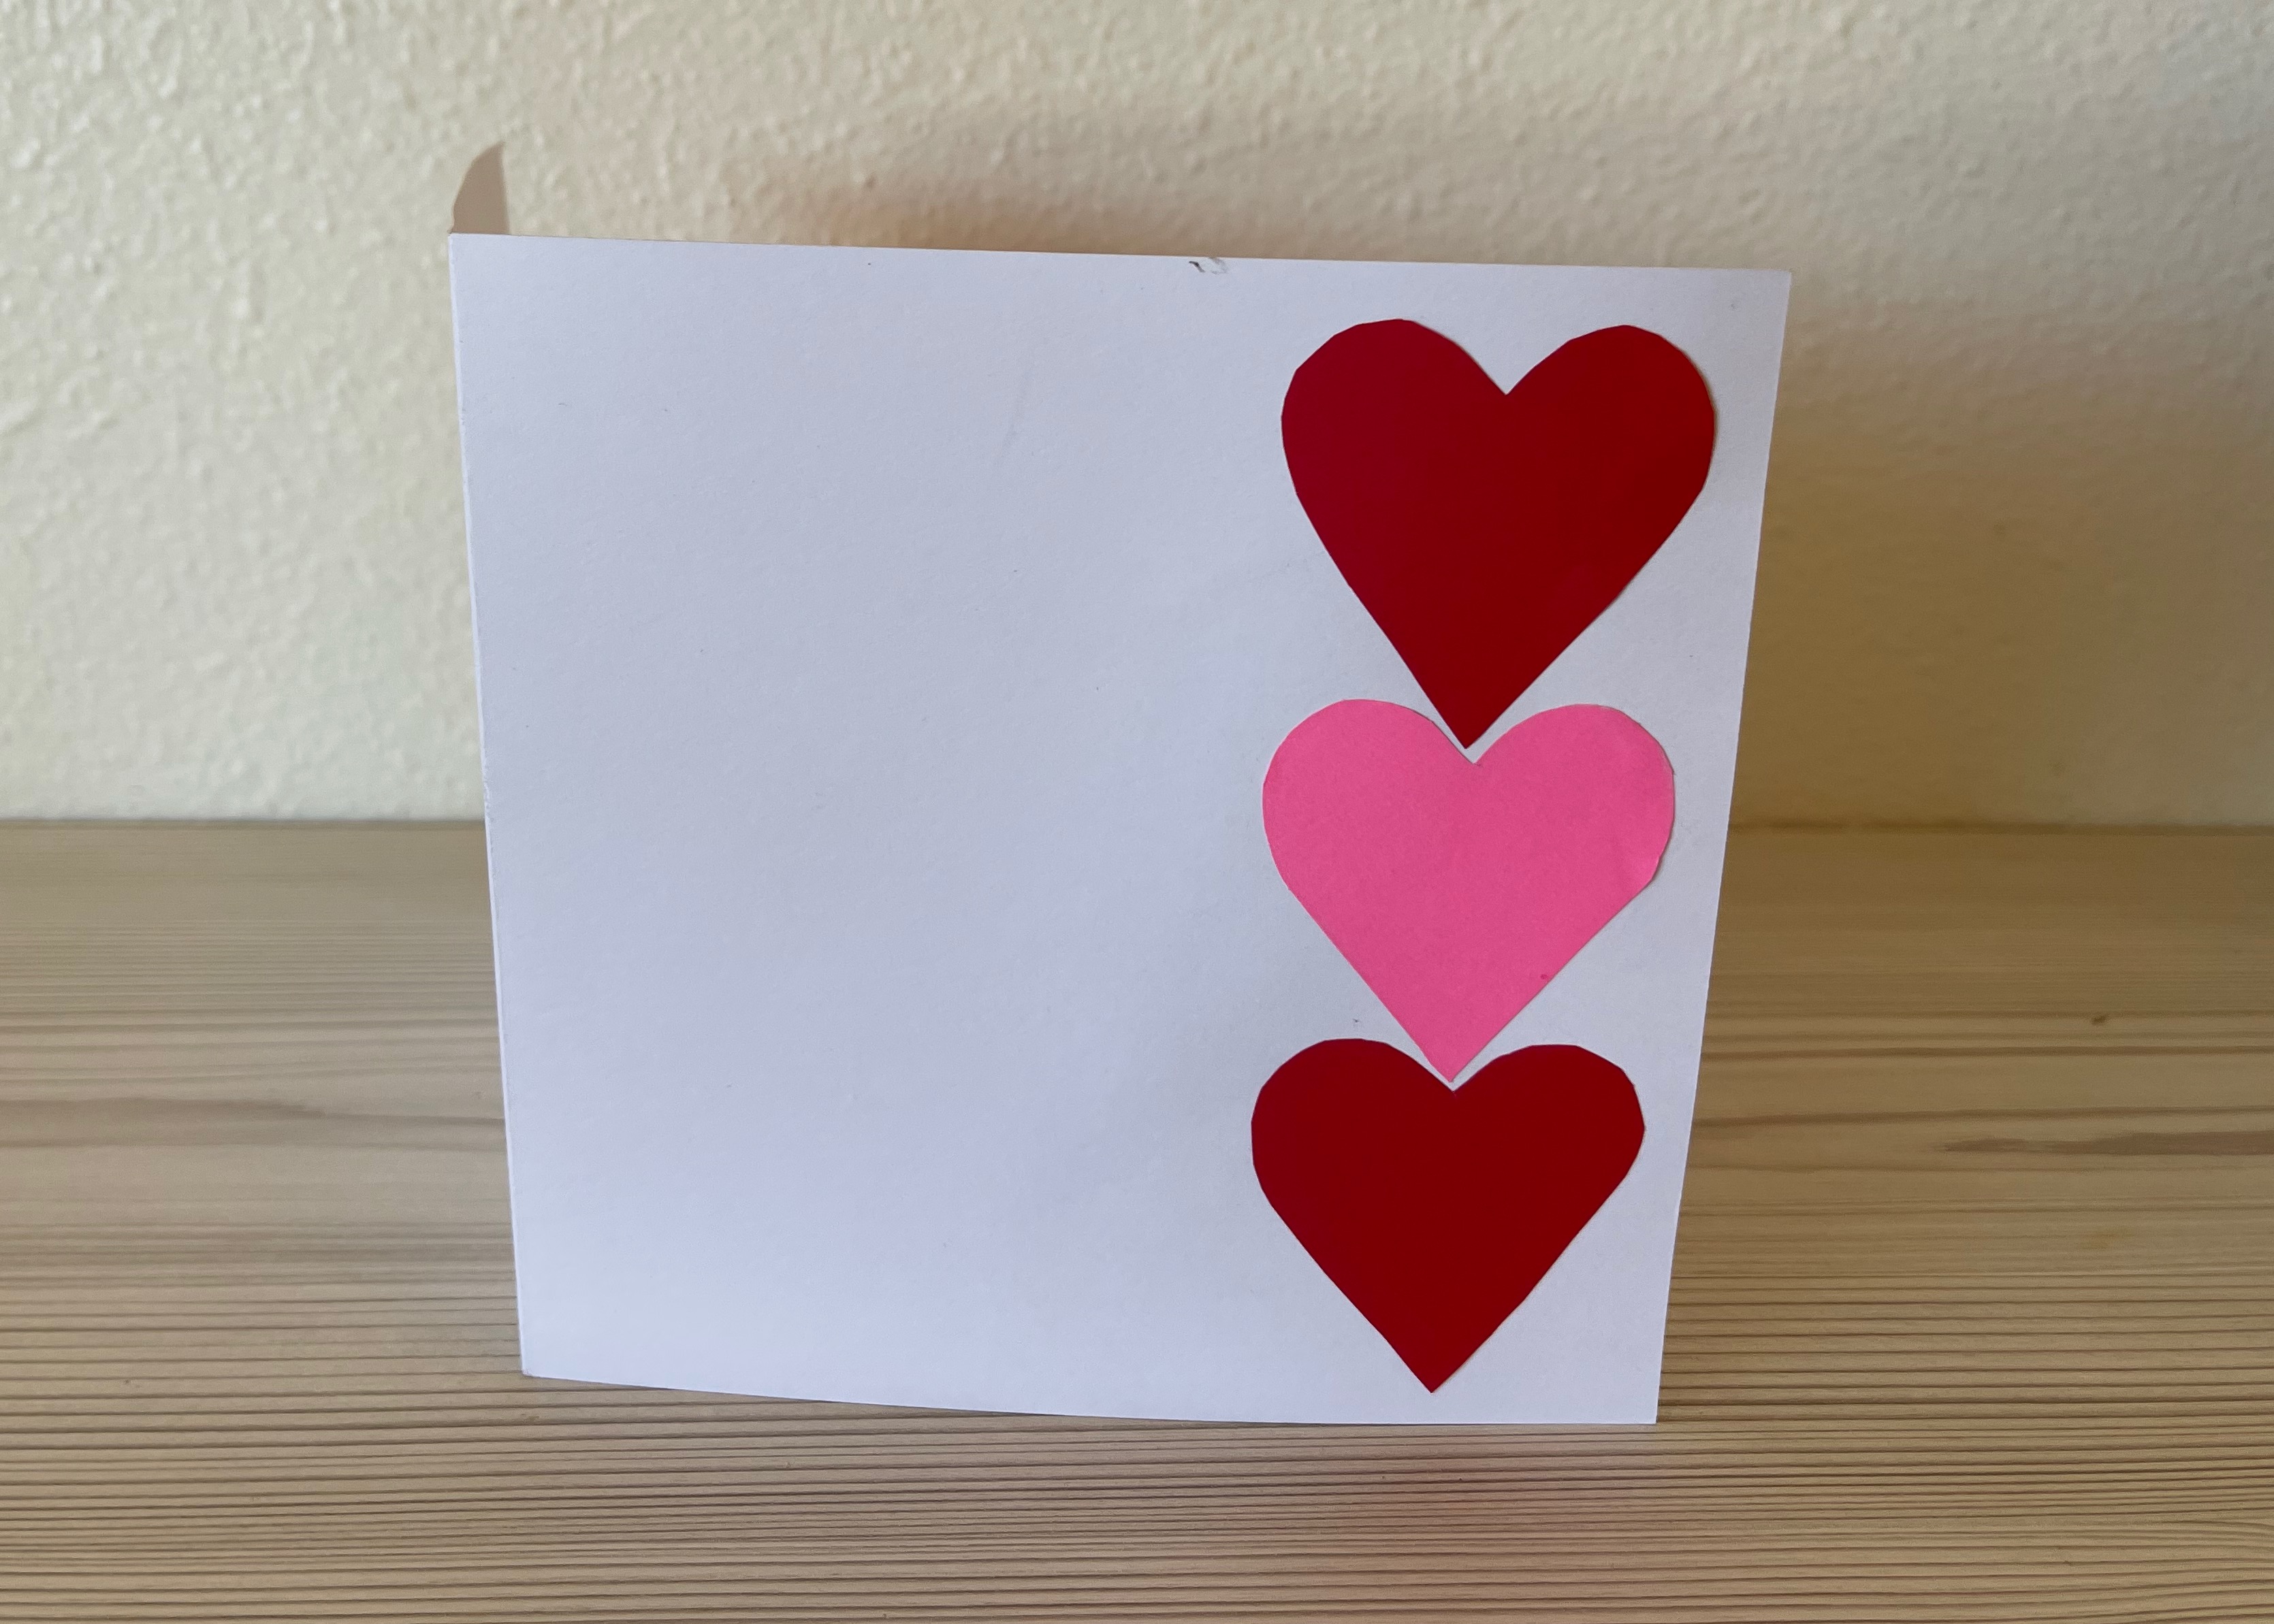
POP UP VALENTINE CARD
1) Accordion fold your paper to slightly less than the width of your template, and trace the outline.
2) Cut only the bottom edge and the top edge, being sure to leave the folded edges intact.
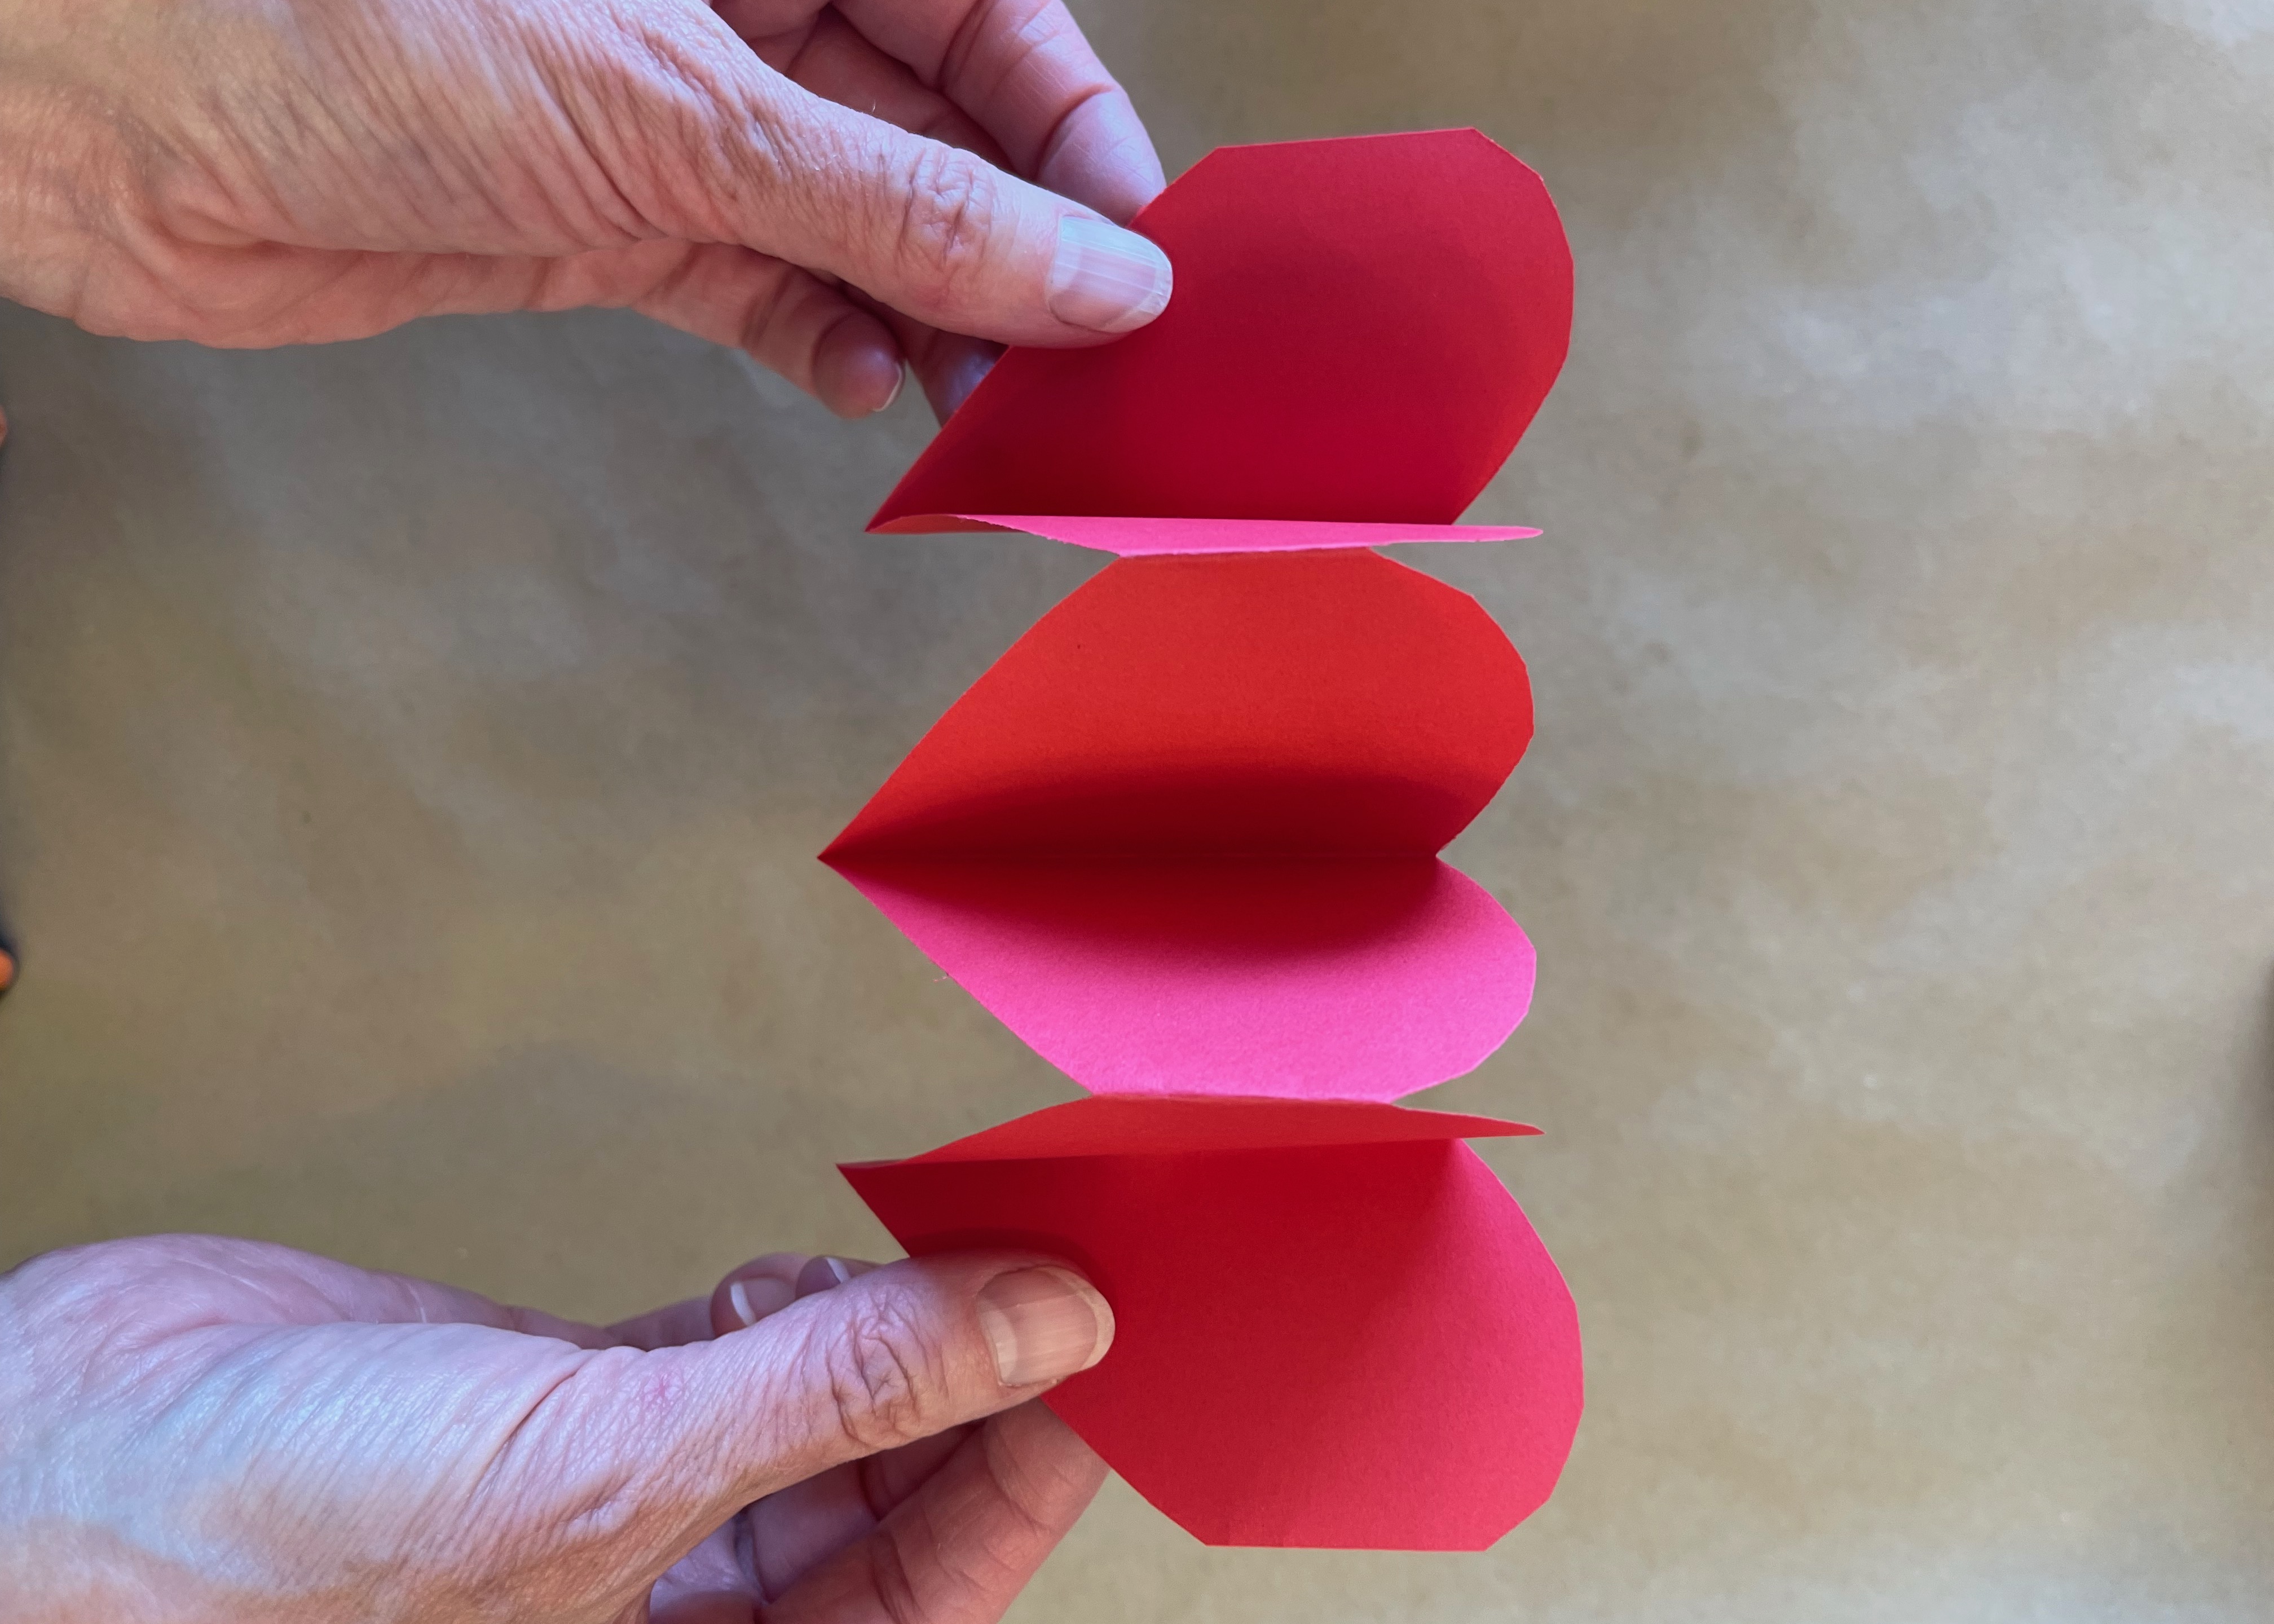
3) Unfold the shape and test out the location that will allow the card to open and close easily. Compress the folds back together, add glue to the outer surfaces, and close the card to glue them in place.
4) To add some interest to the front of the card, add more hearts in a design to your liking.
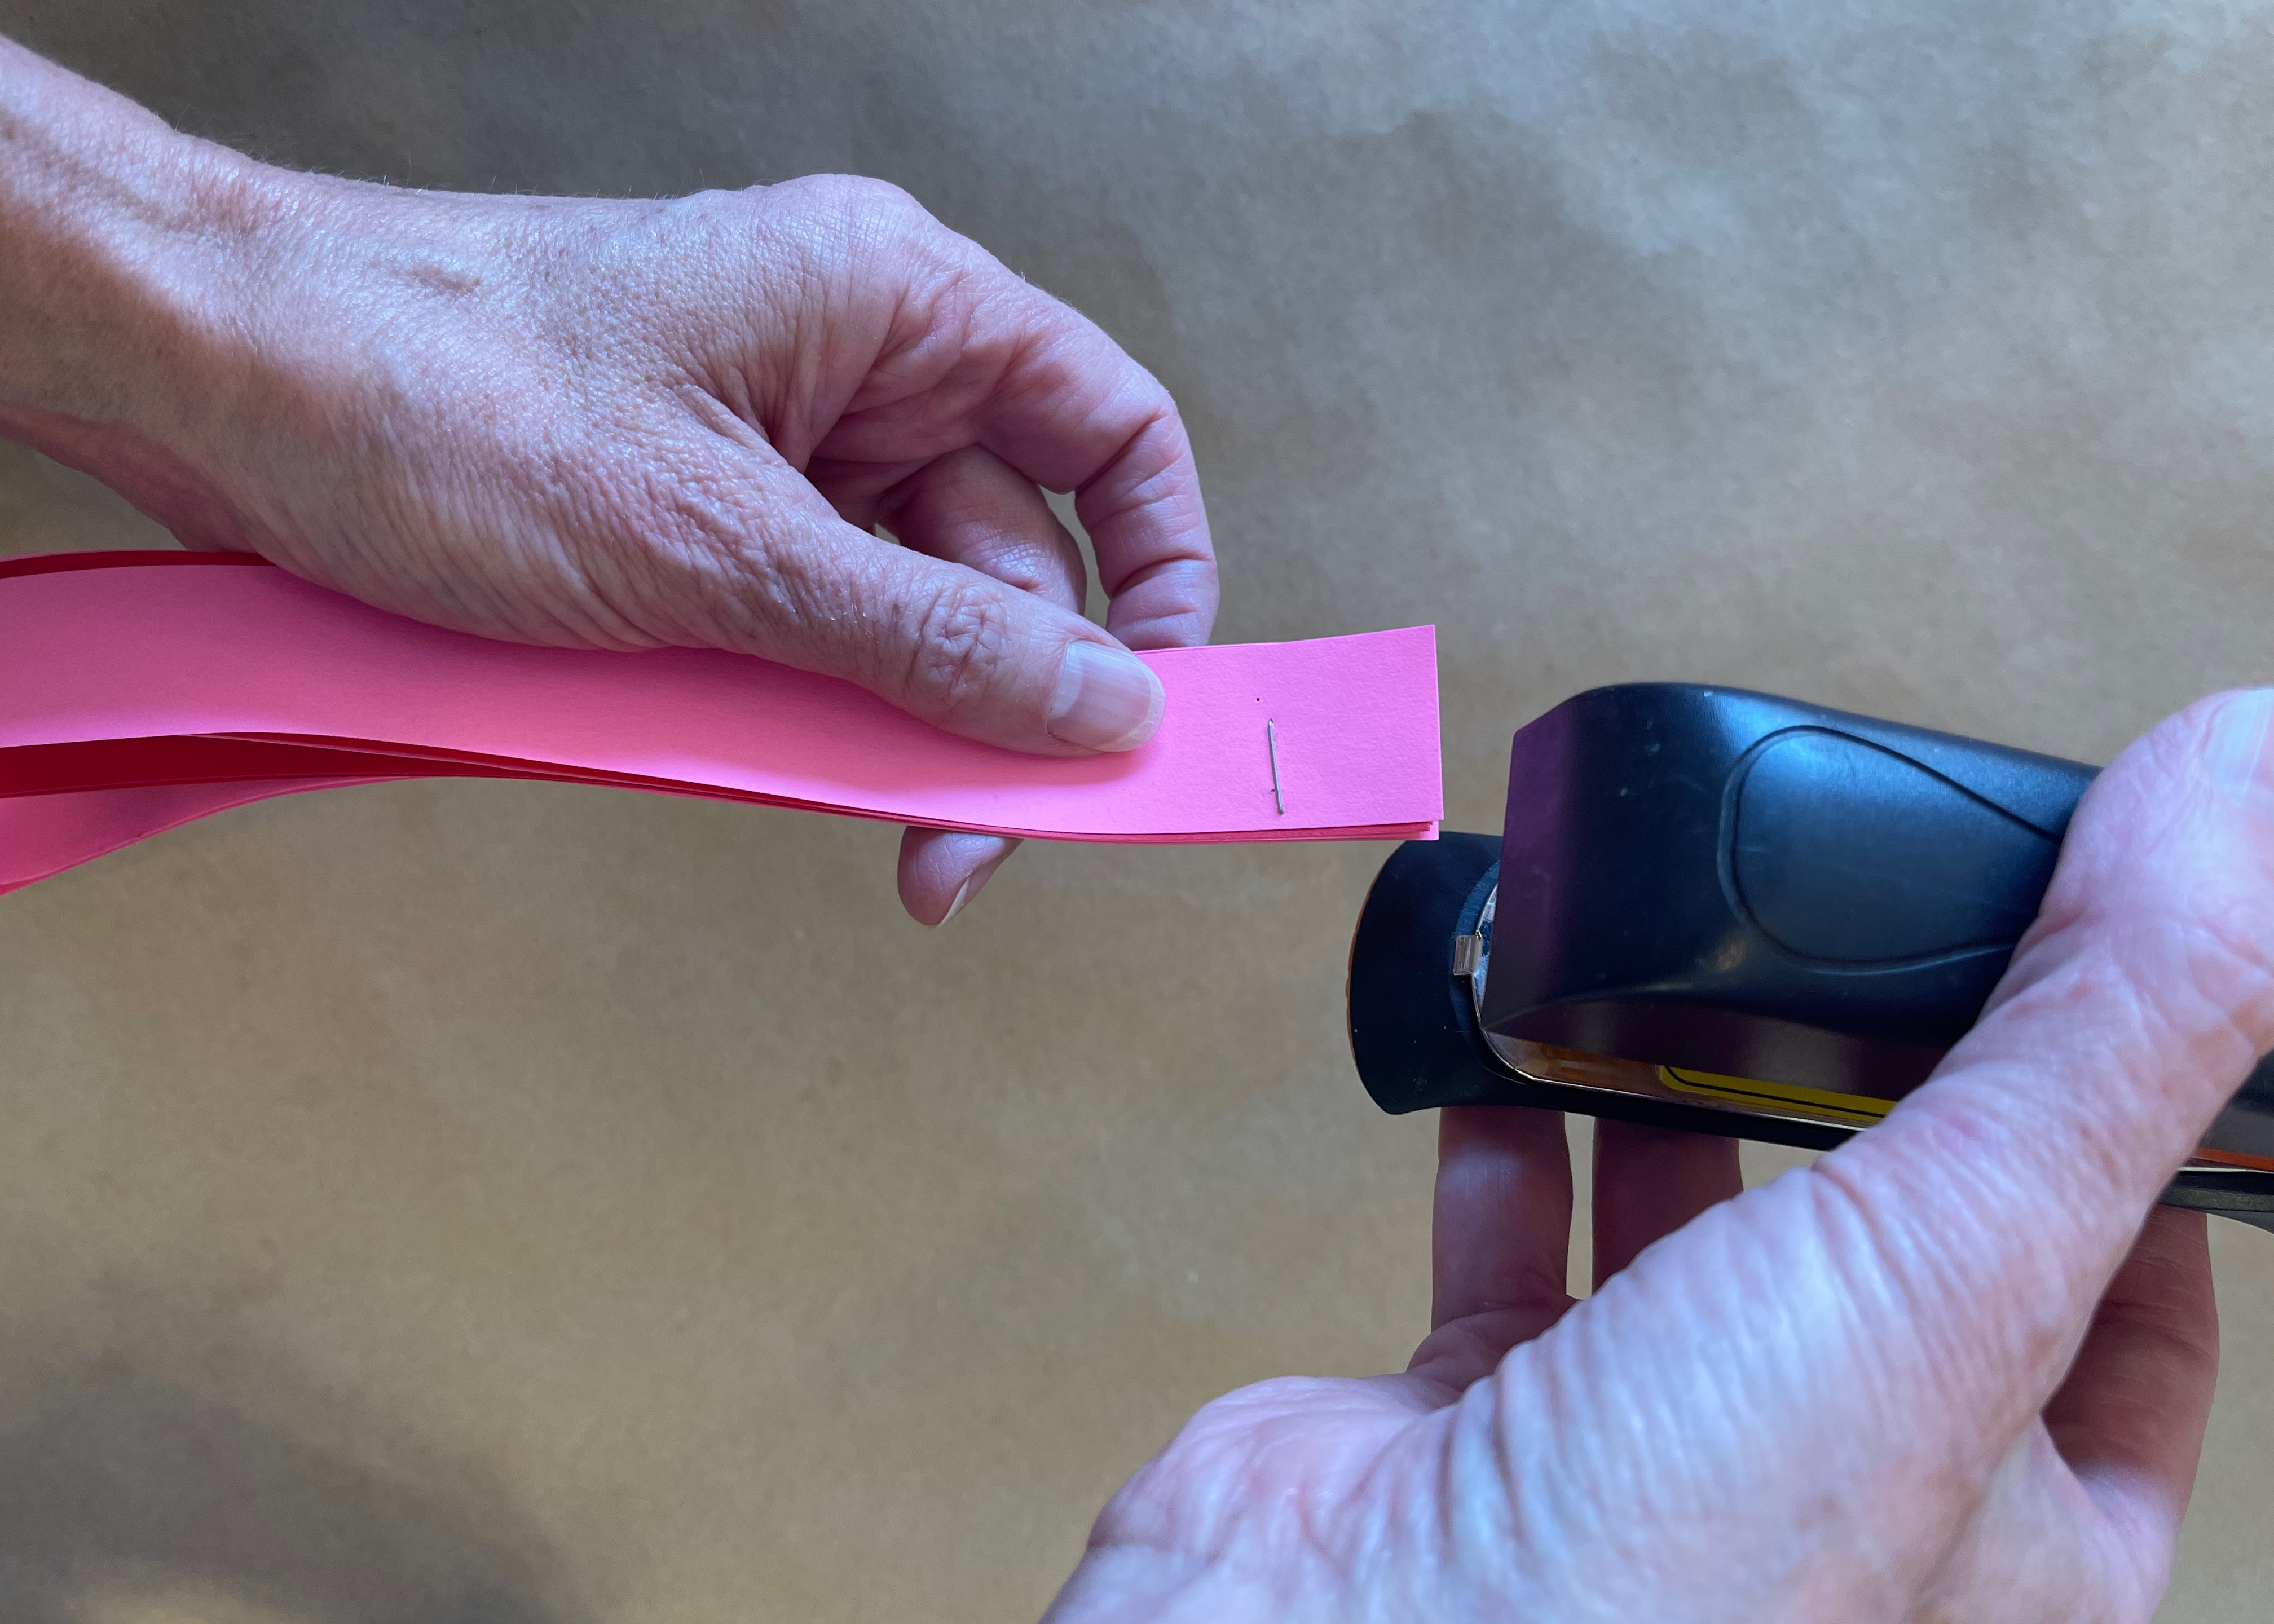
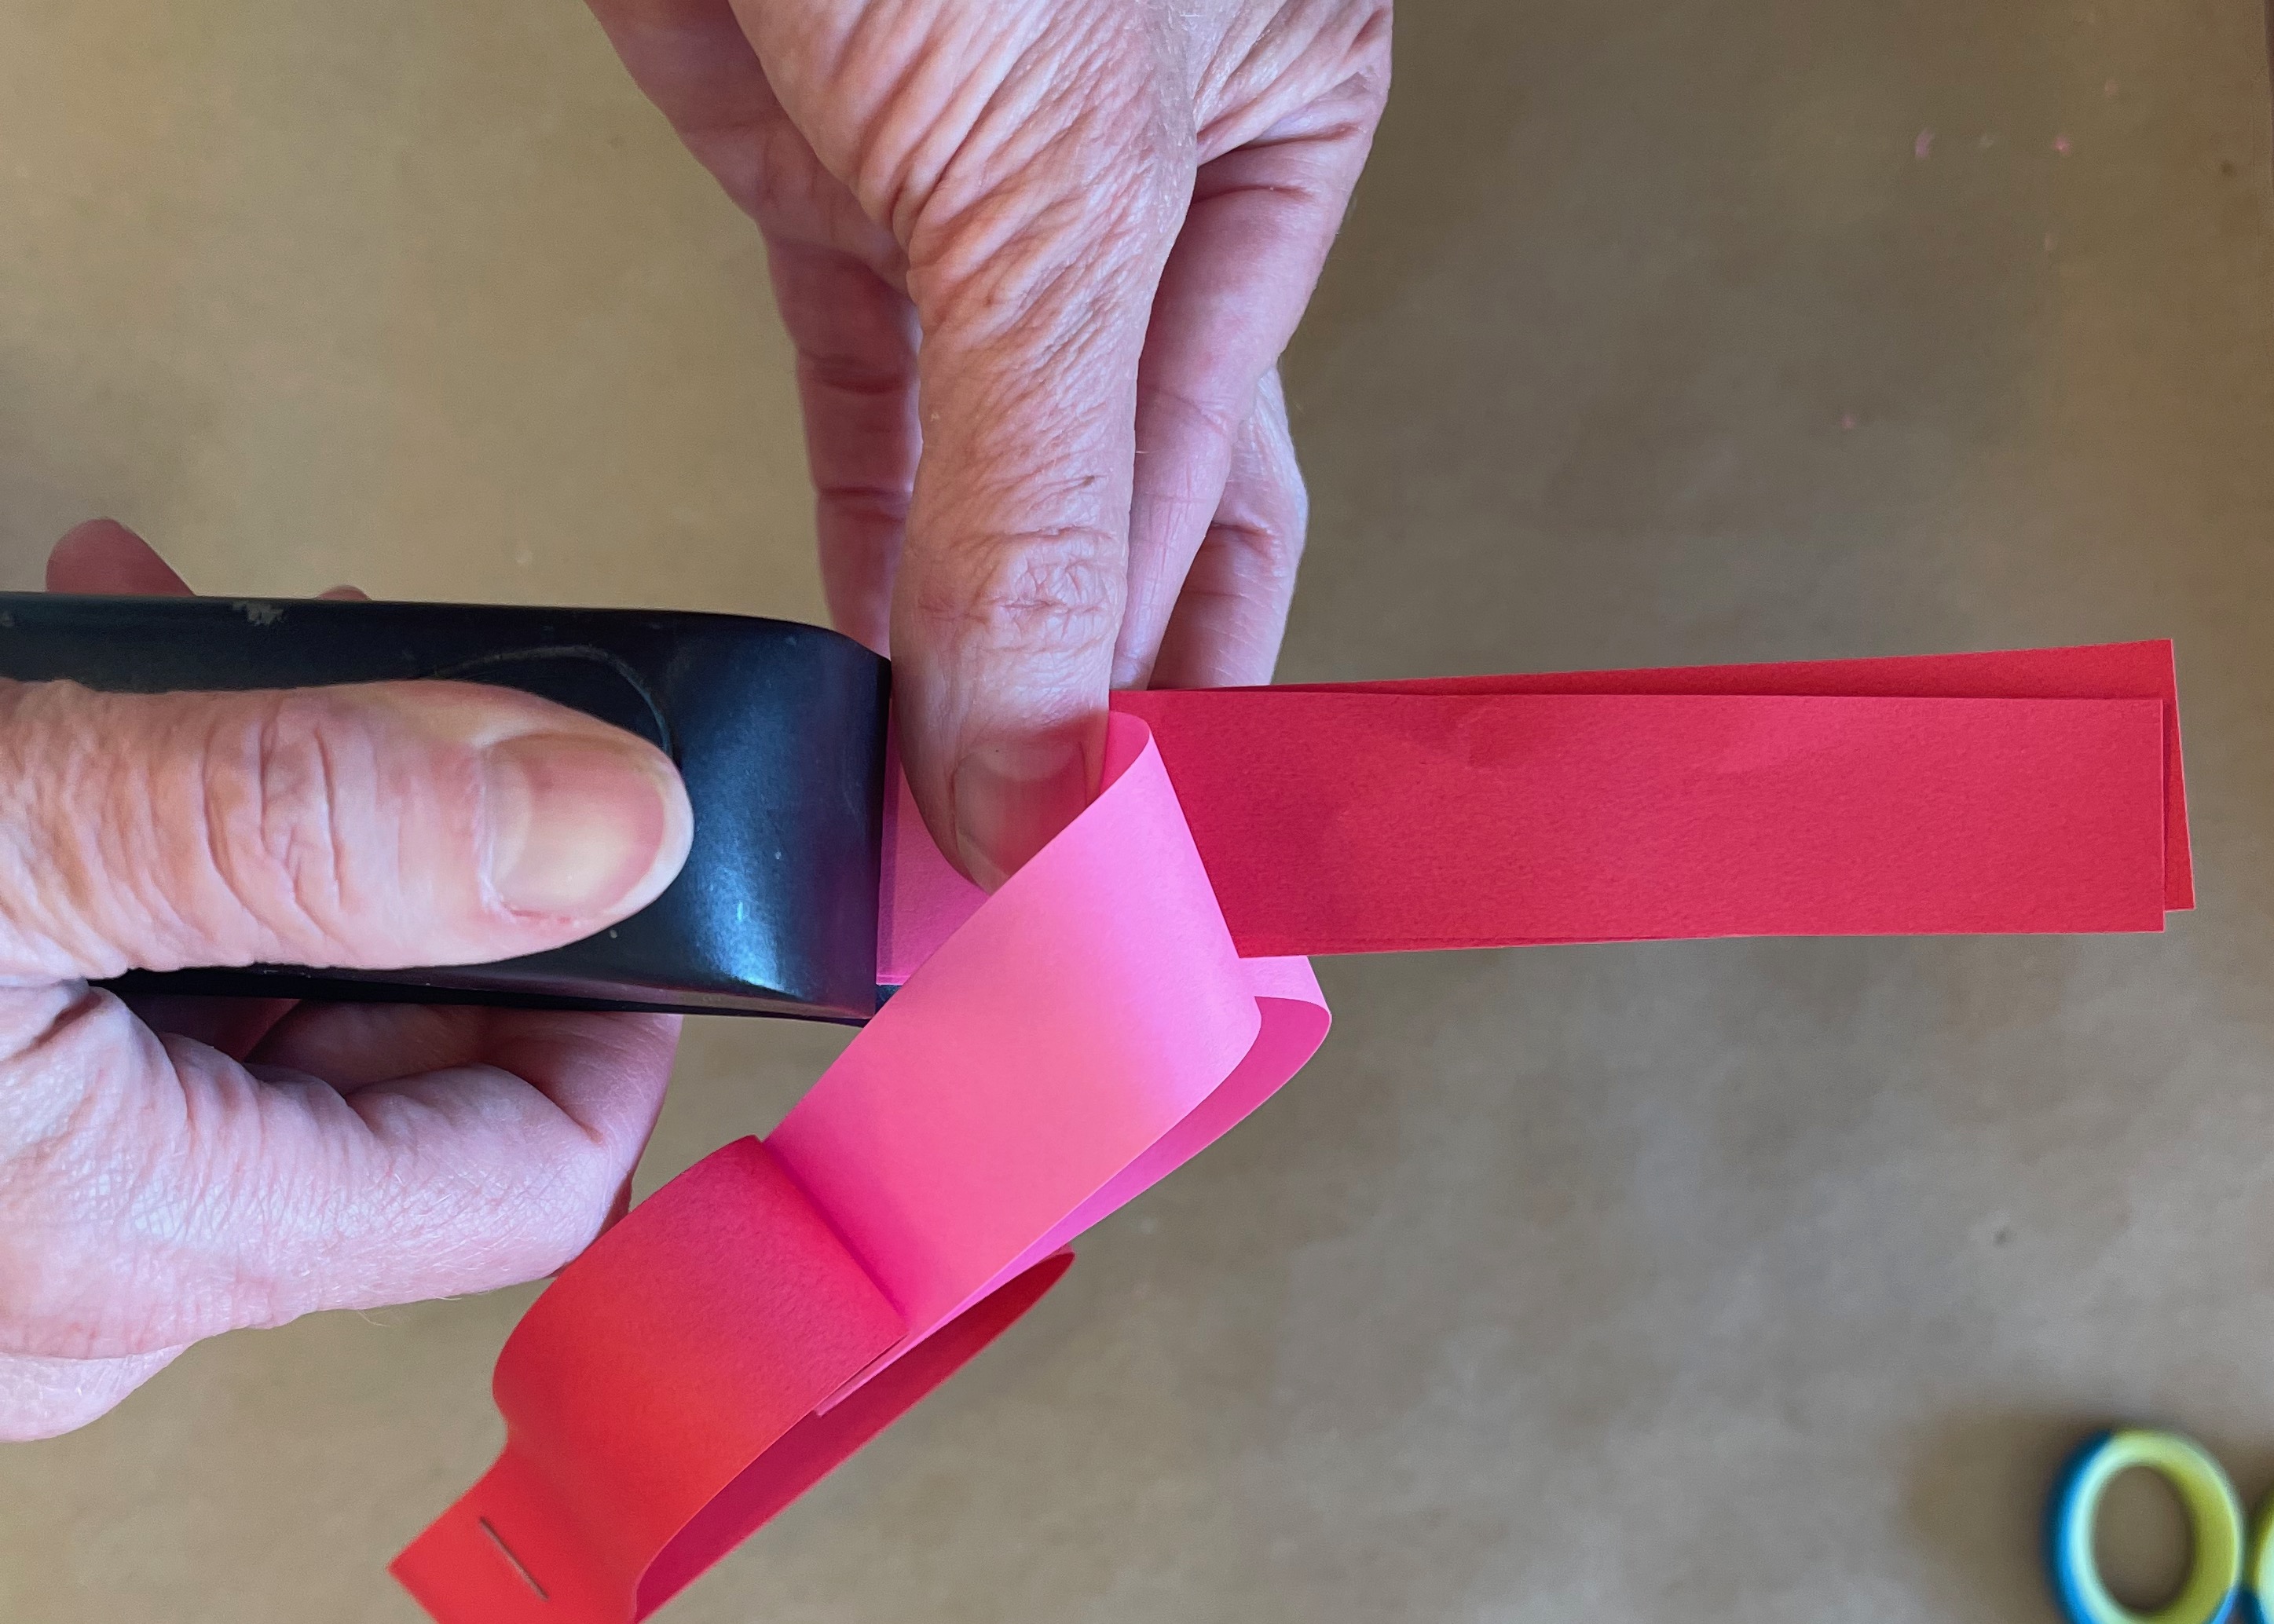
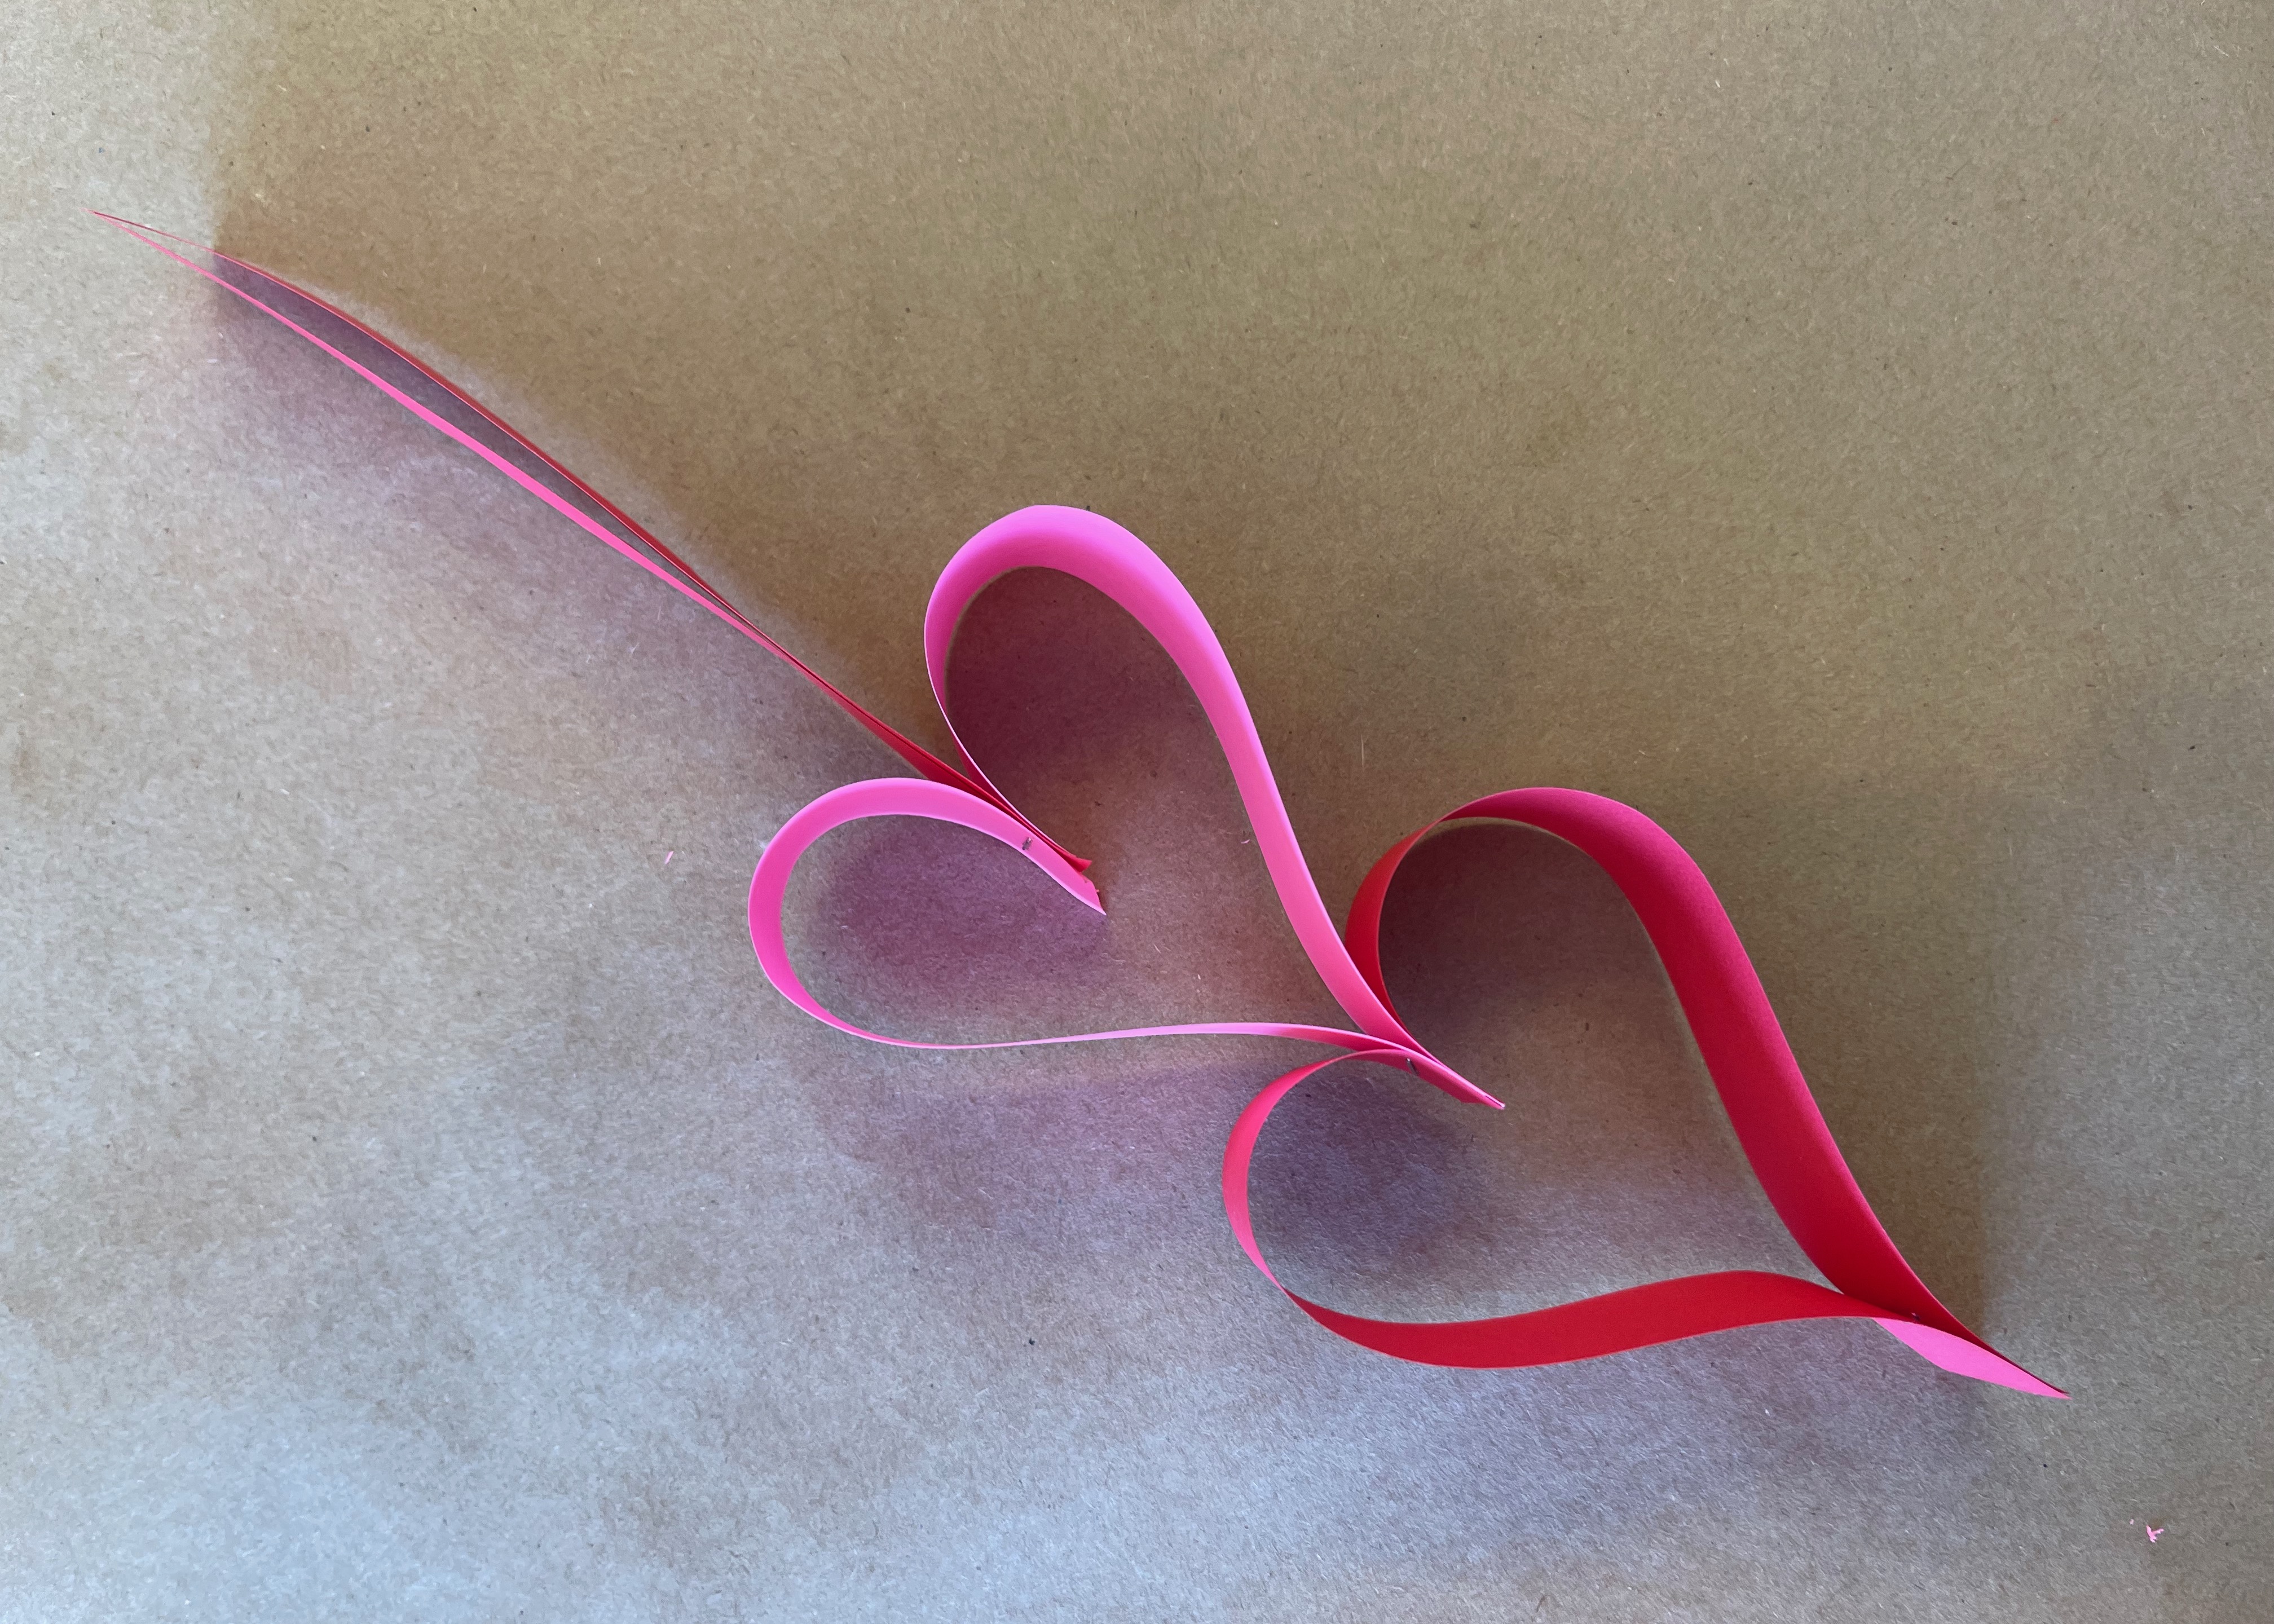
PAPER CHAIN HEART GARLAND
We took the easy route and used a paper cutter and a stapler on this project. You can use a ruler and cut the strips by hand, but if you have access to a paper cutter, it's the best choice. Glue works in the place of a stapler, but if you're making a long chain, a stapler is best.
1) Cut strips approximately 1 inch wide across the short side of a letter sized page.
2) Pinch together four strips, and staple about 1.5 inches from one end.
3) Fold down the two outer strips add one more to each side, which will create the next heart in the chain, then form a heart shape with the center two, and staple again about 1.5 inches from this end. Now the two hanging strips become the next heart shape, and these steps are repeated for as many chain links as you want.
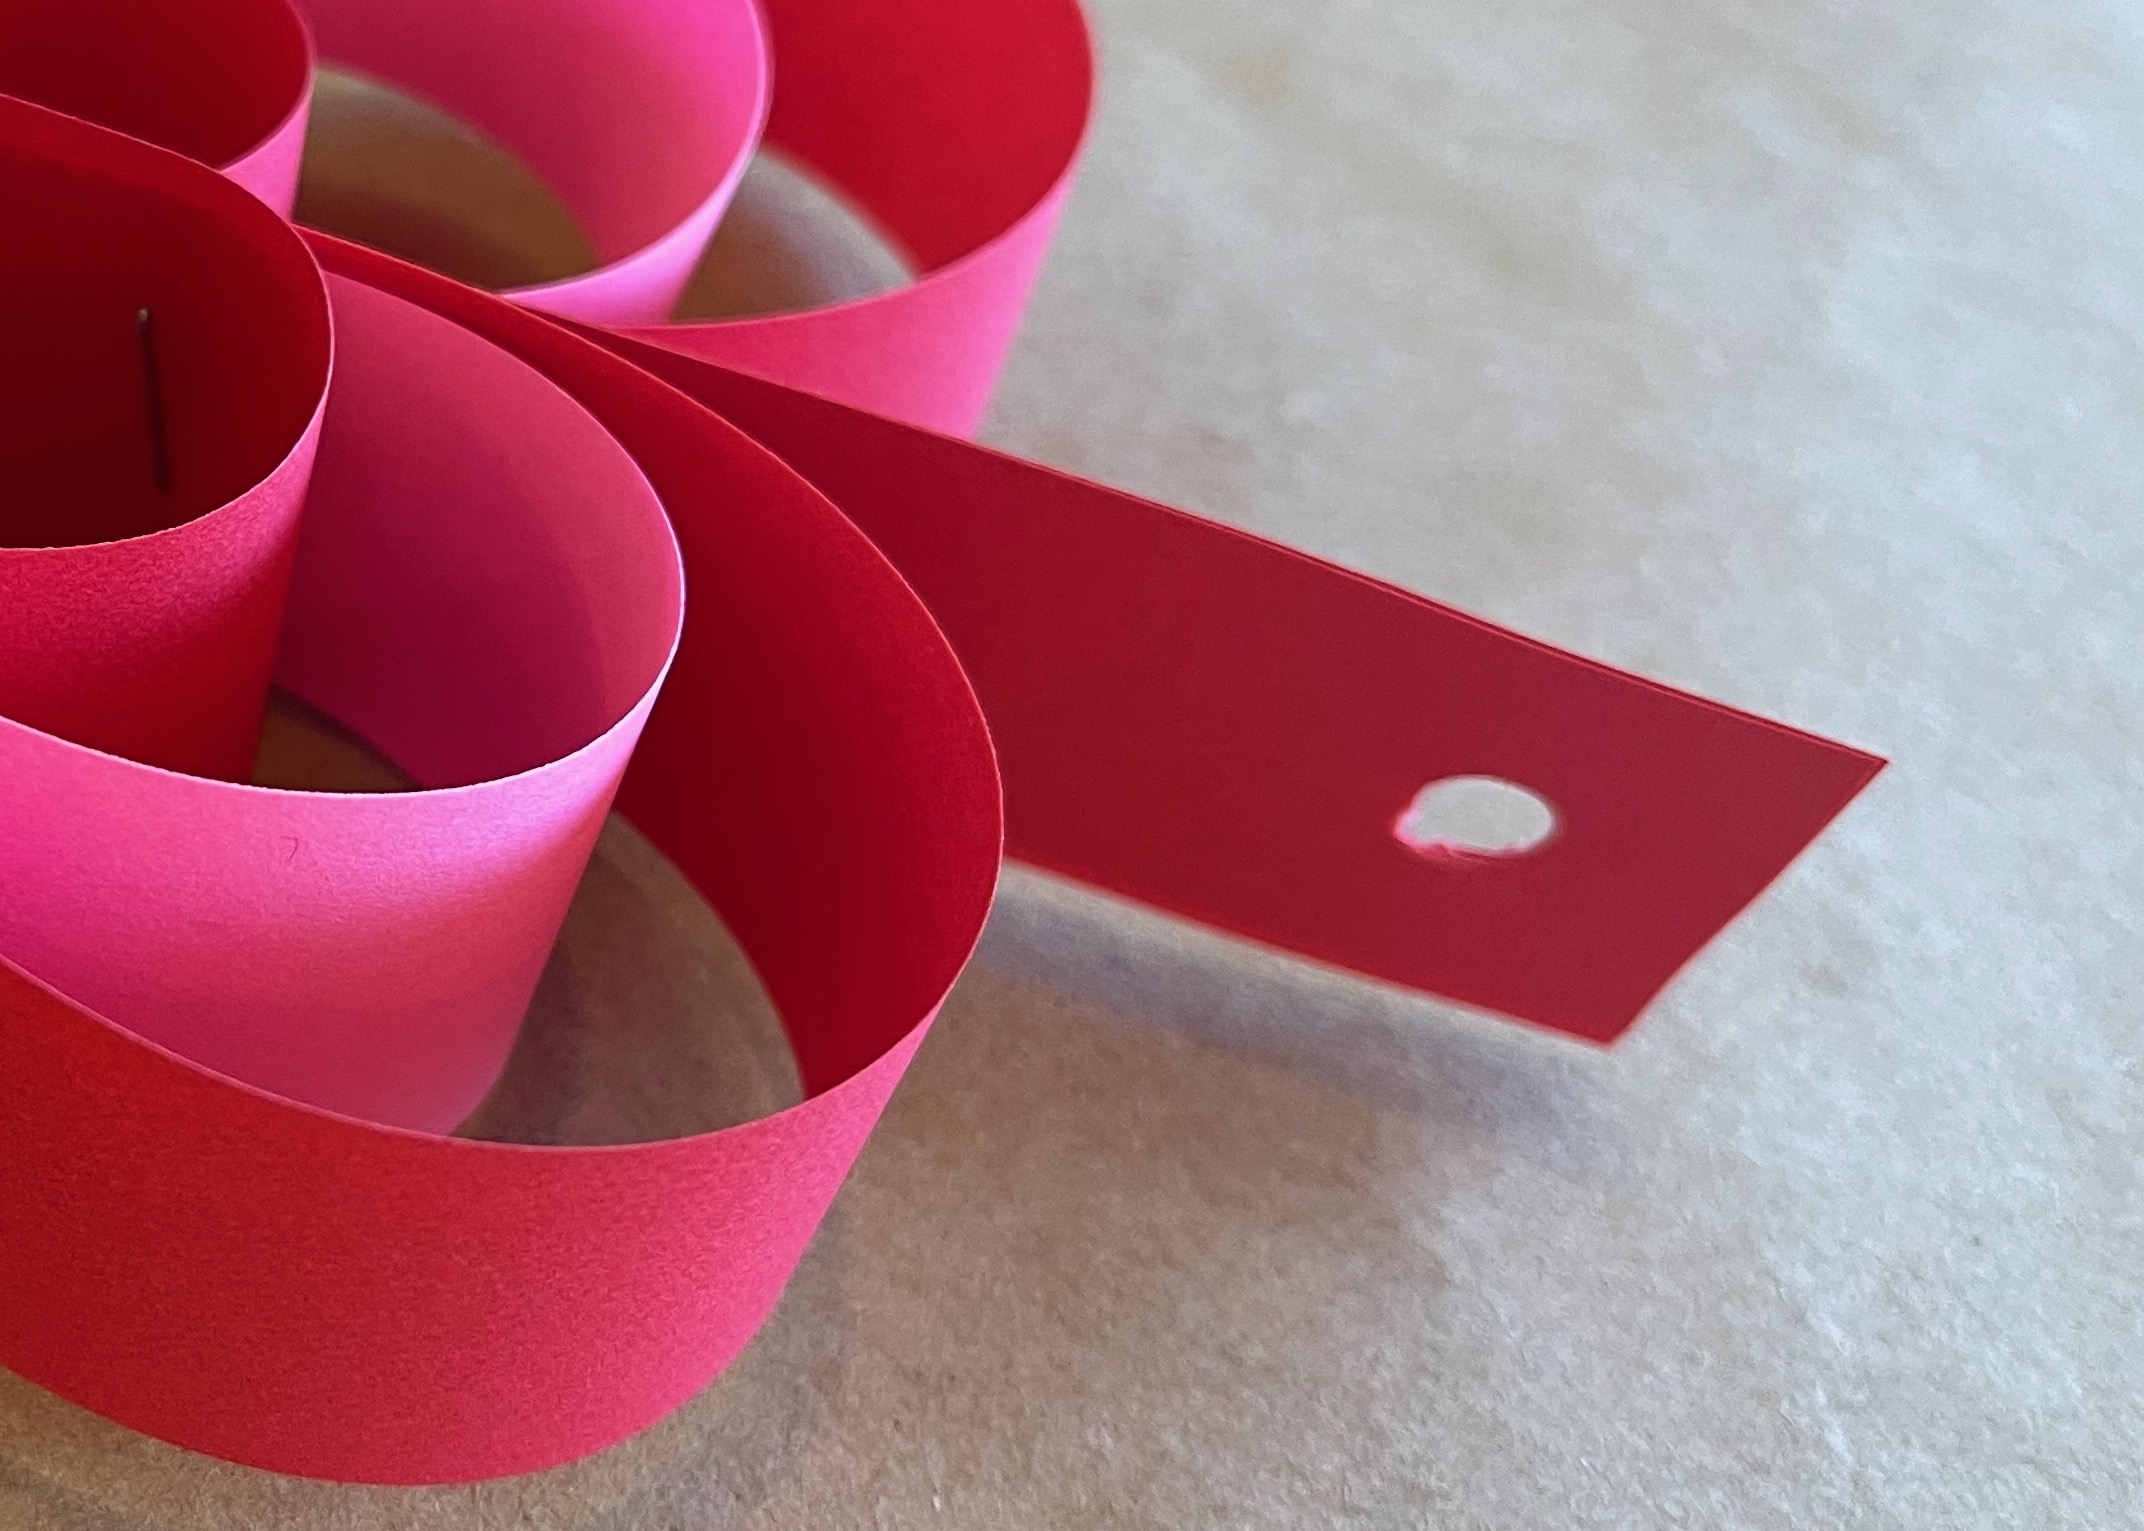
HANGING PAPER HEART ORNAMENT
1)This ornament uses the same idea as the garland, but with more layers and sizes. Start this one with 8 strips, cut front the long side of a letter sized page, and leave the two strips in the center pointing upward. Use a paper clip to position the strips of paper to form three hearts, trim the excess length, then staple.
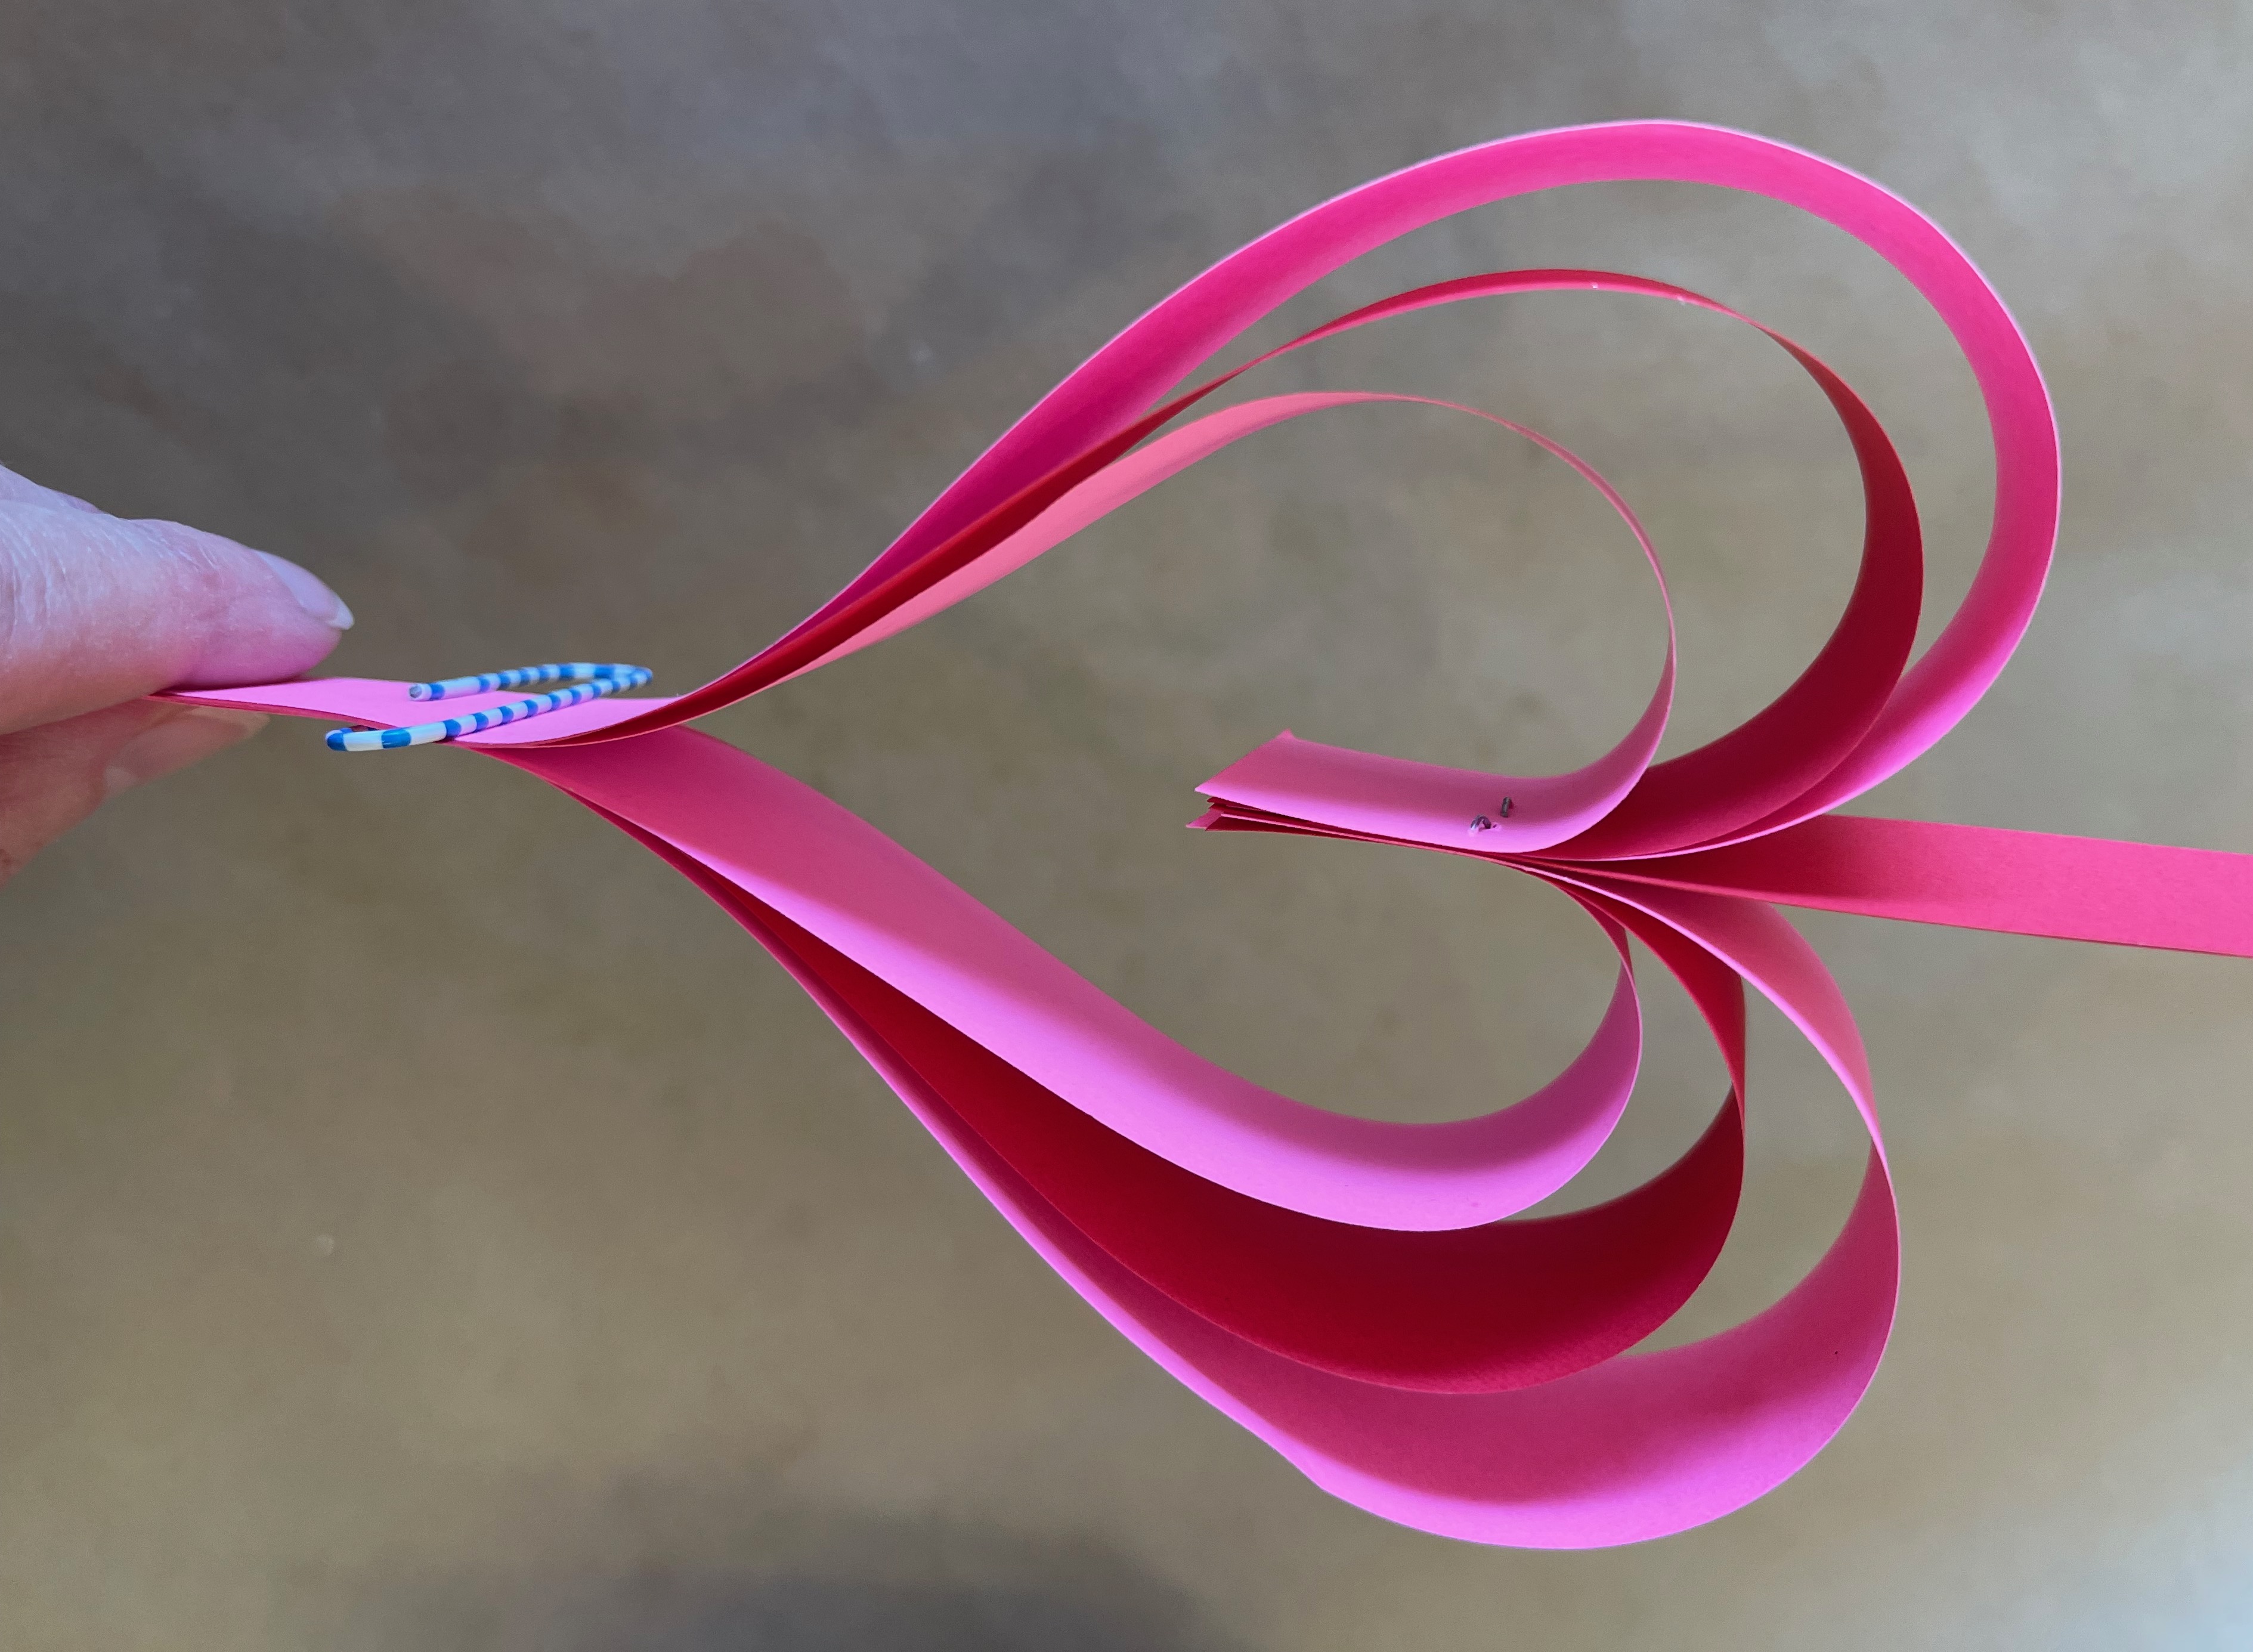
2) Punch a hole in the upward pointing strips and hang as an ornament.
After making all these fun projects, we are now people who decorate for Valentine's (who knew?!) Maybe you will be too!